Dovetail Joint!

Okay, the good news is - it works. (Yay!) :grin:

The bad news is…the settings for acrylic char the hell out of the thin, un-masked non-PG ply that I was cutting it out of, so it looks like any time we want to do something like this we’re going to have to tailor the settings to the material.

The overburn on that makes for a very loose fit. We’re gonna have to test each material.

16 Likes

So you gotta test materials…
First attempt in wood and it’s plausible

That is cool beyond reason. So cool.

8 Likes

Man do I like that better than the straight tabs!

5 Likes

Is the slope still linear? I.e. will we just need to scale the power for a new material or will we need to adjust the grey scale linearity?

Looks to be, but hard to really tell on something that thin.

4 Likes

So excellent!! Great test, and thanks for sharing the files to help the rest of us understand and learn :slight_smile:

2 Likes

Love love love this. Hopefully when I get my pro you guys will have more settings for this newbie to lasers

1 Like

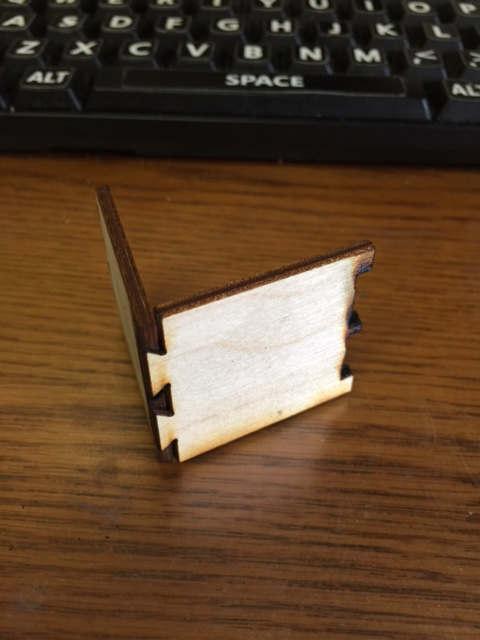
Next: dovetails with interesting contours in the pins and tails. The canonical version is based on what a saw (or relatively simple router bit set) can do, but we have LASERS.

As long as there are no undercuts/overhangs, the sky is the limit. (Yeah, probably not as strong as a canonical dovetails, but that’s seldom an issue)

3 Likes

Dan , please I beg of you . You must put instructions on how to make dovetail joints in the store. Pleeeease

3 Likes

no need! @mpipes attached a sample zip; you can check and see how he did it for yourself:

6 Likes

super sweet! Just to add to the instructions – I changed the engrave settings for the gradient bmps to 3D render, and changed to 3 passes. They fit together great. There’s a tiny bit of wiggle with medium acrylic, but medium maple hardwood snapped together perfectly and is a nice, stable fit.

2 Likes

Welcome to the forum.
Thanks for the additional info.