Indeed! He’s really quite happy with himself that he was able to design it how he wanted it. You could tell that he had an idea, worked with it a bit, and was happy when he got the result he envisioned.
Quick note about the prototyping…
It was a little tough for me to help him visualize what his cut was going to look like. I tried, within Illustrator by changing the fill colors to show him how it would look cut out, but that wasn’t… ahem… cutting it. So I had to print one so he could fully understand it. But I didn’t want to waste any good material and I didn’t have any scrap less than .75" thick. So we tried cardboard. It was awesome. We did find that engraving cardboard caused… uncontrolled smoldering. A quick opening of the lid and tossing on a damp paper towel prevented anything bad from happening. I wonder if there’s a setting that will work for engraves. But the cardboard cuts?!.. man… the cuts are crisp and clean! The points on these prints were actually rather sharp to the touch! It was impressive!
We always have a few boxes around. Now it seems I’ll need to cut them up and store them with the rest of our materials! It’s free!
1 Like
1% power and 335 speed at 240 does ok for enraving texts and designs since the density of burning isnt too bad
1 Like
That came our great!!
Nice you two can share this together!
1 Like
the 50.oo a month it for the how lot of things not just AI. You should be able to AI for 9.99 a month if that is all you plan to use. I dont use it as much as I like to but some times having it handy is a nice things to have (I use Photoshop more but then again I really should learn gimp and dump all adobe products).
I also used inkscape for my vinyl cutter and I do ok with it.
Just waiting for my GF to see what stuff I can do.
educational discounts on the CC suite are pretty primo too, if you can swing that.
2 Likes
I hope no one would turn me in if I confessed that I tend to use my wife’s subscription to Adobe CC. She’s a teacher and I’m poor 
4 Likes
hey, she gets two computers to install it on!
1 Like
My daughter recently got a subscription and we installed on her computer… and mine for backup …
2 Likes
Ah… Speed, I think, was my issue. I didn’t realize it could go that high!
Thanks!!!
Pretty much do all my engraving at highest speed. Sometimes the surface of the acrylic isn’t as nice looking, but it does speed up things.
2 Likes
Exactly ![]() , and truth be told it’s actually on three, which occasionally leads to, “Sign-out all other devices…etc.” but I figure as long as it’s only being used on one at a time I’m not hurting Adobe in any way. Heaven knows they’ve pulled a lot of money out of my pockets over the years
, and truth be told it’s actually on three, which occasionally leads to, “Sign-out all other devices…etc.” but I figure as long as it’s only being used on one at a time I’m not hurting Adobe in any way. Heaven knows they’ve pulled a lot of money out of my pockets over the years ![]()
we hit that sometimes too (SO’s desktop, my desktop, my laptop) but it’s never more than 2 copies used at the same time, so you’re in total license fulfillment, there! 
1 Like
Hey that’s pretty neat that you were able to have the outer race of the bearing serve as the connector between the two halves! Love it when a design comes together!
Nobody was more surprised than I! Especially since I don’t know the best way to cut that. I know the bearings are 22 mm (.8661 in). And that’s what I made my circle at first. But in my cardboard prototype I found that was too loose. Didn’t even think of holding. And each new prototype I just shaved a little bit off that number. Total guesswork that I was sure wasn’t going to work out well. But! I think in the end I used .85 in (21.59 mm) and it worked better than I could have imagined.
3 Likes
@dan posted this in another thread, it’s an opening for bearings with relief cuts to allow an easy press fit.
Props to your son, that’s awesome!
Note that the radius seems to be based on pixels, which means on a high-res monitor, you have to nail the exact center for it to pop up.
1 Like
Another consideration is that the top of the opening (towards the laser) is slightly wider than the bottom, because of the shape of the laser beam. For that reason, the bearing will go in more easily one way than the other.
4 Likes
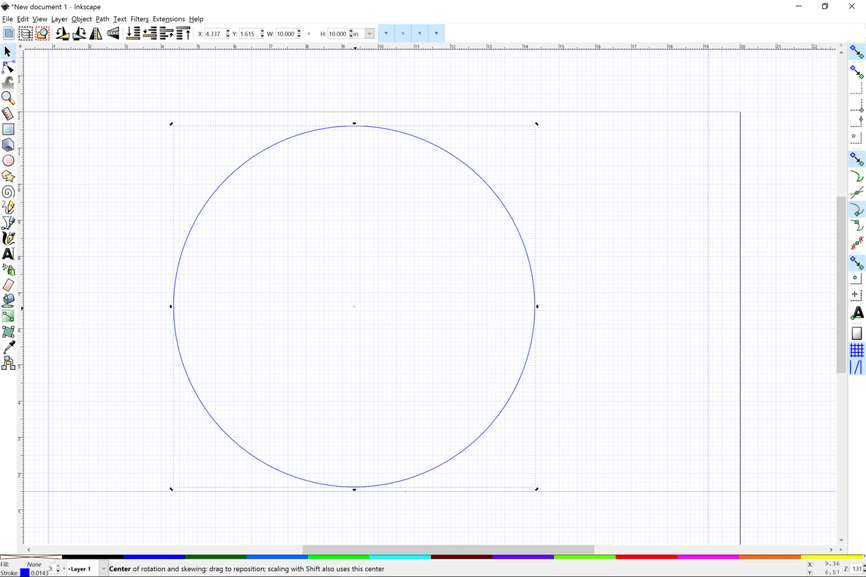
There are multiple ways to work with getting to the center of a circle. Most of the time align and distribute in relation to another object works. There are also ways to do a coordinate centering of a circle. So if you want a circle centered in a circle. Make two circles and then align and distribute one in the other. This works with any object. Where you might get hung up is saying I want to draw an object starting at the center of a circle. That is a challenge. Click the object twice, once to get resize control handles on corners and a second time to get rotate control handles. The second set of handles will have a plus sign in the center of the circle.
3 Likes
He smiled and said “Thanks!”
You really do.
2 Likes