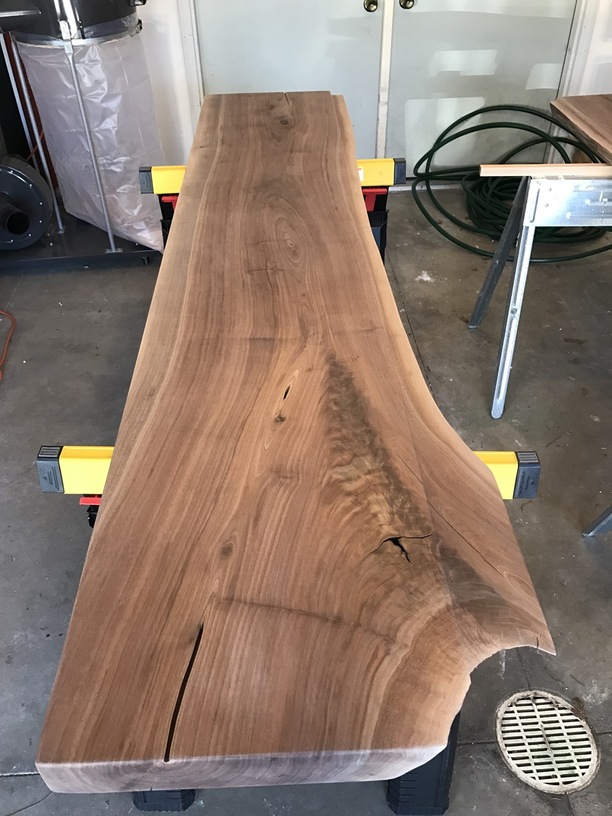
Gorgeous table!!! They almost look book matched, except there is a Rat tail on the left and not on the right, or not as apparent.
Also like the contrast with the lighter floor!
Where did you find the walnut slabs?
Gorgeous table!!! They almost look book matched, except there is a Rat tail on the left and not on the right, or not as apparent.
Also like the contrast with the lighter floor!
Where did you find the walnut slabs?
Thanks! They actually are bookmatched. I agree it’s hard to see in the photo.
Sourcing slabs is a pain. This particular pair came from a guy 45 minutes away who has a side hustle milling, kiln drying and selling slabs. But I literally had to go to his place in the evening and watch as he used a forklift to move huge piles of slabs around to get to the walnut bunches; and then sort through every one until I found what I wanted!
Pre-finishing
I would say this was well worth the 45 minute drive and the effort of wading through the piles.
You sound like me. I not only sort and high grade, but I also organize piles of lumber I pass by that someone left stacked poorly. It must be a sickness. ![]()
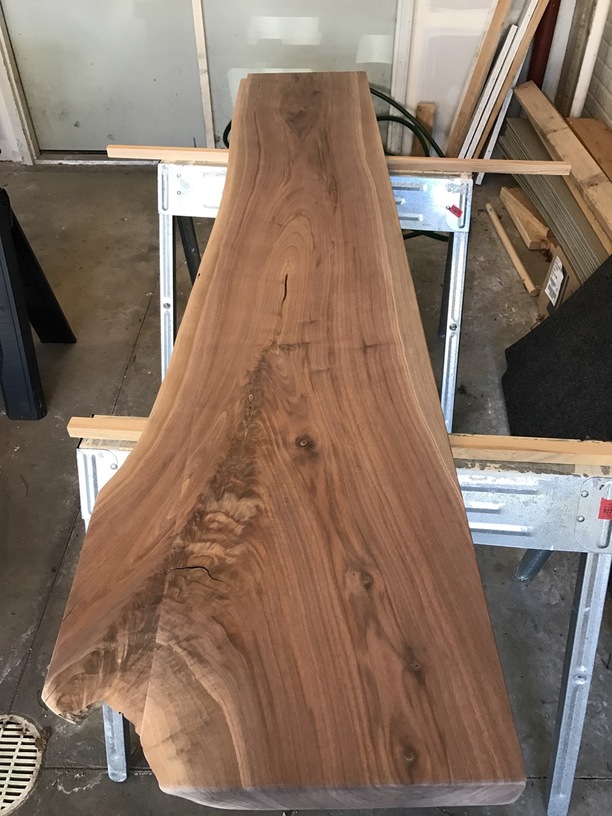
I just visited your website, there are even some nicer photos there of your table!!!
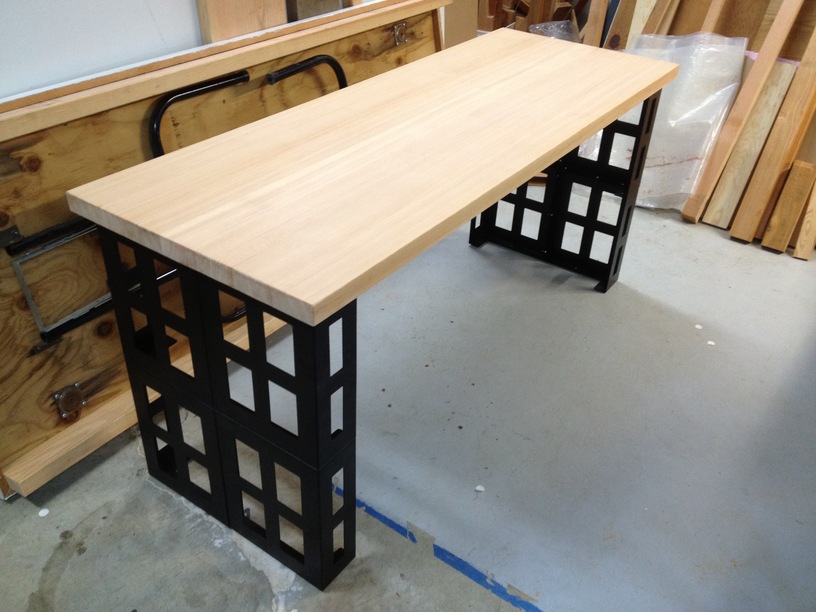
I have always liked metal with wood, especially black metal. I will attache a couple photos of a desk I made for my wife, wood and metal.
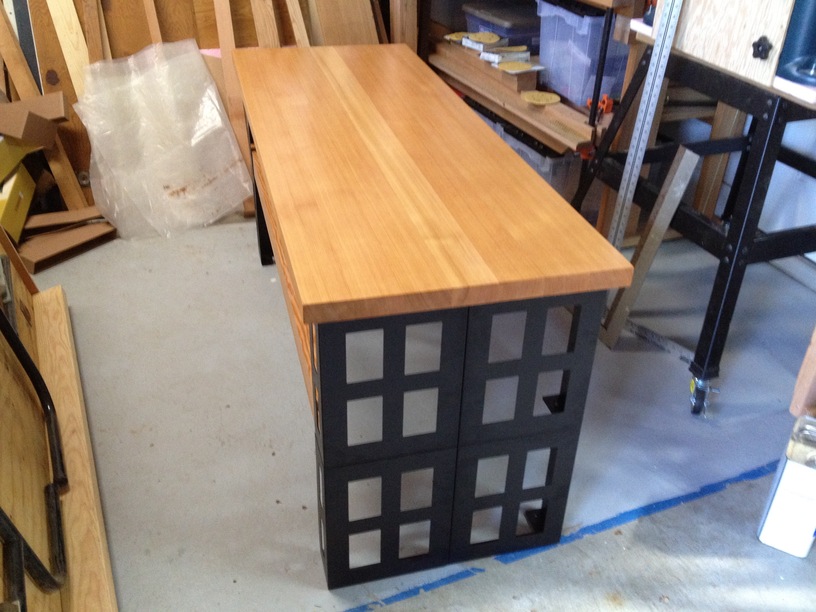
I am also attaching them so @aohnstad can see a photo of unfinished wood, then finished with two coats of 100% Tung oil to see its effects. On softwood, the Tung oil really brings out the warmth in the wood.
The desk is made from 2 by 4, Select grade, quartersawn, tight grain Doug fir-Larch. I believe it is Larch because Doug fir and Larch are both sold as Douglas fir. It is challenging to tell them apart, but the lumber is excessively heavy and since Western larch has a much higher specific gravity, I figured it must be larch.
Unfinished lumber, plus showing endgrain.
Unfinished desk.
Two coats of 100% Tung oil, adds nice warmth.
That is a mighty fine edge glue match up there, @timtsuga.
The two Rat tails show up perfectly in those two photos!!! Nice!!!
Thank you!!!
I have had a lot of practice, and lots of not-so-good results over the years.
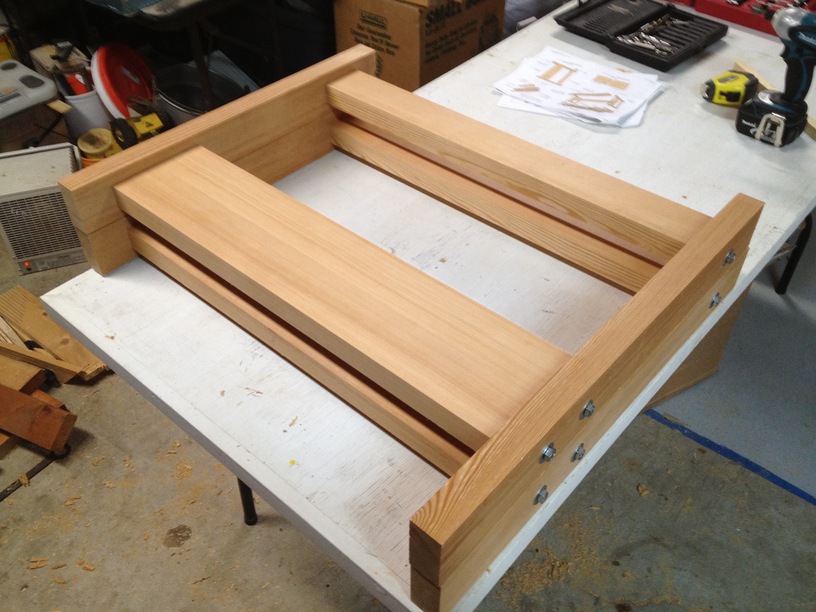
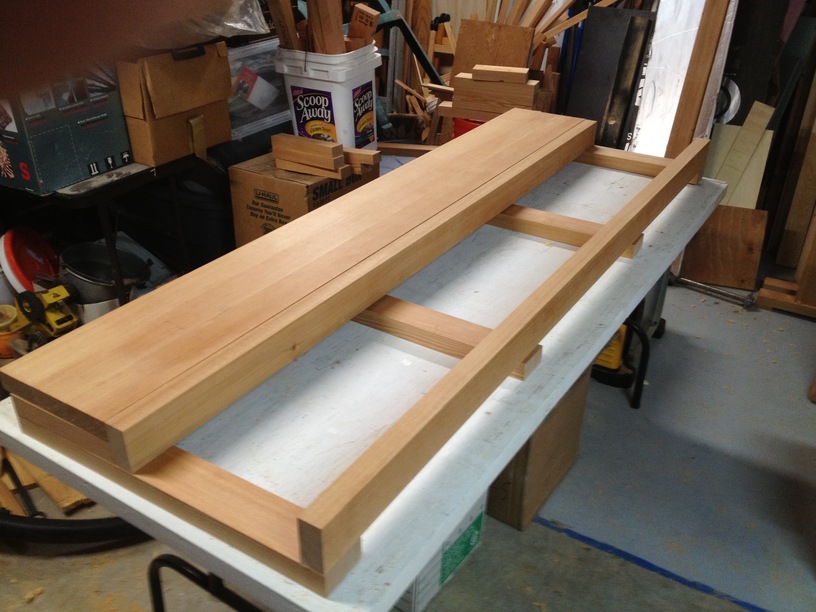
The secret for this work is that I made three of the same item, the New Fangled Workbench. You saw the best joints! After jointing, planing and sanding, then using biscuits and glue to put the 2 by 4’s together, I use a card scrapper to smooth the surface. A card scrapper is a fabulous tool if you have never used one. It takes about a thousandth of an inch off on each pass and seems to help hide the joint.
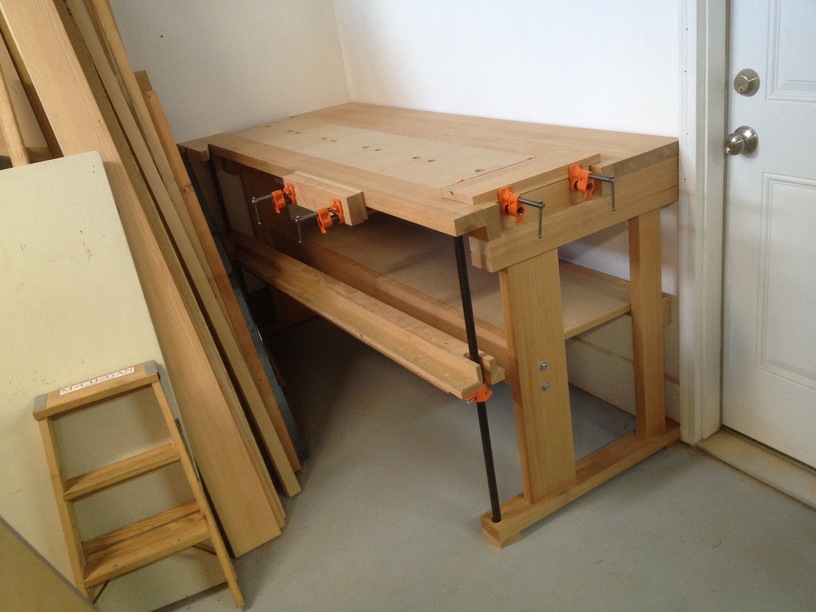
If you are looking for a great workbench, they are easy to make. I used high end materials, but they can easily be made with construction lumber. I will attach a couple photos if you are not familiar with this workbench.
All three were finished with Tung oil.
There are 3 vises on the workbench. A double clamp vise on the end and front, plus a wedge vise on the front. The platform raises and lowers and is great for planing items like doors. The OSB pieces with holes pull out so items can be clamped so they sit on the top clamps. Once they get beatup, full of drill hols, they can easily be replaced. I can also mount tools on the OSB squares and drop them in the slop on top, then clamp them tight. Very flexible workbench. Lots of storage underneath too.
I now have a pretty bad case of workbench envy to go with my workshop envy.
LOL!!! Finewood Working sells the plans if you want to build one.
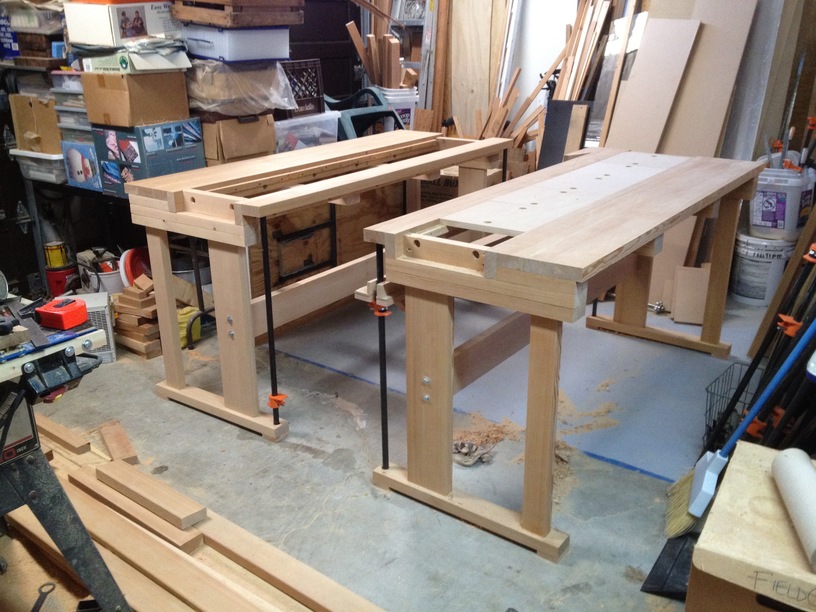
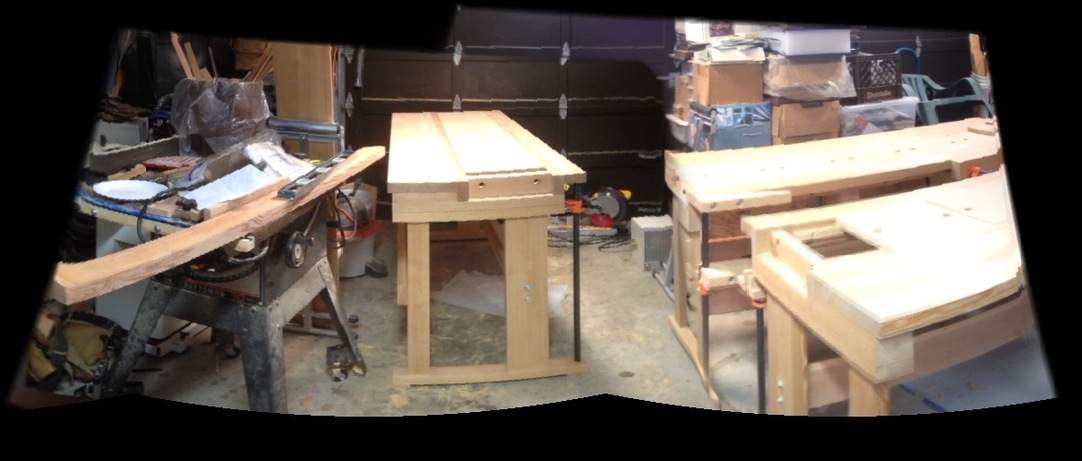
Just to be cruel ![]() I will attach a photo of all three of them together, I had to use the pano capability of the camera to get them all in the photo!
I will attach a photo of all three of them together, I had to use the pano capability of the camera to get them all in the photo! ![]()
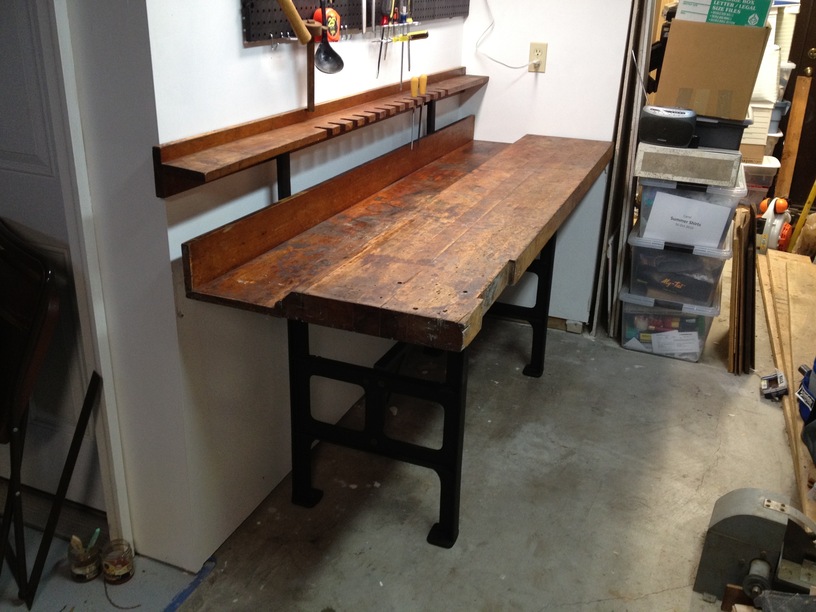
The New Fangled is not my favorite workbench. Maybe I shouldn’t include a photo of my favorite, but I will because it is unique and had an important role in our history.
It is a pattern makers workbench that came out of Ford’s B-24 plant in Willow Run / Ypsilanti. These work benches were used to make the molds to fabricate the metal parts of the B-24 manufactured in WWII. A friend of mine worked at the plant.
Ford could build a B-24 Liberator in 58 minutes, 24 hours a day. There were 40,000 ‘Rosie Riveters’ doing the work.
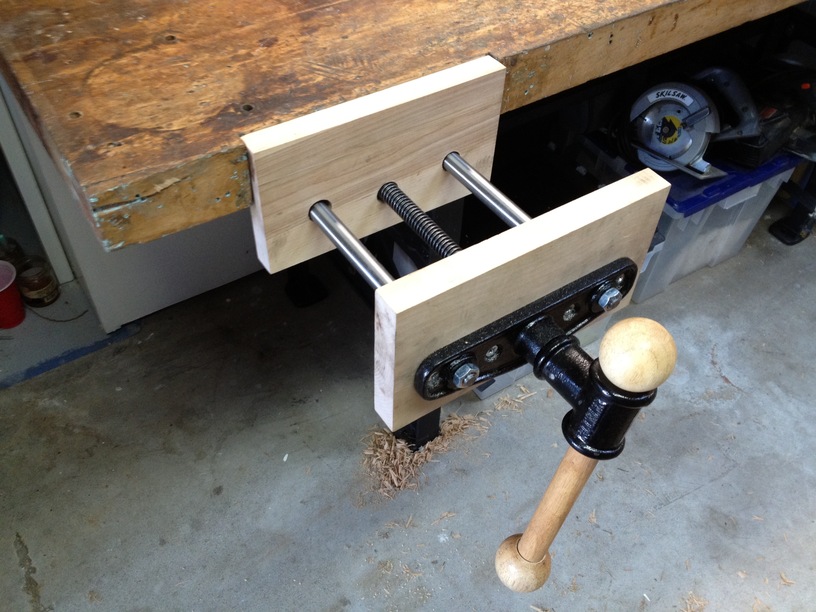
The legs and cross piece are cast iron and the top is maple. I added the wood workers vise, made from Yellow birch out of Northern Michigan.
Enjoy the photos.
Worth every minute you spent on it. It’s gorgeous.
Thanks for the photos and story. Love that pattern maker’s workbench so much!
Thanks again for the suggestion of wipe-on poly. After returning from travels, I’ve tried a couple of thin coats on a bubinga wallet. It’s a really nice-looking surface and has a pretty nice feel as well. (I thought I’d do a third coat, but after a light prep sanding with 400 it looked and felt great, so I’ve left it at two for now.)
I’ve been carrying it around a couple of days now to see how the surface wears in the pocket. So far, so good—but I need the weather to heat up a bit so I can get some good human humidity going…
Returning with an update. In the end, I found that wipe-on poly started to wear away after a few days. I decided that the best approach was probably to use a beeswax and oil mix (Daddy Van’s), and allow users of the wallet to decide whether they want to renew the finish. I’m happy with this solution: I’ve been using the wallet for months now and like the way it has worn. I’ve never wanted to apply more wax.