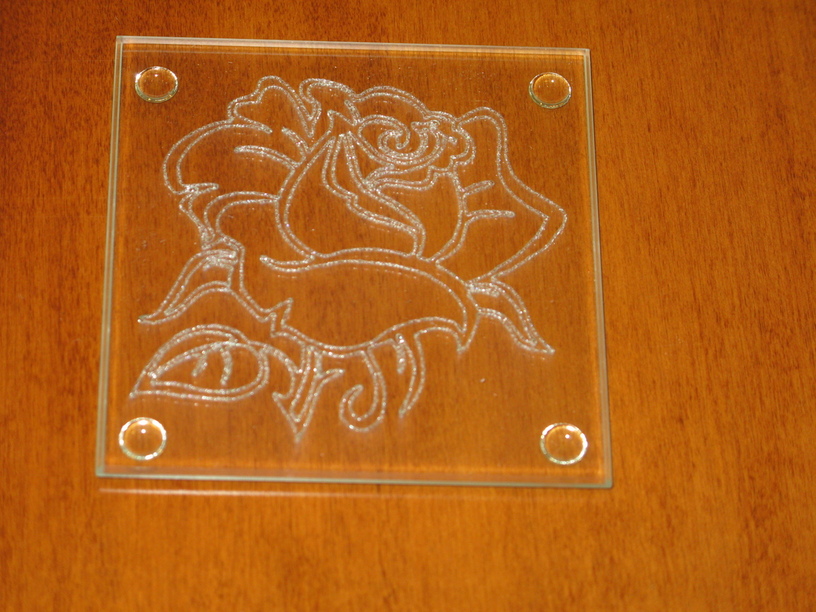
I tried my hand at making some glass coasters. I had purchased some coasters long ago while I was waiting for my Glowforge from “Glasscoasterstore.com”. The plain clear glass ones were super cheap so I have 3 boxes of them. I decided to try them first. They have little soft plastic feet on them so I turned them upside down and told my Glowforge that I had medium acrylic in it. Yes, I know I lied, but it worked. I did not use any masking on the glass. Here is what I ended up with.
I was thinking, boy I am getting pretty good at this until I showed it to my wife. She liked the design, but said that a solid glass coaster will stick to the bottom of a wet glass, fall off, break and make a mess. Where was she and her “wisdom” when I was buying them?
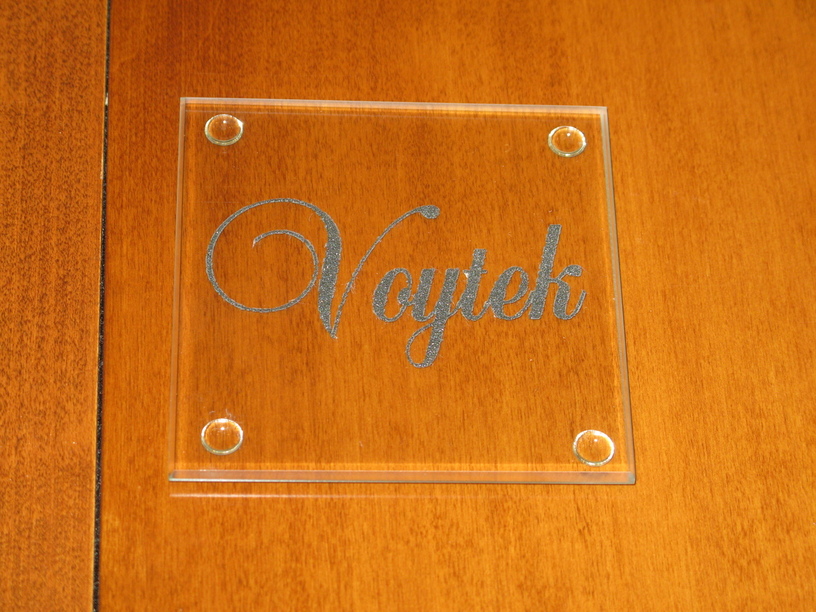
Anyway, next I tried some cermark spray on some. I had never used any of this before, and need to tell you that the directions do not tell you how much of a mess you can make with that stuff. The stuff is like a graphite powder and gets all over your hands no matter how careful you are. Here is a picture of what I ended up with.
The text in the picture looks grey but it is black. It feels rough to the touch. The part that isn’t hit by the laser washes off easily, but don’t do it in a sink that your wife will see. It makes a real mess with splatters. I will be doing any others out side with the hose.
I remember reading something about having to use masking on the glass so the Glowforge can see the thickness, but I didn’t. I don’t really have the thickness part worked out yet, but it appears to work the way I did it.
Nice tests! I do believe you’re the fist 'Forger to report use of Cermark! Thanks for that! I haven’t bought any yet 'cause it sure ain’t cheap! But I definitely plan on it.
Yes, I agree with the cost, but since I purchased most of my stuff over a long period it wasn’t that bad. I only used 2 heavy sprays across the tiles when I did mine.
Since you told it you were using PG acrylic it had the info it needed. Maybe someday when the head adjusts focus on the fly we’ll need it to “see” the material but right now I don’t think it’s necessary to mask.
@davidgal2 These look great. Was this regular Cermark, or the special formula for glass and ceramic. I also bought some a long time ago and haven’t tried either metal or glass versions yet. The glass and ceramic comes in a few different colors, but none of them look to be super vibrant.
The ui thickness settings are to correct for the ui placement issues. The cut operation used the range finder in the head from my understanding for him head laser focus. Then again I could be wrong and the range finder in the head is a paper wileight
The thickness settings in the UI are used in conjunction with the lid camera to enable placement & layout. This is true of both PG and non-PG settings. The red dot laser in the head is used to focus the CO2 laser to the actual surface based on a single spot measurement (this will eventually be expanded to multiple/continuous, TTBD). However, if the user has manually selected a different focus height for any/all operations (cut, engrave, score), then the auto-focus will be overridden.
So the thing of it is when I select a material non pg I have to se the material thickness for the optical reasons but then… It populates the focus for all the actions as well this over riding the auto focus anyway?