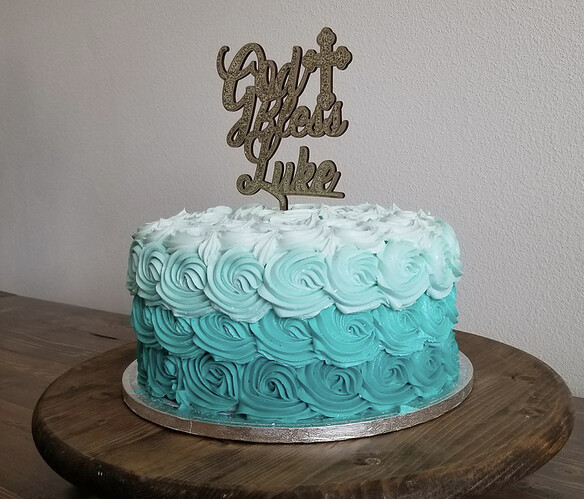
Here’s a link to a caketopper that I just made for my son’s baptism this past weekend: Quick little cake topper for our baby's baptism! - #6 by sailbyc
The approach I took is roughly outlined as follows:
- Search for fonts on dafont.com (or other font repositories)
- Use a text manipulation tool. I actually used powerpoint lol. I basically created 3 text boxes (for each row of my cake topper design: “God,” “Bless,” “Luke”
- I then manipulated each text box (i.e. changed the font, size & position) independently
- If you want a similar design to what I went for, you want the text boxes to “overlap” in a subtle manner to keep it all as one piece. This takes some adjusting to ensure that everything is still readable & appropriately spaced/positioned.
- Once you’re happy with the placement, I screencaptured the 3 text boxes.
- At this point, I moved to inkscape (a free vector design tool similar to Adobe Illustrator). I pasted the design I created in powerpoint as an image.
- In inkscape, you can create a vector file from an image. This is especially easy for monocolor designs (which is the case here). While your image is selected, go to “Path > Trace Bitmap”
- A dialog box will open which will allow you to set the right parameters for inkscape to vectorize your image.
- I typically select use the “Grays” multiple scan option. I set it to 1 scan & check the box to “remove background” - there’s a live preview option to see what the generated vector file will look like based on your settings.
- Press OK once you’re happy
- You should now have a vector file that you can manipulate. At this point, I wanted to cut the shape out of proofgrade walnut, so I set the line color explicitly so that the Glowforge UI will identify it as a step/cut. Save your .svg file
- Go to app.glowforge.com & import the .svg file
- Cut out the shape!
- Done!
Hope that’s helpful. Sorry no screenshots, but hopefully it’s simple enough to follow, especially if you’re already familiar with inkscape.
Cheers!
