Heat Form Acrylic would be a good search term. Here’s a video of one technique. Heat guns can be used with care. I have never done this, but have been reading about it in preparation for exactly this type of thing.
2 Likes
I have seen a video where a defocused laser was used to heat acrylic to the point of “droop”.
I have used a torch to “polish” the cut edge of it, I suspect the laser can achieve this with proper settings.
1 Like
@vettha, with the recent discussion of laser tiles, I am curious what the effect of laser on glaze would be. I am curious if with the correct focus/power/speed we could melt the glaze without vaporizing it. I envision coating something like a fired tile with glaze and etching a design into that glaze then washing away the remaining untouched glaze.
Is that something you have experimented with?
1 Like
I have not, but I am also curious. 
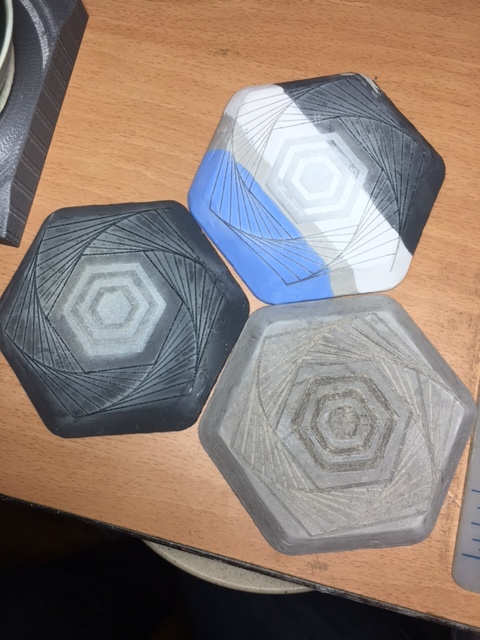
Did some clay tests yesterday on a Trotec Speedy 300, 80watt set to 100 power
The tiles with color were bone dry, the color is an underglaze
The outside lines were vector cuts
The inside Hexagons were raster etched
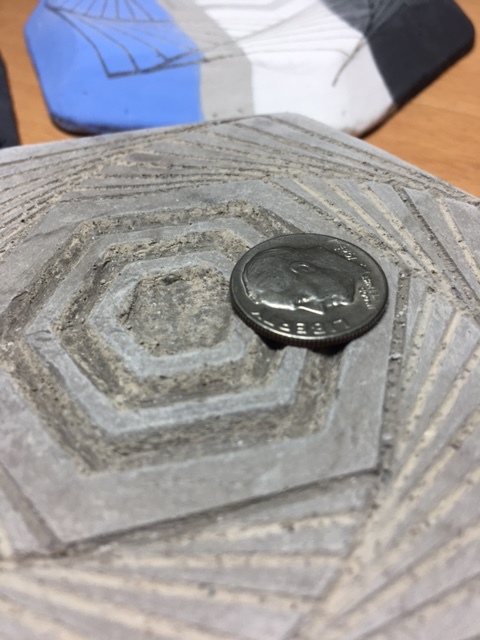
The uncolored tile was soft wet clay
Clay is Cone 6 with a medium grog
Results:
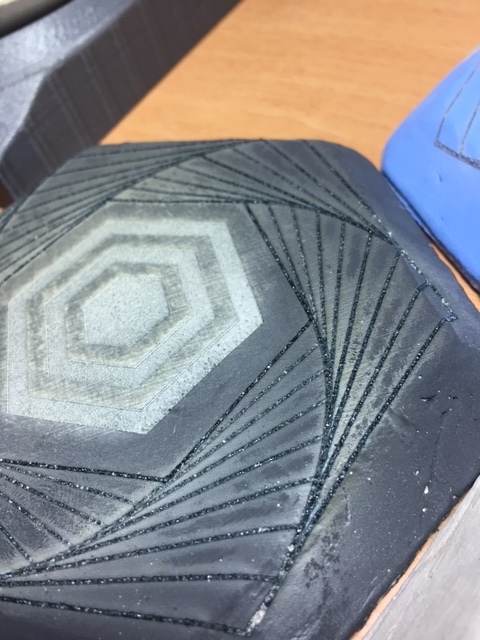
Vector cuts:
On the black underglaze the cut lines appeared to vitrify and feel like they are raised off the surface. The laser threw up a lot of sparks in the process, I’m thinking it’s from the iron oxide in the black glaze.
The white and blue underglazes were different. The color was removed and the lines are recessed slightly, The lines do look darker.
Lines on the unglazed portion of the bone dry tile are bumpy and raised off the surface as well.
Lines on the wet clay tile are .2mm deep but 1mm wide. The lines were bone dry after the cut but soon reabsorbed the moisture. The lines are clean but are very wide for a vector cut.
Raster:
On the bone dry tiles with color the raster removed about .2mm off the surface, the White and blue underglaze appear to be gone, the black glaze raster area is darker but the glaze might have penetrated deeper into the clay body when painted on.
The raster surface has a slight texture to it but is very even.
On the wet clay the raster dug 1.3mm into the clay. The surface was really messy and uneven.
Rastering on the wet clay produced a lot of fine clay dust, I’m concerned that this may lead to filter issues with continued use.
Conclusion:
The laser can be a really interesting option for Sgraffito work, removing color underglazes from the clay surface. I would stay away from rastering moist clay to create a relief, too much dust and the surface is messy.
wear a dust mask!
I need to run a test on leather hard clay but I suspect it will be similar to the wet clay.
I’m also considering trying the mishima technique where I will mask the clay body with a glaze resist first, run the laser and then apply underglaze over the piece to fill in the lines.
Hope this helps, Let me know your thoughts.
Christopher.

24 Likes
Great test! Thanks for sharing this. I’m inspired.
4 Likes
Thanks for the detailed post and photos. I see lots of interesting potential for sure!
1 Like
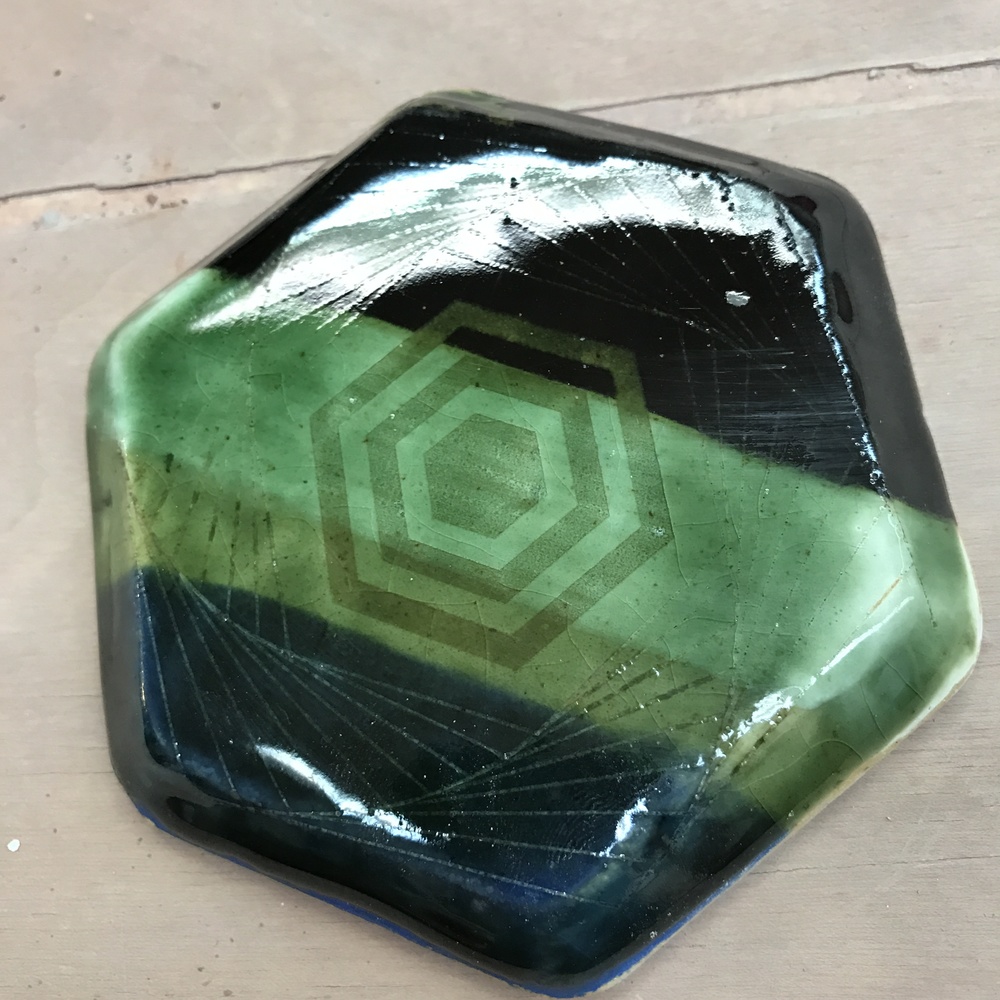
Finally got my test tiles out of the Glaze firing. First one is the one where I etched the wet clay and glazed it after bisque. I filled in the etched area with a green glaze and then dunked it in VC5.
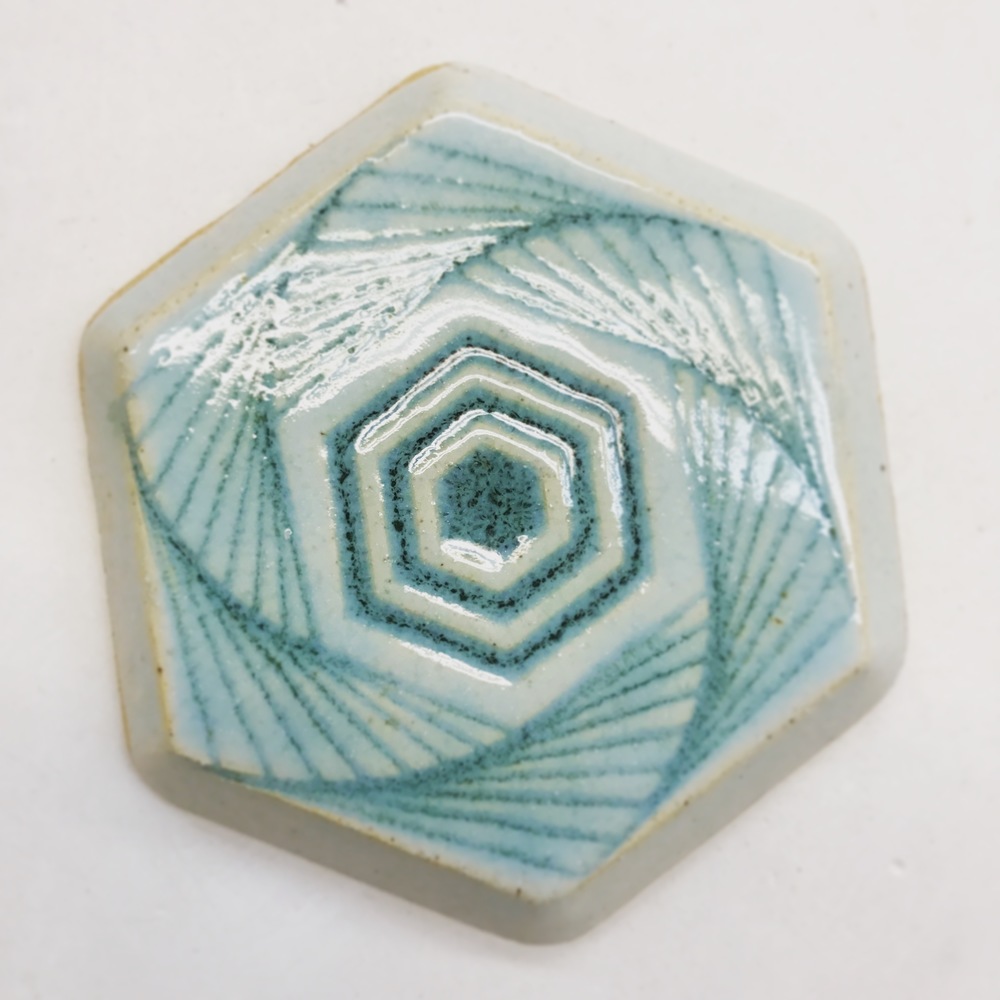
The second was etched over underglaze on bone dry clay, bisque fired then glazed with a glossy transparent green glaze we call Oribe. See my previous post for what it looked like before fireing.
23 Likes
Gosh…these are really gorgeous!
3 Likes
Wow. That looks like some really cool possibilities.
2 Likes
Custom ceramics! You got all that with one firing?
How big is your kiln? Do you use cones or a pyrometer?
Very nice!
1 Like
Wow, very nice indeed! I especially like the first one. Would love to give that a try.
2 Likes
Bisque at Cone 06 and then a glaze firing at cone 6. Standard size studio kiln,
3 Likes