Have you had a replacement machine? If you have it may have been placed on the first one. Check and if it has, let @bonny know.
This seems to be a common problem. Given that they say they’re working with individual machines and their calibration, you’d think they’d not work on data that was not updated in weeks… save time, and work on the ones that are generating data at least weekly if not daily…
My preference not for them to deliver on a promised feature that pro users bought and they have not delivered. Your “warranty” analogy is flawed, everyone gets a car warranty and not everyone bought the pro. Yes, I am suggesting you should be left to fend for yourself wrt a feature you did not buy. Do you also expect cheese on your hamburger when others are buying cheeseburgers?
Sorry, @mark14, but your argument is flawed. Precision alignment was a “feature” to be (eventually) on all models so if you consider that there wasn’t a pro model even available in the very beginning, this argument doesn’t hold water.
Responding to nobody and everybody… these arguments speculating on how well or terribly Glowforge are spending their time and resources are getting waaaay out into the weeds. Could all participants in the melee please step back and take a few breaths?
I’ll humbly ask again, is there any way to take the ruckus posting somewhere else, leaving this thread to focus on the productive side of the Snapmarks discussion?
I’m not sure whether it’s a good sign or bad that nobody from the company has showed up here to calm this fracas down…
Best regards to you all.
 right on. Stepping out of this one, now.
Agree precision alignment was also promised. IT is not clear that snapmarks delivers on the promise of precision alignment. IT appears to be a workaround at best for some issues related to alignment. .
i was speaking about passthrough which was a purchased option. What is clear is that they have described snapmarks as a poor man’s passthrough.
" With a little effort, it lets you use the Pro Passthrough even better than before."
I don’t know that they have time or inclination to read it all. By this point, various individuals’ opinions are fairly well known. ![]()
And all the well-intentioned opinions offered don’t change one fact…the Snapmarks aren’t ready yet.
Every time they push an update, it has to be checked again. And sprinkled into the opining here, are a few stories about problems and issues that people are trying to get to Glowforge’s attention. If they get missed or overlooked because everyone wants to vent or offer opinions, it’s just going to delay things even further.
Nobody is going to change anybody else’s mind about what they think ought to be done or not done. But it might delay the process to keep discussing it here.
So yeah, I’d second the vote for just starting another thread where folks can discuss it to their heart’s content. This one needs to be accessible to the development team for locating and repairing problems.
Then here is a simple resolution, 1. sell the one you have and go buy another one for more money that will have the features you want or 2. Start your own company. But complaining about the features you do or don’t have will not solve the problem.
One inch equals 25.4 millimeters, doesn’t it? From the post " Learn By Doing: Your First Prints and More - Snapmarks:"
“Note that each Snapmark need to be at exactly W0.332” x H0.405" (W8.437 mm x H10.279 mm). If they appear to be a different size in your design software, you can manually change their width and height."
But:
0.332" * 25.4 = 8.4328 mm
0.405" * 25.4 = 10.287 mm
I’m going with the inch measurements, as that is what the fiducials from the Snapmark template came in as, after I selected “Use geometric bounding box” in Preferences - Tools.
Am I missing something with the metric dimensions listed in the post I mentioned?
I made 8 consecutive engraves using Snapmarks for alignment over yesterday and today, then, without the jig being moved at all, I’m getting the message about not having enough Snapmarks.
Any one else had this? I’ve cleaned the cameras.
They work brilliantly when they are picked up.
IIRC there was a slight discrepancy introduced by certain versions of Inkscape that the slightly altered numbers might account for. You’d have to read through the whole thread to find it.
(The 8.43 x 10.28 mm size should work too. It’s a very small rounding error. You just need to make sure that the size in the file is the same size that is scored on the jig.)
Yes, I saw something similar a couple of days ago. I blamed it on the file I was running, but @bonny might want to mention it to the team. We’re catching some unexplained error messages.
@Jules Thanks for the reply. After I posted, I also noticed that Inkscape converts the inch measurements to the (slightly off) metric values listed in the post. Once I switched to the geometric bounding box, which I had never noticed in Inkscape, the fiducials from the template were perfect.
@bonny Hope you can help me … I have images!
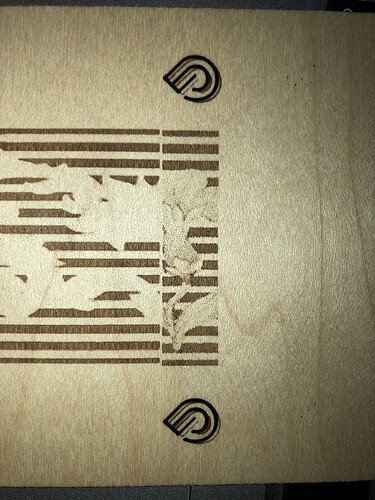
Got to working with snapmarks (FINALLY) this morning, and it’s so CLOSE…
Med Draft Board - Default settings (engrave design and cut snapmark for pt1 (right side burn) modified setting (std engrave/score (so I could see where /how far off) on the pt2 that snapped in the GF app (larger left side burn).
This was the second consistent “almost”. My graphic is clean and no empty space at the top, it seems to be off 1mm low & 1mm left…
Any thoughts?
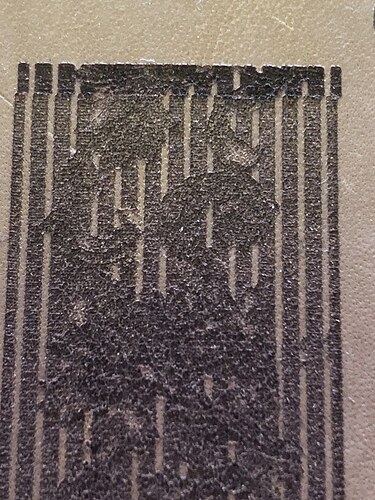
edit: changed material to veg leather (not gf material) and we got REALLY close 2x’s…wondering if the draft board thickness is off… checked and my draft board set to .125 automatically, it’s actually measuring .1181 (3mm) with digi calipers. still off on horizontal axis. help.
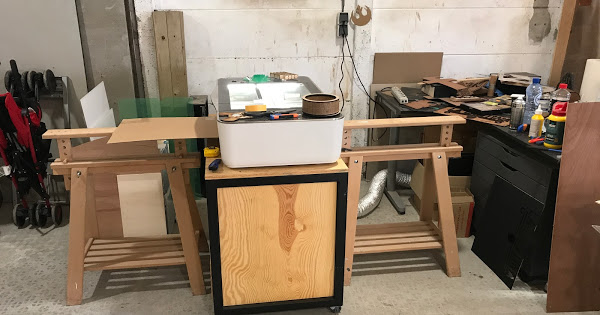
I got snapmarks at christmas 2018. I finally got around to learn how to use them for a passthrough project. I had a sign of 1000mm x 390mm to make so this was the time to do so. Learning curve was very steep but after I figured out this was just like using registration marks for applying vinyl decals I got the hang of cutting up my design to fit on the board and placing snapmarks where I needed them to be. It took me 2 tries on cardboard and succeeded the third time on multiplex wood.
I think these snapmarks are a powerful tool in the toolbox for the glowforge. I got perfect alignment on cuts, scores and engraves with this. Even when being sloppy with aligning the material.
I have to admit I had tried passthrough once and I found it was too much of a pain to align materials and designs. But with snapmark and after understanding how it works this is now easy!
It’s not fast, but it is very accurate.
I would always use 2 pairs of snapmarks and rescored the first pair to see if alignment was where it needed to be (perfect every time!) Sometimes and on dark materials I had to use some painters tape and redo the snapmark for the machine to notice the snaps. This works well if you already have some snapmarks in the file!
All my errors I identified in the end in the design or in how I had cut up the plans.
Here is a google album with pictures of my first snapmark adventure and includes my pass through setup and up close look at alignment.
Nice job! I don’t have a pro, but I think the photos of the process will be helpful to anyone who does and hasn’t tried it yet.
So I just started trying to use Snapmarks and I’m having a weird issue. I’m not sure whether to post it here, or in the Problems section. I’ll put it here and see what happens I guess.
I printed out the fudicial ruler, and it was sort of working, but I thought maybe I was having a scaling issue. So I pulled down the “official” Snapmarks svg and made my own ruler. Just a 90 degree angle with a pair of Snapmarks on the long arm.
But now my machine is behaving oddly when I tell it to scan for the Snapmarks. Here is what I’m seeing:
- Turn on the power. Machine centers head as usual, then sends it back to the corner.
- Upload the design. Set the thickness to the thickness of the Snapmarks ruler (three thicknesses of proofgrade fiberboard to make it close to the thickness of the object I’m engraving.)
- Focus changes in the GUI as expected.
- Click on the Snapmarks button.
- Machine scans and locates the two Snapmarks.
- Head goes back to home in the upper left.
- It thinks about it for about 15 seconds and then the head starts banging into the upper left corner.
- Artwork does not align at all, print button says “Ready.”
This has happened three times in a row. I’ve powered down the machine, twice - once for more than an hour (cooked and ate dinner.) Still happened. You can look in the logs for the time period just before this post (7:45 ish CT)
Any ideas?
I am having the same issue, mine did it twice before i just shut ti down and haven’t used the SM since…
@bonny:
We’ve got a couple of cases of head-banging with the Snapmarks function…posts #1228 and 1229, plus a misalignment on post #1225. (Just wanted to tag you.)
I believe this is still the place to report it guys…i just tagged Bonny so she will see it. She’ll get back to you if she needs to have you do anything or run a test.
Thanks Jules, you’re the best.


