Looking for post about acrylic kerf

Somewhere on here I stumbled upon a post about acrylic kerf settings. There was a link to a short video where the user was showing a black and white piece they had made, where the black cutout would basically just fall out of where they were putting it into bigger piece. They cut the same shape in white, with slightly different size settings, and the white piece stays perfectly. I’m going to try a small acrylic piece using two different colors, and was hoping to find that article before I try. I definitely want the inlay to be a perfect fit…

Any ideas? Thanks!

1 Like

Just look for kerf adjustment in general. Acrylic, wood, etc, doesn’t matter what material you use, the techniques are the same.

I use the stroke width, stroke to path, union/different method, myself, but you can do it with offsets. The only variable is how much you’re offsetting, and that depends a lot on your material and settings, so nobody can give you a magic bullet there. For wood, I start at 0.005 for looser fits, and go up to .009 for “omg I need a hammer to put it together, what was I thinking never again”. Acrylic has less give than wood, so ymmv.

11 Likes

I’ve done this a few times to make curb house numbers. I cut “holes” for the numbers out of white acrylic. Then I cut the numbers out of black acrylic—but as a mirror image. This is because the cross section of the laser cut is more of trapezoid (i.e., wider at the bottom than the top) than a rectangle.

If you want a tight fit you need to “grow” the letters by the needed “kerf” amount. That’s a bit complex in Inkscape. The subject has been covered here before. I use something like 0.1 mm as the kerf adjustment, but your mileage may vary, so a test would be required for your particular Glowforge and material.

In fact, I just made this* yesterday…

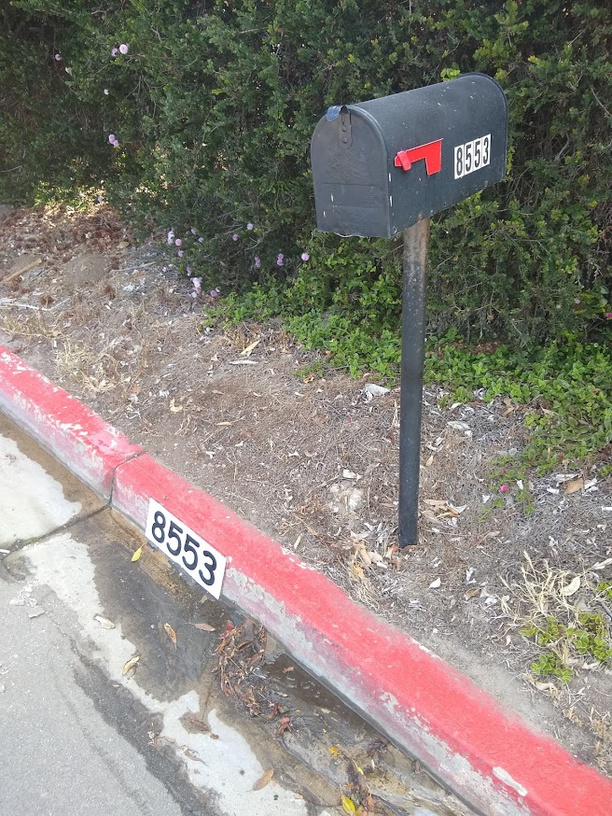
*Adding Comic Sans to the neighborhood’s curbs—one house at a time! :sunglasses:

15 Likes

Oooooo, you’re evil!

6 Likes

@ryan.niemer: This post has more detail about the kerf adjustment I use for PG acrylic inlays… :sunglasses:

4 Likes

Thank you!

I bet you saw this post and video from @smcgathyfay

6 Likes

That’s why I love my Glowforge family! Someone always has the answer! Thanks!

5 Likes

Oh cool, glad that’s what you were looking for! Funny thing is I had stumbled across this again just last week so I knew just what you were talking about.

2 Likes

that’s good timing on my part then lol

It is all a bit different with different thicknesses of material. And the variation in the tolerances of acrylic adds another variable. If I am going for friction fit in acrylic or an inlay, I makes sure I do a test piece on the particular sheets of acrylic I am using and make sure I measure around the perimeter of the sheet.

4 Likes

Evil would be doing it for your neighbors as a “free service.”

Here are my findings.

tl;dr: For a simple project where inset shapes don’t touch, you can make the piece you plug in .008" bigger via Offset Path. But it is better to compensate all the pieces by half that amount.

This post has some additional tips about using Offset Path but the press-fit method it describes, again, is only for simple shapes.

3 Likes

This topic was automatically closed 32 days after the last reply. New replies are no longer allowed.