Manual 3D Engrave Settings - ProofGrade Thick Clear Acrylic

They’re the same bands that appeared on my other acrylic engraving tests that I posted.

Not sure if it’s because of trying to get 256 levels of gray into a narrow (1" wide) strip and power modulation of the laser while it’s on the fly, or related to stepper motor stepping, or something else. However, remember the one test I did with the artwork rotated 90 degrees did not have the same banding, where the laser power was consistent the full length of the X-axis movement.

6 Likes

It looks like the chaotic looking waves that appear at depth might be just the out of focus striations.

5 Likes

One thing I’d be curious to test is the power switching speed of the Glowforge, swinging from 0 to full power, and how fast it can accomplish it. I think that would be a good test to add to a Glowforge test pattern diagnostic.

4 Likes

My son and I have been sitting here looking at your results for the past few minutes. That is really interesting.

1 Like

@mpipes thanks for the experimentation and write-up.
I cannot tell you how much money and time, you and others are going to save the rest of us when we finally get our machines.
Many Thanks

9 Likes

You mean like a serration? This is a glue-up of 3 pieces of 1/8" acrylic. This was an early test and was running full power and pretty low speed to hog all this out in a single pass, so it’s not a very clean run LOL.

You’re welcome! All in the name of science!.. and because I am immensely obsessively curious… :slight_smile:

6 Likes

Not necessarily a serration (which implies a gradual ramping of low to high power), more like black and white bars at a high resolution/LPI at the fastest movement speed. The question is what material to use, I suppose, that can take the full energy blast and keep some sort of detail to it for evaluating when its complete.

Acrylic is probably not a good material to use for testing it, though… It would retain too much heat and just stay too molten.

Ah, gotcha.

The laser can switch on/off instantly without any power ramping.

With acrylic, the very top ledge of the cut will form a tiny radius. Here’s a photo of a sample from my other acrylic testing thread that shows a close-up view if you download the full size image.

You have me curious though if it may behave differently for a repeated pattern.

7 Likes

OK, you win. Nice!

1 Like

You don’t know how much your generous efforts are appreciated @mpipes. You probably saved me a sheet or two of acrylic and a several frustrating hours getting to this point. Thanks man. :clap:

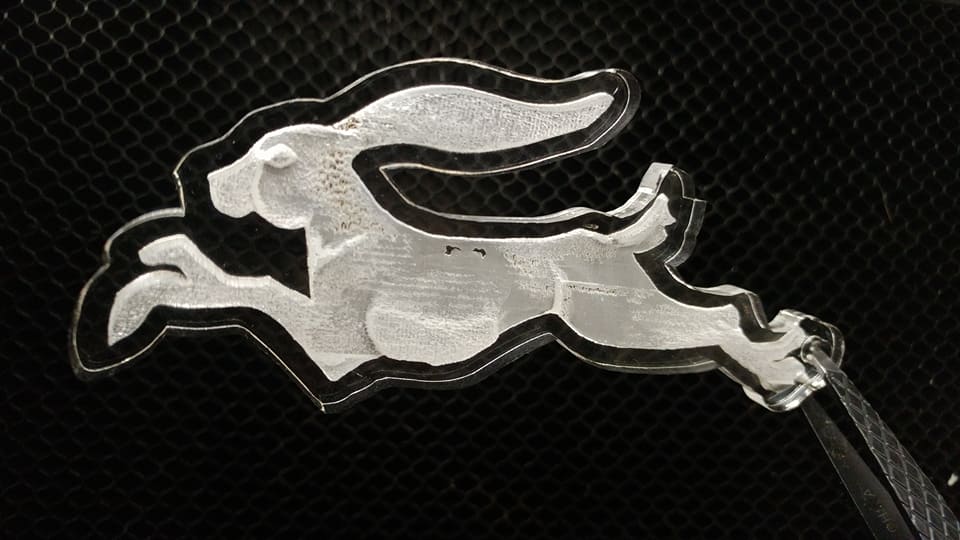
This is non-PG .23 acrylic (from Inventables I believe) set at 295/80 at .1 focus. It was my own hand-colored greyscale image and I’m really happy with the first effort.

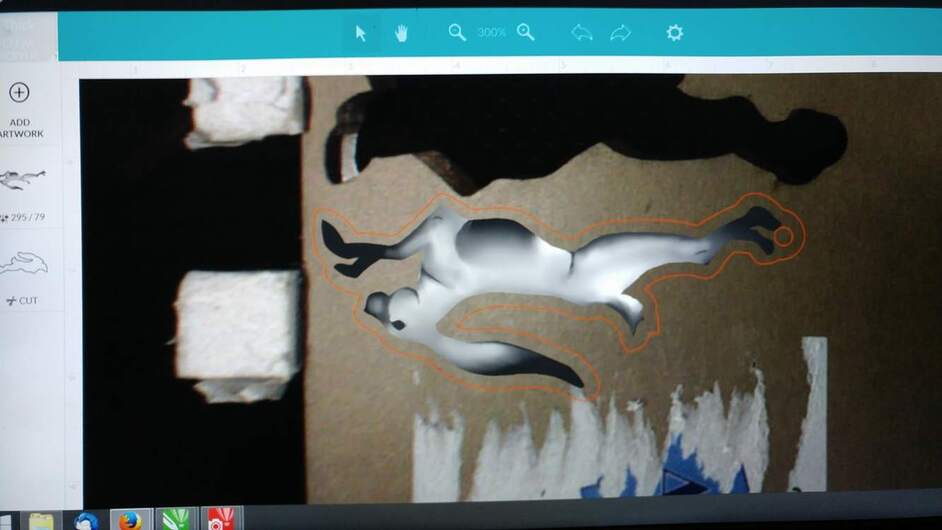
Some of the lines in the engrave are from the blending of the image and not the GF. The weird line at the elbow and the blowout at the bottom of the foot was from a mis-start and those areas getting three passes, not two. I fixed some of the blending and made a few other adjustments and I’m cutting it again at 295/80/.07. (The GUI pic is of the 2nd attempt.)

14 Likes

You’re welcome!

I’d love to see some of your skeletons done in 3D too. :slight_smile:

I could hear Jack calling my name while I was unsuccessfully trying to fall asleep tonight, so here I am 2:00am taking photos of him lit by LED. :slight_smile: The LED is blue, the other two pictures I just laid transparent fluorescent acrylic in front of the LED to color it.

28 Likes

Thanks. Now I’ll never get back to sleep!

1 Like

What diameter is the disk?

It is 0.976" diameter.

1 Like

Did you have to invert the image for the detail? I am currently trying to do 3D photo engravings in the thick acrylic but the whole image seems to be completely white. I have tried it with color, black and white and with inverting the image.

1 Like

There is a pretty comprehensive information on how engraving works in the tutorials section:

The heavier the engrave, the closer to black you need those areas of the image to be.

Wow. old thread for a first post. Welcome,
If you have an image for 3D it will be White where you want no cutting and black where you want the deepest cutting. if you are coming in from the back side you will want that reversed so inverting the depth would be in order, You do need a special sort of image with the different depths sorted out that will not look like a normal photograph. Everything that is cut at all will be white.

If you want it in color after that then you need to shine a colored light on it,

If what you have is a photograph then you need to do a dithered dot cut that will work the same no matter what as the dots will be close together in darker areas and farther apart in the lighter areas

The images will look like this,

. This is the image inverted. Should I take out the tray inside or keep it in? I’m sorry for asking so many questions. Thank you so much for your responses as well.

That image will not do well in 3d at all.

Think about what you are looking at, with the part in the hair in a deep hole along with their eyes nose and lips? Imagine each shade of gray as a plane with each darker being lower than the lighter one above. When you invert the image and cutting from the back it is just a double reverse. so what was white will be higher looking inside the acrylic. Where there is a sharp distinction from black to white there will be a sort of cliff or hole, or else a butte where white is surrounded by black.

It would be better to go back to your original image and maybe flip it right to left and do a dithered dot pattern with the masking left on. Then you could spray paint the back black, and let it dry well before removing the masking (and search weeding for instructions of difficult cases). You will need to cut back a bit on the darkest areas as you don’t want the dots overlapping and you might still have to do a few tries to get it right,

1 Like

Thank you so much

1 Like