As far as the layout of cut material: it is all done by hand. I just use qGIS to export vector line work to Adobe Illustrator. Then its a pain staking process of organizing them and turning them into individual layers.
I really think Autodesk’s 123D Make is the go-to program for this. It’s free, and it does an excellent job. I’ve been playing around with it, in anticipation.
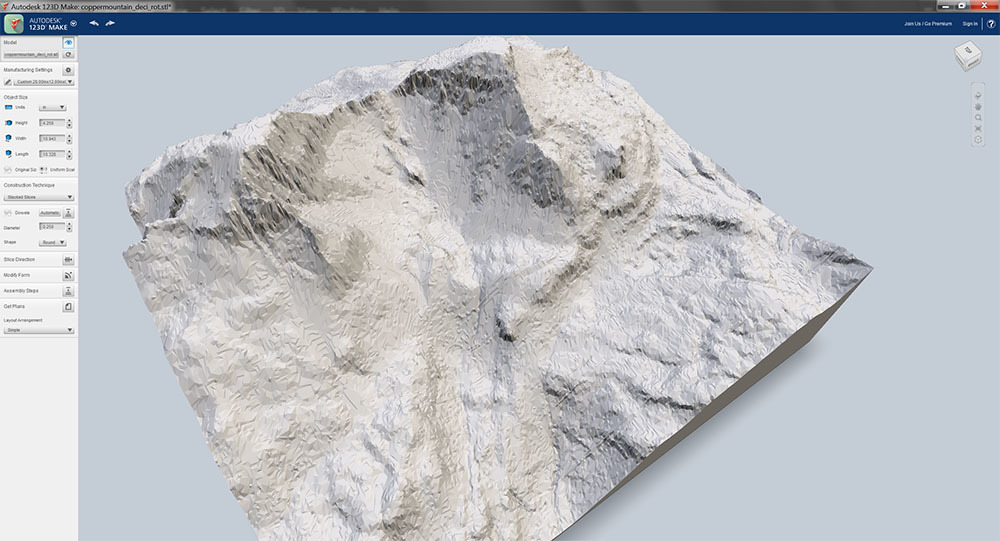
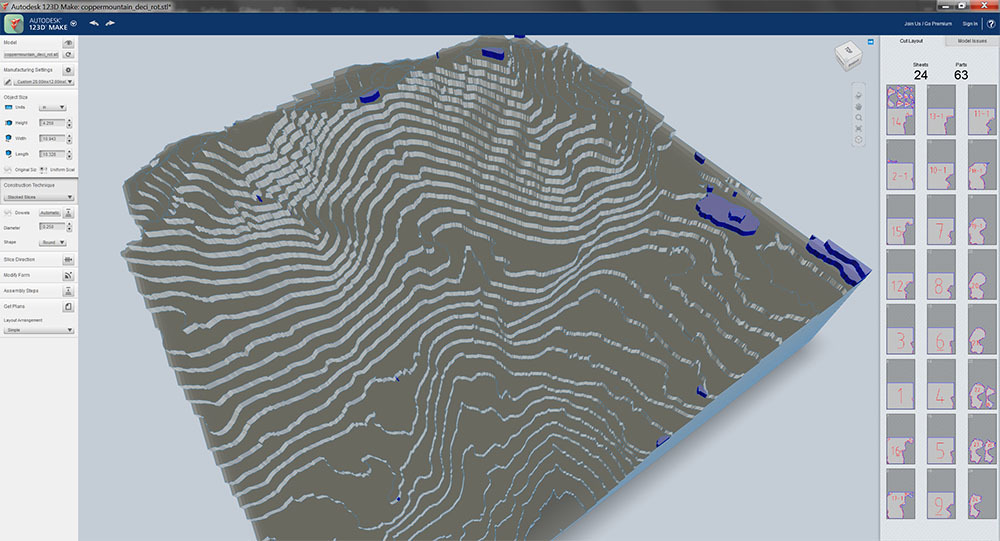
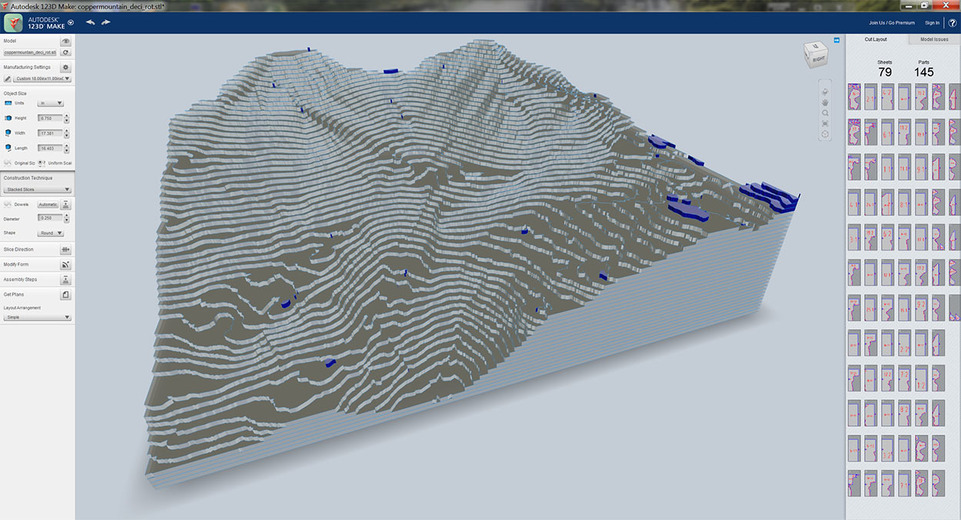
Here’s a model of the peak of Copper Mountain, Washington. The first picture is the raw model, and the second picture is after slicing at 1/8" in 123D Make.
And here’s a model of Portland, Oregon, again before and after slicing, this time at 1/16".
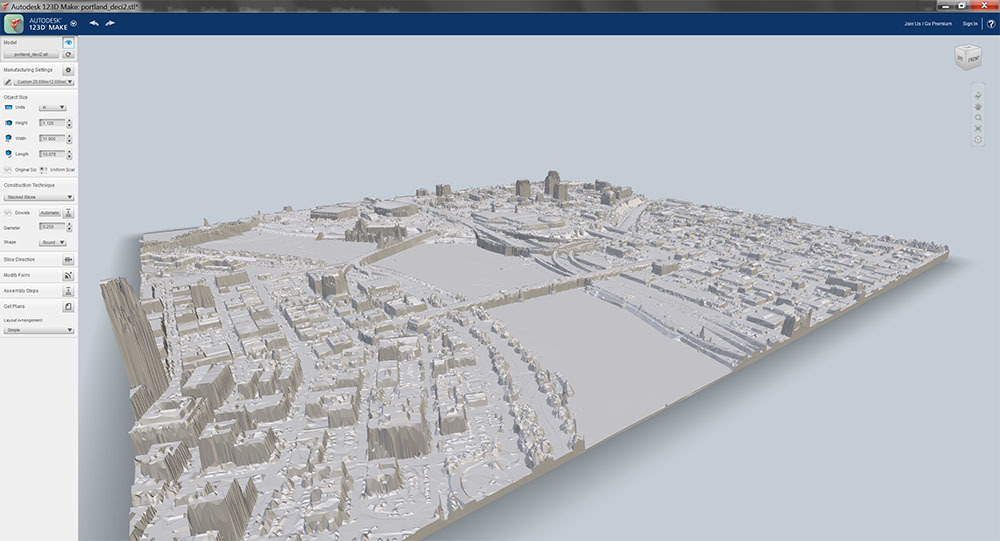
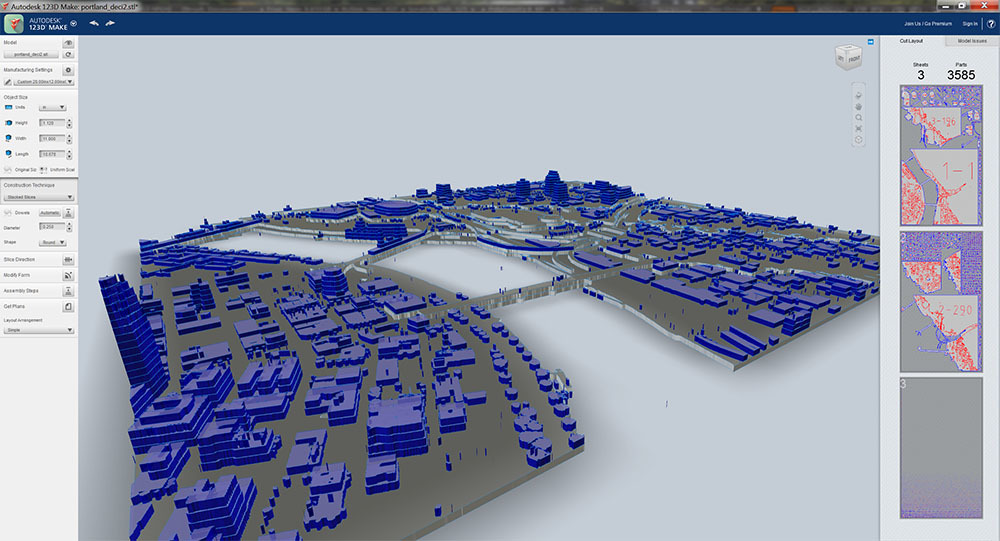
Not that I’d ever build the Portland model, not with over 3,500 parts, most of them unattached. I was just testing what the software could handle. This model has around 170,000 vertices.
The source for the data is here:
http://www.opentopography.org/index.php
The data is sparse unfortunately, but high quality if available. I liked the interface because it allows you to zoom in and use a selection rectangle. It can then export just the data for the area selected in DEM, LiDAR point cloud data, and various other raster formats. It’s free, but there’s a limit to the amount of data you can select, and you have to give your email address so the service can notify you when the files are ready. It warns it can take up to an hour, but I just stayed on the page and the data was ready in under a minute.
To convert the data to an STL file that 123D Make can import, I basically used a technique I found from this blog post:
http://www.the3dprintedfuture.com/shapespeare/?p=1
The post itself isn’t too helpful, it only outlines the steps with no details. However, the .pdf file linked in a comment by Gregor Luetolf is pure gold. It details all the steps needed to convert the data using mostly free applications. The only one that costs money is AccuTrans 3D, and it’s only $20.
I basically followed the steps in the .pdf, but I didn’t use the Qgis application. Unstead I downloaded LiDAR point cloud data in LAS format from the link above, and opened that in 3DEM, skipping the first and second step. However this resulted in some very large models that 123D Make couldn’t handle. I had to open the models in ZBrush and use its Decimation Master plugin to reduce the polygon count. But I think you could play with the settings in the conversion programs to get smaller files, particularly AccuTrans 3D. I’m going to continue to play with this, and I’ll post back if I come up with some better settings or a better workflow.
5 Likes
Ok, one last example. I wanted to see what the Copper Mountain model looked like if it was about as large as the Glowforge Pro could cut in a single sheet. This version is about 18" square. I set the size by the height, using a multiple of the material thickness. The height is 7.25" and the material thickness is 1/8".

Fortunately, owner’s of the non-Pro model aren’t prevented from creating large models. I input a material size of 12"x20", and 123D Make automatically split some shapes up. But it seems like the shape has to have two straight sides. There was one shape that was too large to fit on the sheet that had a completely contoured edge, and 123D Make refused to split it up. I had to reduce the height to 6.75" to get it to fit.
3 Likes
Yeah this is what I would do for an ornamental model but it really doesn’t work for something has to be precise. And each layer doesn’t directly correspond to a contour. I guess if you scale it correctly it could theoretically work.
I agree, ornamental models was what I had in mind. I guess I was a little too enthusiastic about the program, and it came across in a way I didn’t intend. I didn’t mean to question the method you described. I can see how the program wouldn’t give you the precise control needed. Plus AutoDesk requires you to have a paid subscription to use their software commercially. Unfortunately it doesn’t look like there’s any upgraded software with the membership.
Haha don’t worry no offense here.
Also would like to point out that there is a workflow to go from a 3D model to fully laid out cut sheets in Rhino3D with the Grasshopper plugin. I don’t have it off hand. I’ll see if I can find it.
This type of project is one of my favorites. Thanks for even more great ideas.
2 Likes
These are gorgeous Mark, thanks for the photos! I took a landscape architecture course in college and man did I have some late nights assembling cardboard topo models. Part of me misses them… 
Thanks Kevin! These are for those exact courses. It’s funny because we’ve used CNC routers to make them and it never looks as good. Laser or by hand. I’m going to pass along the info on Glowforge to my university to see if they might pick up a couple. We’re a state school so we can’t afford a commercial one, we always relied on the local makerspace. Can’t wait to get my hands on my GF!
Linking to a good instructable on this topic, especially www.qgis.org.
http://www.instructables.com/id/Make-laser-cut-bathymetric-maps/
5 Likes
These are going to be some of the funnest project to do with the GF. I cannot wait to get my hands on one to do this stuff. I am working on a few ideas to make it easy for non GIS people to do these, but I am still in the ideas and gathering data phase. Hopefully I come up with something cool.
I think I will resort at times to Minimal technology: get a piece of transparent paper. Put it over a map with a light source under. Trace by pencil. Clean up. Go over with sharpie. Fix tracing to the material you want to cut. Put in Glowforge and print away. Or you can scan the map. Open in whatever drawing program. Do the magic wand thing or point by point use a bezier tool to trace the outline you desire. Now you have lines that you can edit. I’ve done this lots of times when the image I had just didn’t lend itself to auto trace.
You could definitely do it by hand, but I am a Geospatial analyst / developer, so I want to deal with all of the data and make the 3d models. Then slice them in 123D. I have a few ideas I will be trying over the holidays, which I hope will work out.
Really interested to hear what you come up with and what your workflow looks like.
Sometimes I read too fast. I couldn’t figure out what I was doing wrong for a while. Realized that I downloaded and installed 123D Design and NOT 123D Make. Make is for turning 3D into 2D. Design is the 3D modeler. Where is the facepalm emoji? 
1 Like
I have been pretty busy with work before the holidays, but I should have a bunch more time to work on this over the next two weeks. I now have a script that creates and scales the surface automatically. I just need to set it up to do the sides to make it a solid. I am really happy with how it is coming out so far. Just need to tweak a bit more and I will share it out.
1 Like