I cut these for an emergency project that I just couldn’t get right with “found objects”. I am now official in my gravity fighting boxes. Thanks!
Ok, I’m pretty knew to this. So bear with me. I opened the svg file in GF and it was bigger than the proofgrade med draftboard I’m planning on using. If I scale it to fit, will that change the size of the boxes? How do I keep the correct size and keep it within the lines, so to speak?
You don’t scale it, you just move the parts that are outside of the printable area.
1 Like
I just want to double check one thing. Let’s make sure that the art you are seeing is still the correct size. If somehow the SVG DPI changed, everything would look off.
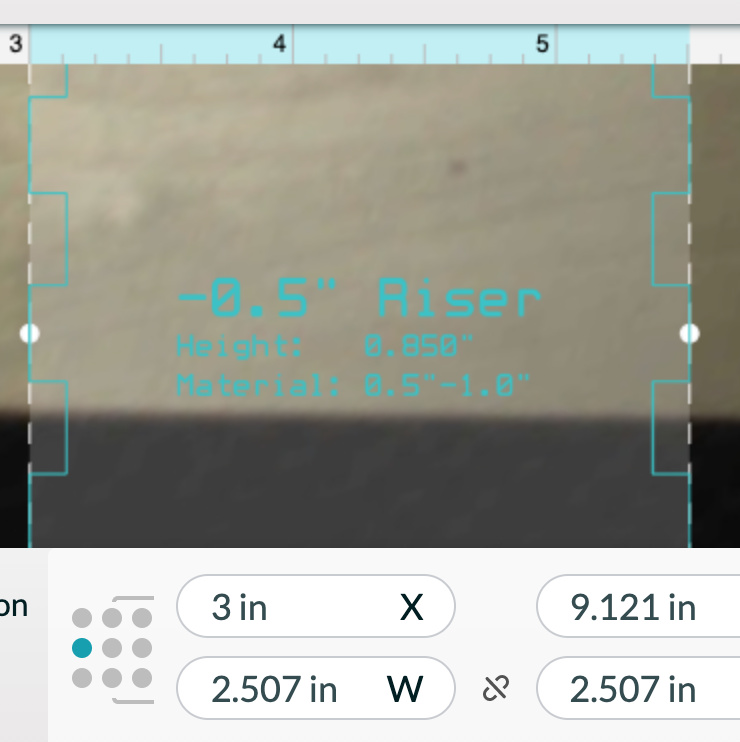
Look at the - 0.5" riser art. The piece I have boxed in here should be 2.5" wide according to the rulers in the Glowforge browser app.

If that’s what you see, then your pieces were imported at the right size, and as @eflyguy said, you just have to move the parts around so they land on your materials. (Use the select tool to draw a box around a piece before you move it – they are made from many separate line segments as I recall.)
If that box is NOT 2.5" across in the Glowforge app, something went sideways.
1 Like
Thank you!
I made these yesterday and the side pieces seem a smidge off, thus they wouldn’t fit together. I wasn’t sure where to change the cut width in the Glowforge settings.
My apologies if I totally missed the mark on this as I am new to all things laser engraving.
Any suggestions on how to re-make these is greatly appreciated.
Thank you!
When I made mine they stuck together pretty tightly. You may just need to push harder.
It is also possible that draftboard is a little different now and these plans won’t work as-is any more. 
There is no setting for cut width. Cut width (AKA kerf) just happens based on a combination of speed, power, and the nature of the material. When making a project like this you usually have to do some test cuts and figure out what the natural kerf is, then adjust your design to fit.
I will try pushing harder to see if they come together. Thank you for your input!
I just made these - THANK YOU for doing this for the collective.

Thanks!
Mine turned out great! Thank you for this. I used a small rubber mallet to put the tight pieces together and it worked like a charm.
My one contribution to Glowforge culture. Glad this is still helping some people. 
2 Likes
I plan to make this because I need this for one of my projects. But I only have a 1/4 thick draftboard that I purchased from home depot. Can I still use this with that wood? Or would I need to make some changes to make this with the wood that I currently have?
There’s basically no way to know til you try. I think the chances are good that it would fit together… maybe with some extra force. If it doesn’t quite fit, some time with sandpaper or a file should make it work. And it for some reason it is too loose–not what I would expect–you can use glue.
1 Like
New to GF thank you for these tools much needed
1 Like
Welcome to the forum.
In addition to useful files, there are lots of helpful people.
2 Likes
Go to this website, put in the size of box you want. It will generate the code for you and save as a PDF for your Glowforge. Just cut and glue. I use a couple of 1/2" and 1" boxes for thicker material. Super easy! https://boxdesigner.connectionlab.org/