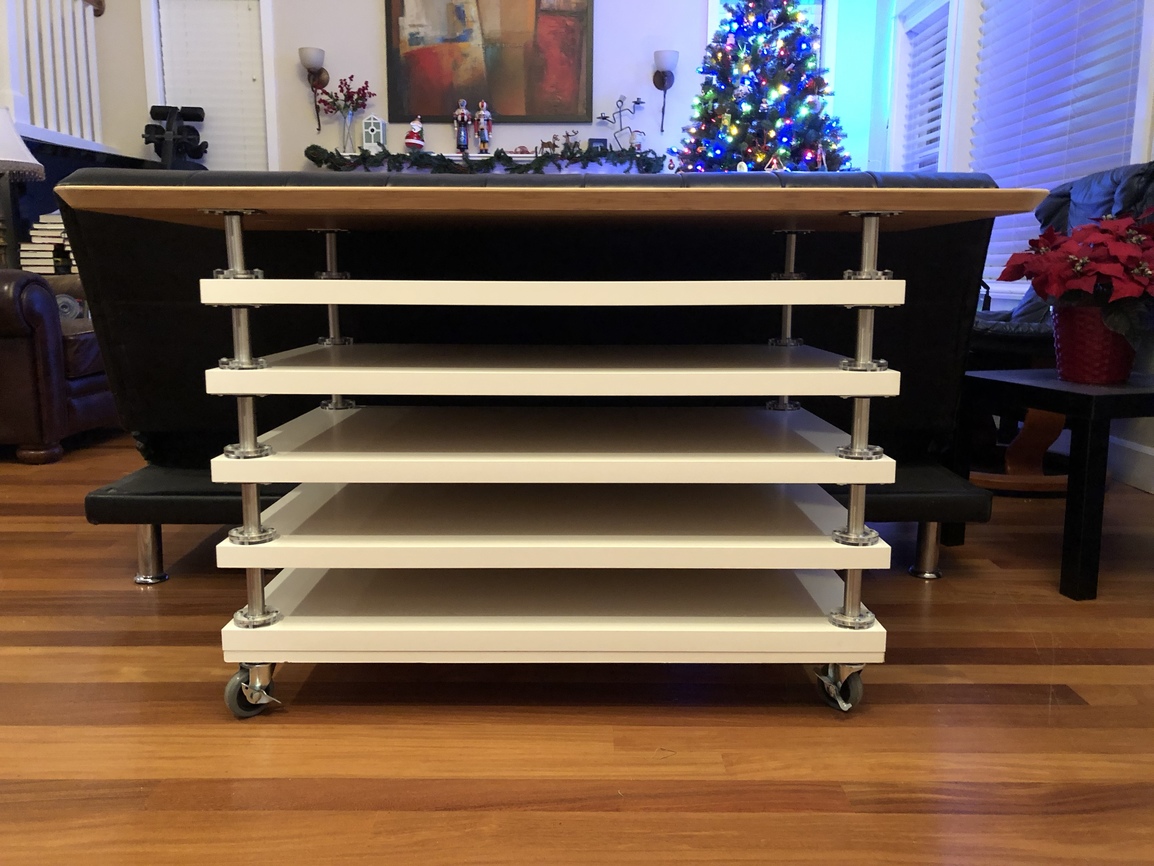
My Glowforge Table

I just finished making my Glowforge table. It is basically Jonathan Fong’s design with a few changes, including casters instead of feet. His post didn’t provide many details, so I’ve taken pictures every step of the way and plan to post complete instructions, including what glue to use (clear epoxy), the need to rough up surfaces to get a good glue bond, full parts list, dimensions, etc.

I am not concerned about strength and alignment of legs. Each shelf is rated for 110 lbs. The heaviest shelf will be the top one — the Glowforge + air filter weigh 80 lbs, and the weight will be well-distributed across the surface. Each set of legs are rated for 1100 lbs and a set of the casters I used are rated for 700 lbs. The weakest link is the glue, which is why it is important to get that right.

None of us want to take chances with our Glowforges. As long as you take care in your construction, this design is solid.

3 Likes

Oh, please do post this. I am about to build that table, and you may save me a ton of headaches.

2 Likes

If you have not yet built a table using Jonathan Fong’s design, may I make a suggestion?

The Linnmon table tops are a great choice, inexpensive and rigid. But I wonder if glue would keep the Capita legs in place if the table gets a hard bump. Further, it doesn’t appear that they leave enough space to stack Proofgrade material on the shelf, because the mounting plate means the leg will be in from the edge of the shelves. If there is at least 36" from left to right between the legs, then 3 stacks of 12" x 20" material will fit: 12 + 12 + 12. I don’t have Capita legs to check the exact measurement of the mounting plate, but it looks like it would be hard to get >36" space.

An alternative construction method is to use threaded rod. There’s a popular stereo equipment rack built this way - the Flexi. See Easy Flexy Rack for an example. 1/2" rod is likely sufficient. When deciding how far from the edge to drill the holes, make sure to account for the diameter of the washers used, to get at least 36" of side-to-side space for material. Blind holes (i.e., not all the way through) can be drilled 3/4" deep in the bottom of the Linnmon that is used for the top most shelf, and it can just be set on the top of the rods. Or epoxy nuts into the holes for greater strength.
If the bare threaded rod isn’t an appealing look, cut PVC pipe big enough to fit over it as a sleeve. There are instructions on the web for removing the printing, or painting the pipe.

Another leg option is to use PVC pipe, or metal conduit or tubing. 1" outside diameter (OD) is probably the biggest you could use while maintaining the distance between legs at >36". Get coarse thread screws that are at least 1" longer than the diameter of the legs and the distance they will be from the end of the shelf (e.g., for a 1" OD leg placed 1" in from the end of the shelf, the screw should be a minimum of 3" long). Position the shelf at the right height on the leg and drive the screws in from the end of the shelf, through the leg.

If you need more details, ask away!

I had planned to build a Flexi-style table, but decided I wanted covered storage, so will be using IKEA kitchen base cabinets with doors.
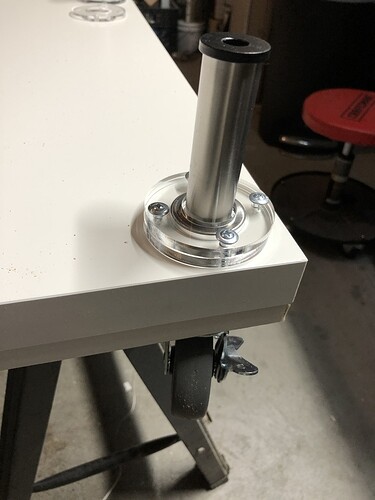
I really appreciate you taking the time to post this. I have already built my table, though. Like you, I was uncomfortable with the glue. I made some brackets out of quarter inch clear acrylic:

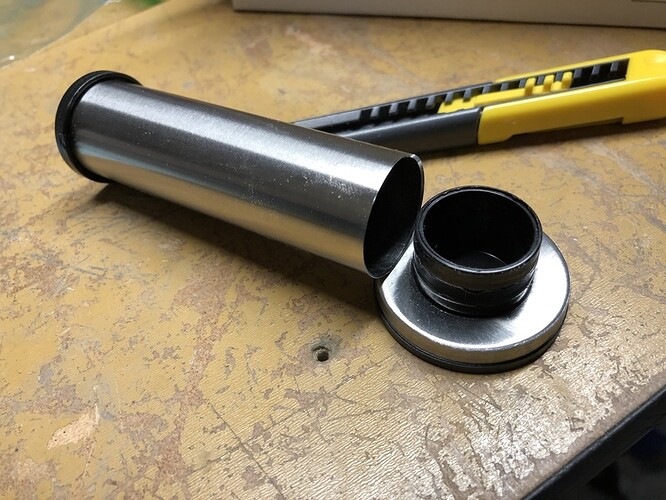
The brackets work well, and I think look nice. Unfortunately, the Capita legs are the weak link in this design. They are fine to support the weight of the GF, but if you try and lift up on any shelf except the bottom one, they will separate like this:

The threaded rod is a good idea, and one I will give serious consideration if I ever rebuild the table. BTW, here is a pic of how the table turned out (pic is pre-reinforcement of top shelf - see below)

image

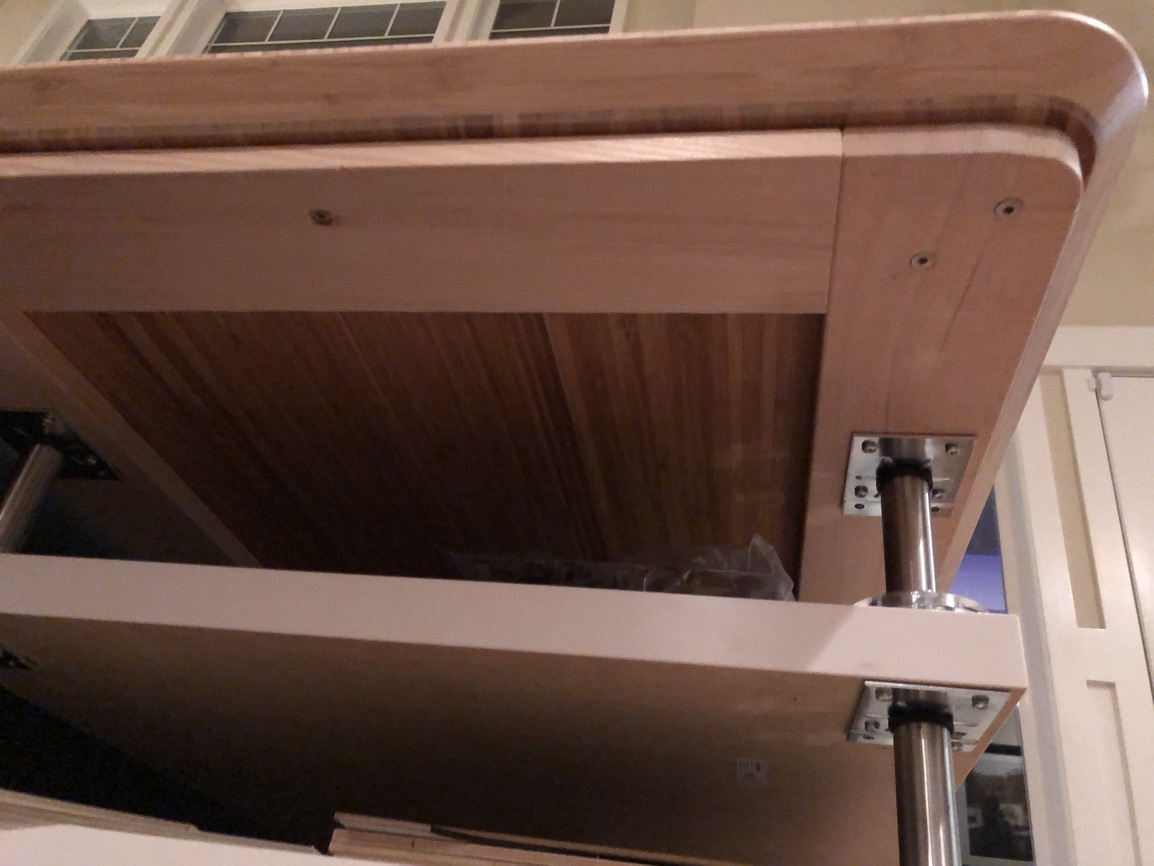
I collaborated with another user here, who provided many good suggestions for the design. He is planning on posting a full write-up on this, so I’ll save the details for that. But I do want to say, if you use the alternate top shelf that @chris1 suggested, you should seriously consider reinforcing it, as it is a very thin layer of wood over a very sparse frame. I built a supplementary frame to reinforce it - pic below.

image

EDIT: Attached zip file has the Illustrator source, PDF, and SVG for the brackets and the drill template, as well as an image scan of the metal bracket that’s on the top of the Ikea Capita legs.
Ikea Brackets.zip (4.0 MB)

11 Likes

Nice job! That looks great.
For anyone else following along, would you mind measuring the distance between the front legs? Wondering how close it is to 36". I can see from the last picture that it might be possible to install them a little bit closer to the ends. Thanks.

The bracket edge is very close to the edge - about 1/8" IIRC, but I will check when I get home. I also have a template that I made to help me drill the hole consistently. I am happy to share the design for that if people would find it useful.

Sorry for the slow response.

With my brackets installed, from the inside edge of the bracket to the inside edge of the other bracket is about 33 1/2 inches. Without my brackets, measuring from the inside edge of the base of the Capita leg to the other is 34 1/4 inches. The distance between the longitudinal axis of the legs is 36 inches, The upper edge of the bracket is 1/8” from the edge of the shelf.

Looking at the base of the leg, it may appear that the legs can be positioned closer to the shelf edge, but this is not the case; it is the upper bracket that is the limiting factor.

Thanks for checking that. It’s helpful to confirm that Capita legs can’t be installed on the Linnmon top with more than 36" of space side to side. That means anyone wanting to store three (3) stacks of Proofgrade material side by side should use a different leg assembly, such as the threaded rod mentioned above.
Sharp looking table though!

that is really freaking nice!! i’d buy one from you.

1 Like

Thanks for sharing the files! What was the specific reason for using a different top table, just more space? I’m about to order my parts, but don’t think I can fit anything larger than 24" wide due to some strange specific logistics in my basement/workshop…

Yes, more space.