I actually am not sure where my Glowforge will reside yet… We are moving in June and we haven’t figured out how and where to set it up at yet…
The only thing about putting it in “living” space is the smell of burnt wood gives me a headache in a small area… We got the pro model with filter but not sure if we will need to vent to outside or not. Thoughts from anyone that already has a Glowforge?
We’ve only had the opportunity to vent outside so far, so we’ve only got half of the equation.
Make sure you leave the lid closed until the fan spins down, it cuts down on the tiny wisp of smoke that can escape after a print. (About like blowing out a candle.)
It does smell of burnt wood though…that film gets on the masking. Remove that as soon as possible after the cut and get it into a Ziploc bag - the smell dissipates pretty quickly.
Maple has a stronger smell after a print than the Cherry, Walnut and Birch ply. (or maybe I’m just sensitive to it…I’m not much on maple syrup.)
Jules that is good to know! I appreciate those tips.
I am hoping they have the Catan board designs in the download catalog (it looked they they were using multiple woods, or maybe it was stain colors). I haven’t done hardly any wood working, I have a couple of 3D printers so I deal in PLA and ABS.
The SoC board was designed by a 3rd party. @dan has stated that they hope to be able to offer it through the catalog. Guess we’ll find out in a month or two.
So I recently reported a bug, that often even with the new extended fan run at the end of the print, there are often puffs of smoke retained under the piece which come up. They cause a reasonable amount of smoke to come into the room when you lift the part even minutes later (I wished there was a feature to put the fan on 15% or whatever when the top opened for a few minutes just to suck this remainder smoke away)
Here is a video I sent support demonstrating the problem (you may need to view it in full screen to see well - and sorry about the dropped phone). You particularly see the puff on the second piece. I also reported the weird motion planning issue since that is one path…
That tiny whiff of smoke gets trapped under the material and the air assist can’t reach it. Running the fan longer won’t help unless you move the material. (Making sure to keep the crumbs out of the tray and grid helps to keep those small.)
(And just so you know, so you can answer questions for new users…)
You commented on the path followed by the laser during the operation and wondered why it didn’t just follow along the entire outside of the cut…my guess is that you used a CAD program of some kind to create your file, and imported it as un-joined segments instead of a completely closed path. Joining those segments fixes that, and the laser will follow along the path without jumping around, but honestly it’s not worth the time spent doing it for complex CAD designs. The laser will pick up all the paths just fine, it’s just a bit dizzying to watch sometimes.
Maybe @dunfee’s idea of having the fan run a bit after the lid is opened would allow you to move items while it is running to have the whips sucked into the exhaust??
Yes, I realized that was the problem, but my point was to have a slight fan running to suck the little puffs out the vent rather than into the room air, just like a stove hood would. It wouldn’t need to run hard, just a bit to make those puffs happen, since one thing that sucks the stuff up in the slight vacuum created by your hand lifting the piece up.
It was a closed path in AI (I checked) I I checked that each vertex was a joined element on the path when I saw this happen. They are looking into it (I sent them the file). I’ve seen this happen on a bunch of files.
I had already reported this to them, so presumably it’s in there.
No it came from OnShape, but once the paths are joined via AI there is no excuse for the GFUI to not treat it as a continuous path. How would it even know? Unless you think there is some weird thing where the paths are separate entities added in a non-geometric order to the the path object. I guess I can look at the SVG code to see if it is a single path in order of points.
No, not that, but I’ve noticed that some of the problems with separate segments actually originate in the CAD program that’s doing the exporting.
I’ve never used Onshape, but I’ve seen it in some of the others - Fusion 360 does it - but only intermittently. It’s not something actually caused by the GF software. (And we can’t expect Glowforge to join our lines for us…they might do it wrong. Most of the mechanical methods for joining paths automatically do a terrible job of interpretation.)
So I just put up with a wandering beam path. It’s really not an issue from a results standpoint, it just gets freaky to watch sometimes.
Just curiosity at this point… (but I also haven’t had a chance to do testing on that aspect …there’s been too much other stuff going on…)
I would suspect that you have some end-point nodes in the middle of your path. If you select the node where the motion planning shifted and you move it, you probably only drag one side of the line, because there are actually two nodes in the same space.
In inkscape, you can select both overlapping nodes (click and drag a rectangle) and join them to restore path continuity.
The trapped smoke… cannot think of any cure for that, fan on while you are removing the piece seems like it would only help marginally. But I have no idea of how strong the fans really are.
Okay… wrote responses as I was reading, so I see that the split paths was already considered… @henryhbk, any chance you could pop the SVG up on here? I am also curious as to how this happened.
I haven’t taken the honeycomb out of the tray, but if it could be shimmed up a mm or so that would open an airflow pathway under the honeycomb that would let the exhaust pull it all out through the exposed honeycomb holes.
My PRU is 3000 miles away so I can’t check to see if this is possible though. I’d know if I had cleaned it before
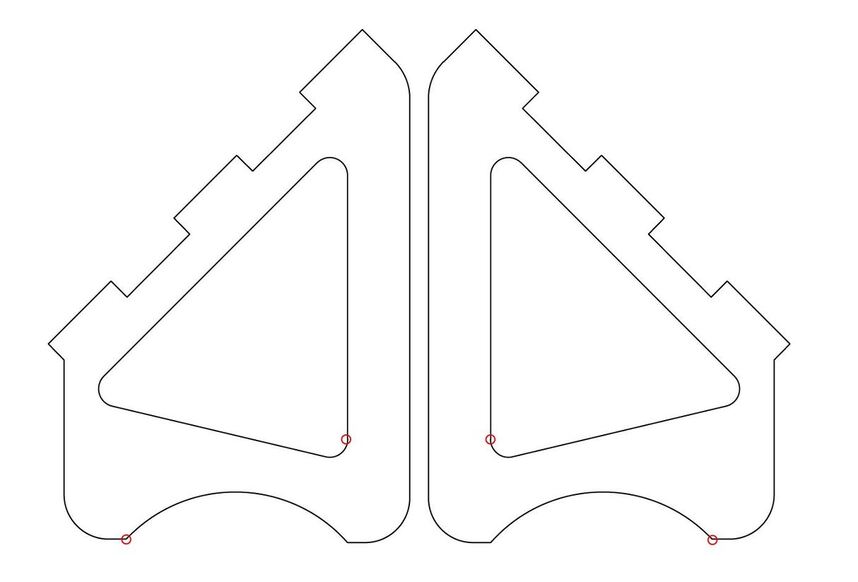
Thanks. I am very interested to hear the story behind this one from the Glowforge team. There were two non-joined nodes, which I had thought were the cause of this. But only one of those was at a point that the path broke, and it broke in a LOT more than two places.
The two parts even look to be cloned from one another, but the machine broke at different points in the path on each one!
So far, I’ve seen the Glowforge interface treat unclosed paths as if they are created from discrete segments, and it optimizes the travel path it takes. (It has it’s own Wild Willy Wander thing going…whatever that thing is called.)
This file looks consistent with that.
Anyway, whenever I see it go off on a walkabout, I check my files for un-closed paths. (That’s if I’m planning to share them, if it’s just one of my own files I usually just shrug and “Whoops! Left one open somewhere.” since it doesn’t affect the results, just how it gets there.)