It’s a pass through, not a drive through! ![]()
6 Likes
One of the main reasons I’m getting it also…I was one of the first people to have John at TRL do a batch of custom scales and want to do it myself.
What were your settings? I’ve done them. Didn’t use enough power the first time though. Just hard to “sneak up on the settings” when it’s a phone. The key is to lock it on the bed using magnets or some jig and then not touching it at all until you’ve got it right (and realize that as you bump the power you’re adding to what you originally did so the final setting is still too low for the initial setting if you want to do it again on a different phone).
1 Like
I love the idea of engraving metal!
1 Like
Hi, @curt. Thanks for your offer…do you still have some small AA parts for practice? If so, perhaps we can connect. Ping me back please and thanks again for your input!
Hi,
Nice results of your pre release! i just got my glowforge.
Could you share your settings for the apple aluminium that gave thr least bleading?
/Balthazar
1 Like
Anodized aluminum will engrave beautifully at speed 1000, full power, and either 270 or 340 LPI
4 Likes
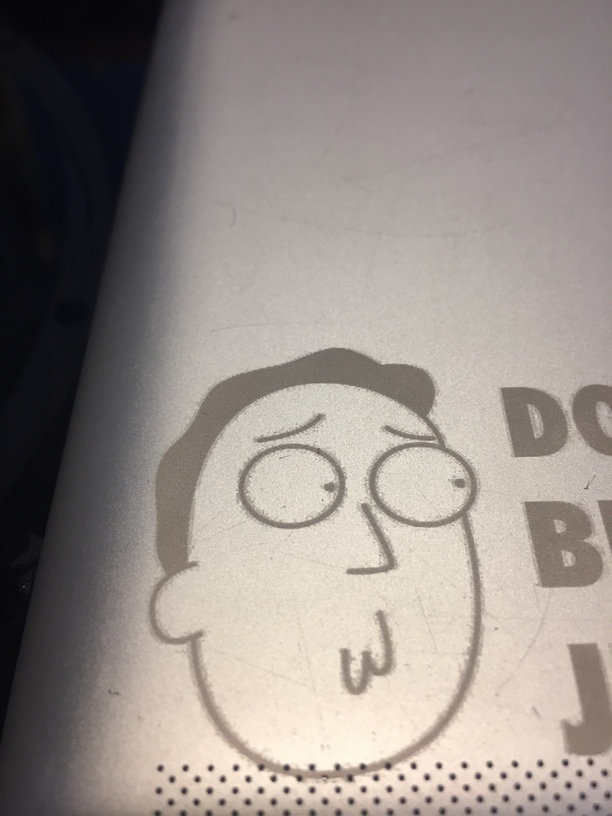
Thanks, I tried those settings on an iPad 2 but got more “bleading” around the lines than I liked. It was a jpg file. I will try again using a vector version of the same head to se if the “bleading” around the lines change
1000/100
270lpi
Grey=vary power
1 Like
Don’t think that’s bleeding, it looks like noise in the jpeg.
The laser is powerful enough to pick those up and replicate them exactly.
The vector version should eliminate it. 
6 Likes
I agree with Jules…image quality is everything when it comes to clean lines. I’ve discovered that myself more than once.
5 Likes
I can confirm that i was a JPG “issue” the vector version gave clean crisp lines
3 Likes