Thanks, @Mombo. If there was an emoji for a deep respectful bow I would post that to you.
2 Likes
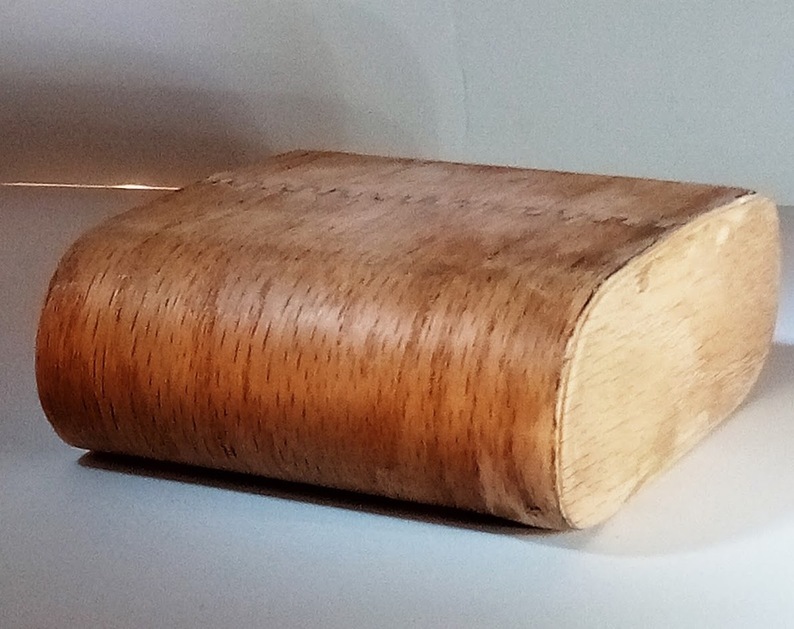
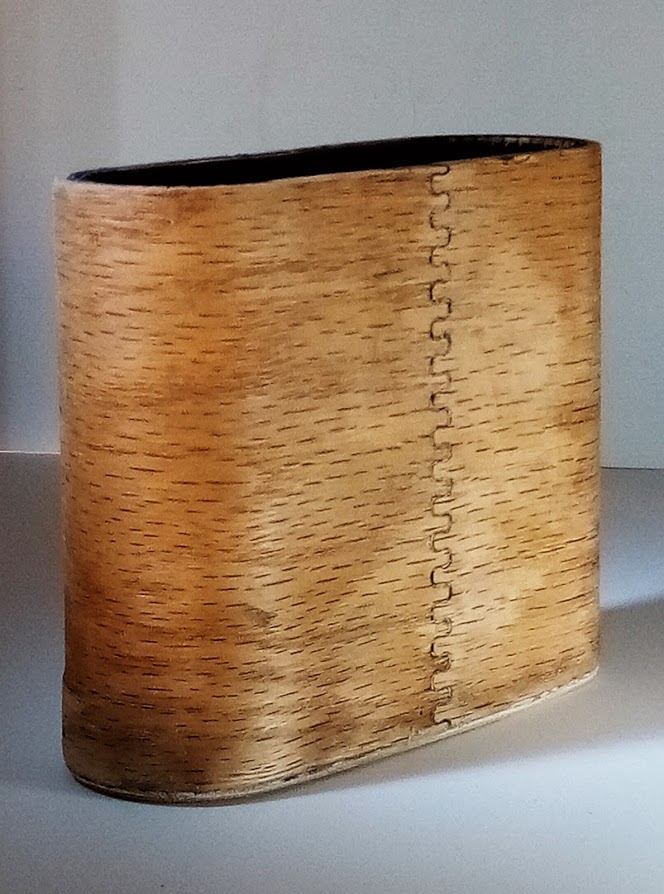
I was mainly looking at a round corner box design using oak plywood and deeply engraving a Living hinge that did not go all the way through. the wood was soaked overnight in Hand Sanitizer and then bent and clamped in place. I was just making a pencil holder, but when struck it was amazingly loud and clear and might even be played as a percussion instrument.
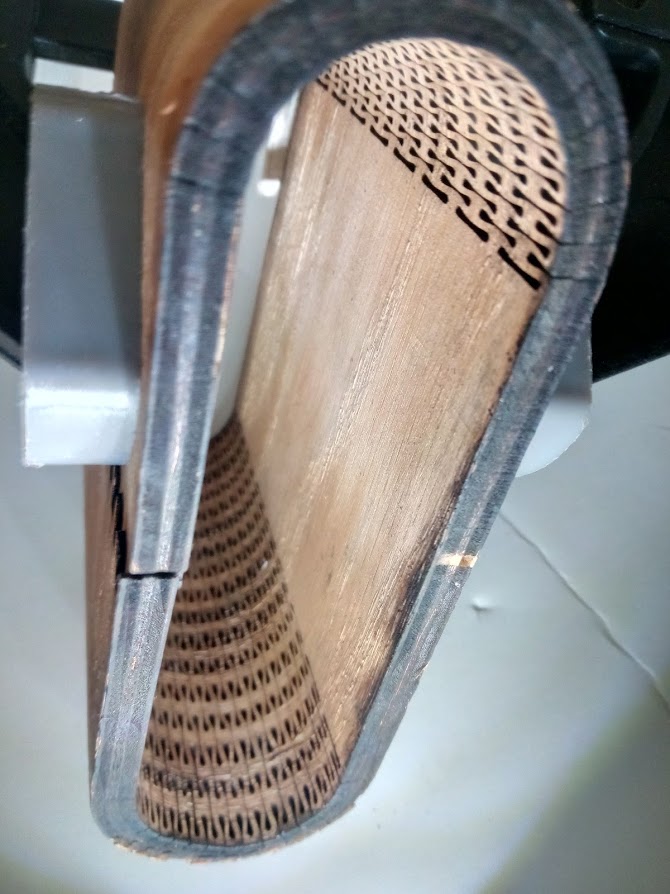
I made a bottom that was engraved to 10% of the thickness and so shows almost no edges there.
11 Likes
Very interesting and nice work, @rbtdanforth. My next ukulele will be a pineapple soprano so this is a similar shape. My design calls for the same living hinge as before but this time I am tapering the sides so that the neck end of the body will be narrower than the tail end. This is a common design in traditional ukuleles. Also, this time I am considering using a veneer to cover the kerfed sides. The primary reason is to see if I’ll get more sound through the sound hole if the sides are airtight and also aesthetically to approach a more traditional look. Using a deep engrave as you’ve demonstrated here could be a very viable alternative to the cut especially on a pineapple body since the material needs only to bend in one direction. Hmmm…
2 Likes
This is a fantastic piece and write up.
1 Like
That is amazing. I am so very impressed. Your entire project is superb. Thanks for the detailed write up. Only thing missing is a video of it being played.
2 Likes
Mindblowing. Seriously.
1 Like
What an amazing creation! I’d love to get my hands on those design files 
1 Like
Against the rules to ask as much work is often done and hard to say no. However if you jump down that rabbit hole yourself there are many videos and having a Glowforge opens many possibilities. Look for both Ukulele and Cigarbox Guitar and you could come up with something more satisfying as you will have learned how to fish rather than being just thrown a fish.
2 Likes
If you want a better way of taking that masking tape off… try gorilla tape next time. Stuff works like a dream.
4 Likes
My apologies, thanks for the tips, I might just have to try this when I have some time!
3 Likes
Thank you @pauline.lally!
@jeannemccorkle - Thank you so very much! Ill… get to… the video… I promise  .
.
Thanks for the tip, @zaccohn !
Wow hats off to you, this is truly amazing
The photos are very well done as well and will definitely inspire the kids at your daughters school
The kerfed finger joint pieces came out really well, I know from experience they are fiddly, but that feeling when they all slot together is awesome
I remember struggling to count all the notches on the top template to marry up to the kerf side pieces I’d always loose count or get it wrong by one.
Was interesting hearing your method of the dashed stroke aswell very simple but effective, I think I over thought it and made an illustrator custom pattern brush (made of 3mm squares)
Love your write up
4 Likes
AMAZING!!! That is awesome stuff, especially cutting and shaping the neck. I hadn’t thought to do that with multiple layers of hardboard, but kudos to you for making that happen.
Such inspiration!
1 Like
Wow! Way out of my league … But really enjoyed your write-up!
2 Likes
I couldn’t help but think of the Strad Style documentary (about an aspiring violin-maker) while I read through the build story.
2 Likes
Thanks @gavinlbailey! I started with creating the outline of the ukulele body. Then I thickened the stoke to match the thickness of the draftboard. You can set the stroke to draw inside, outside, or center to the actual vector. Trouble is that this option is only available if the stroke is closed. I needed open strokes because I wanted the lines to begin at the tailblock and work up left and right to meet up at the neck block. Not necessary but I wanted the pattern to start there. So I tried the pattern brush as you did. However in my case, the pattern brush has issues in that it fudges the distance between the patterns to get an overall even look. It’s close but not quite right. So I went back to the stroke method but this time I created a closed vector, thickened the stroke to material to half the thickness, aligned the stroke to the inside, expanded the stoke, now I have two strokes making a fill, then I released the compound path, saved the inner stroke, discarded the outer stroke, took the inner stroke, made it the full thickness of the material, and now I have a stroke that is that I can use to set up my dashes. The dashed can be any size I guess but I like the finger joint aesthetic so I made them the same as material thickness. Now, because Glowforge likes strokes for cuts, I expanded my dashed line, then used pathfinder to add them to the shape of the ukulele body. Now I have a notches all around the body. There is some clean up required at this point as sometimes the paths are on top of each other and Illustrator gets confused as to whether to join them or not. As for the length of the sides, I get that by creating another stroke that is the inner perimeter of the material thickness stroke I used above. Document info will give you a length. I made kerfed sides to that length. Fits like a glove. Never needed to count notches.
2 Likes
Thanks @mrinken! Yes, so much is possible with laminating and reshaping. I suppose its not absolutely necessary to make necks in this way, but I like the feel of the traditional neck so this is what I came up with. One day I’ll have to make a version that requires no extra tools or shaping - a downloadable weekend project for the Glowforge store or something. It won’t last forever but I’m not sure how this one will do either 
Thank you @ptodd! I’m just about to put the finishing touches on the svgs for the next one.
1 Like