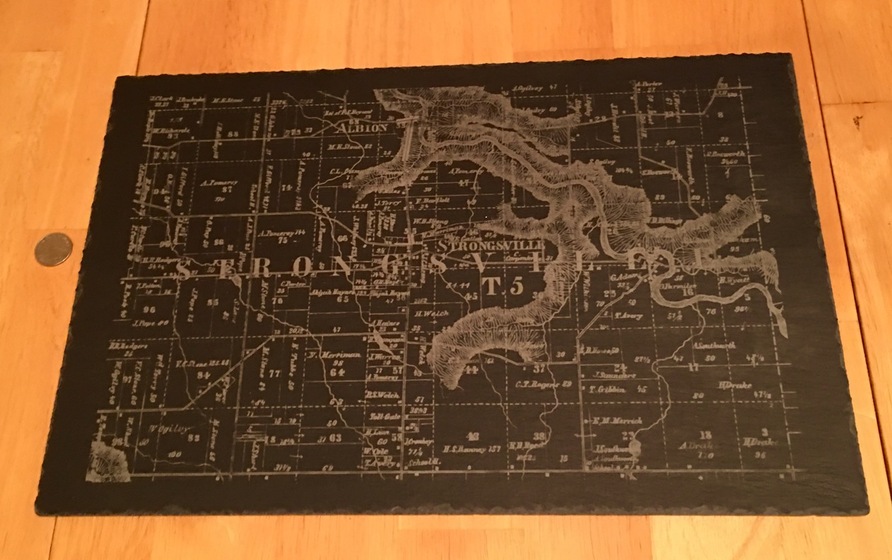
Ok my addition to slate settings: this was done at 900/30/225. Vary power, one pass, minimum power zero.
On slate prep: Thanks to @kittski, I wiped the board down with mineral oil first – it doesn’t require much oil, go light, and use the most lint-free rag you can wrangle. If you’re desperate, paper towels will work, but paper bits get stuck all over the place. Then, expanding on her idea, I let the oil soak in for about 5 minutes, then washed the board thoroughly with dish soap and water. This takes most of the oily sheen off the surface – when it dries, it’s still dark but not slick or shiny. Since this is going to be an art piece more than a used object, I thought the oily surface would hold onto dust and grime, so this is my attempt to forestall that. This is all undiscovered country, so don’t blame me if this doesn’t work ![]() – but so far, it’s great.
– but so far, it’s great.
On file prep: there is very little play in greyscale here. Slate engraves to white almost immediately, so subtle shading is almost impossible. Crank your contrast way up, you really want almost pure black and white if you have any fine details.
My first step was to sharpen the image, then desaturated to greyscale, then change the curve to make it almost pure black and white (my curve looked more like a cliff). Scale and engrave.
Aligning the board wasn’t difficult but also wasnt simple. It’s too big to completely enclose in a frame jg, so I had to improvise. First I gently applied masking tape to the board along the edge, then measured and marked the board centerline very carefully.
I aligned my engrave with a bounding box, and put a score line on the edge of that box. delete the top, right and bottom of the bounding box, and you’re left with a “t” of sorts denoting the edge and center of the finished piece. Scale the vertical side down without moving its center or relation to the engrave, and you’re left with a way to cut some scrap cardboard and score a centerline.
Now I’ll move quickly:
Measure your cardboard height (thickness).
Measure your slate height (don’t forget the height of the feet attached to the slate, use your calipers on the feet to top surface)
Upload to UI.
Align and/or scale the picture so the engraves and cuts fit in the usable area. After this point, you will not ever move the image – this is important.
Set material height for cardboard.
Set horizontal to score.
set vertical to cut.
Ignore engrave.
Cut/score.
Remove waste cardboard, but do not move the scored fresh edge piece. Liberal use of magnets to hold your cardboard is encouraged.
Align the slate carefully against the cardboard, matching the center line on the tape with the center line on the newly marked half-jig. Again, don’t bump the jig, if it moves, you’re out of luck on alignment.
Ignore the cut/score.
Turn on your engrave.
Set material height for slate.
Double check your alignment.
Double check all your UI settings.
Have a slight freakout since you have no other materials or time to correct if you screw this up and the girlfriend’s parents will not have an awesome cheese board art piece. (optional)
Start the engrave.
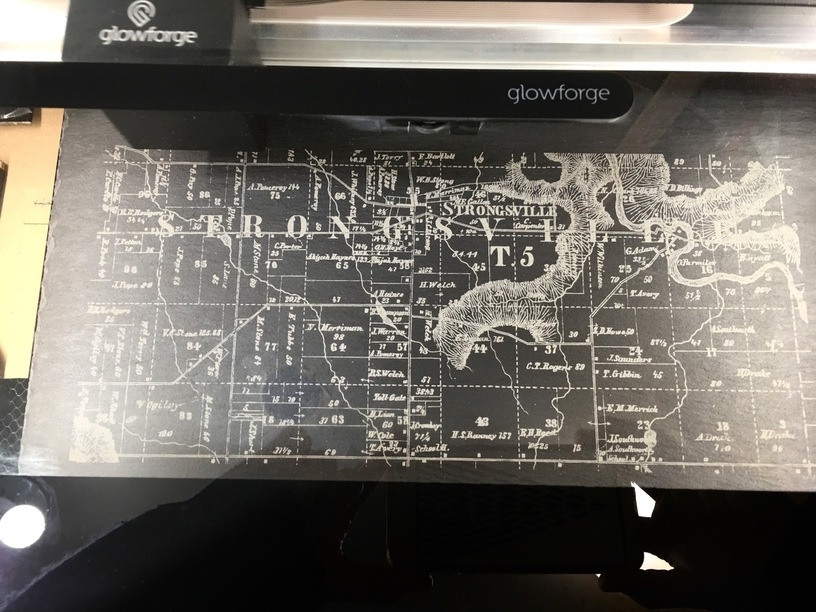
2 hours later, everything worked really well.
if you look carefully in the picture below (where it’s in progress in the glowforge), you can see the cardboard and its score line to the left of the piece. (With a bonus “you screwed this up” line on the jig that was from a previous attempt)
More discussion here, including image source: