Here is a two engraves I did on the flip side of the same rock.
A couple of learning observations…
I needed to remove the crumb tray for this to fit. I finally figured out that I needed to shim the rock so that it was in the focus range of the laser. (I added a couple of bits of wood underneath until the etching area was in the right height range being greater than the working plane of the crumb tray). Until I did so I got an anonymous error, which certainly is an area for software improvement.
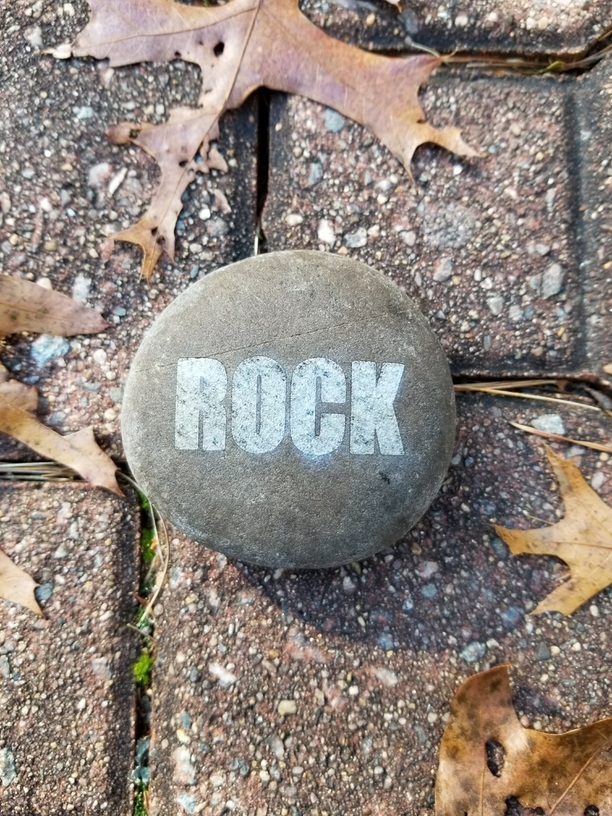
The first engrave, “Rock” was speed 400 at full power, 270 dpi. It certainly marked it but not very deep, in fact I would call it a “surface” etch.
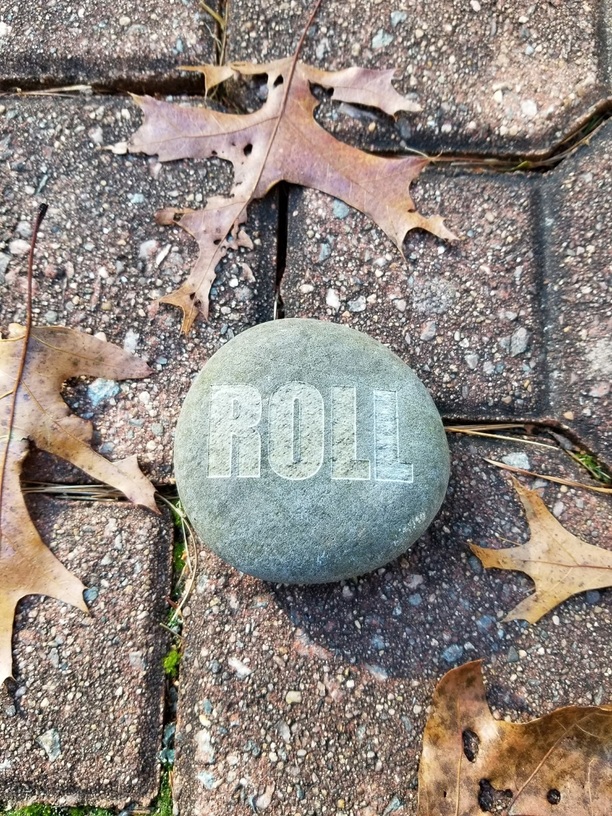
The second engrave, “Roll” was speed 350, full power, 270 dpi and 2 passes. I like the result much better as there is a visible depth to the engraving, and the edges of the letters are defined. I could see the difference in depth between the 2 passes as it was happening.
The etched color differences are interesting, and related to the mixed composition of the rock.
One last thought/caution. As a Scout, I learned that using river rocks straight from the river in the high heat of a campfire ring had a chance of “popping” - breaking with a small chance of flying bits. This popping was due to trapped water turning into steam in a pocket of the rock. After each of the engraves, my rock was pleasantly warm to the touch, so I would recommend giving any of your source materials a chance to dry out before using them. Certainly my camp fire was a lot hotter overall, but the glowforge is quite a bit more expensive and has fragile bits, so I will be overcautious.
For something more porous than granite, I will think about putting them on my grill the next time I use it to make certain they are dry.
Lots of glass fusers ask about using rocks to drape glass over in their kiln for that organic look. The moisture trapped within can cause the rock to explode in the kiln and potentially cause damage to the elements or interior. The best recommendation I’ve heard is to place the rock on the kiln shelf, cover it with a stainless steel bowl, then take it up to about 400 F for an hour. The SS bowl contains any explosion and makes clean-up that much easier.
Or stick it in your gas grill on high. The grill will contain the rock bits. Put it in the grill and then turn it on so it heats up slowly and (potentially) releases the water gradually vs explosively.
You do want to specify model of GF when using “Full” power. All settings up through 100 are the same regardless of model. The Pro’s Full is more power than the Basic’s.
So if you have a Basic but someone with a Pro shares a “Full” power setting, you’ll want to slow it down to make up for the lower Full power of the Basic. And vice versa.
Hi Deedee.
Experimentation helps get settings… of course a pet memorial on a specific rock makes it hard to experiment if you don’t have another piece of the same.
If you look closely at the photos you will see that the rocks in my project didn’t all react the same to the laser.
I think the color was less indicative of results, than other properties in the rocks.
Good luck with your project. I hope you can get results that satisfy.