Hi Newbie here,
I just got a Basic and I’m looking for more material selections and seem to only have a few random ones. I was wondering how to find a complete list of cut settings for different materials?
Thanks.
Welcome to the forum.
Proofgrade settings for all Glowforge materials are in the drop down menu. This includes hardwood, plywood, acrylic and tech devices. There is a Google document started years ago, but not updated much these days, and individual material settings offered by users here in the Beyond the Manual section.
Here is a link to the Google doc: https://docs.google.com/spreadsheets/d/1sWOebDU94HwezYPbHa3YdtXjpLbEl_vEPvCb1dSByL4/edit#gid=582951492
Thanks for the info, but my dropdown menus does not have any tech devices in it and just limited proof materials. Am I missing something or is this all you get with a basic? Seems like there should be a lot of proof settings.
Thanks
You type the name of what you’re looking for. Only the most recently used show in the dropdown.
That said, there isn’t much besides proofgrade materials. Just a few Apple devices.
Thanks so much, exactly what i was looking for, just surprised there isn’t a menu made for them and you have to search that way.
For your own benefit it is best to learn how to test for best settings rather than rely on someone else for those settings.
It’d be tough and time-consuming for GF to keep up with the settings for material they don’t manufacture or have any control over. Luckily there’s a nice document that covers a lot of material. (Notice the tabs at the bottom that also have links to suppliers, files and other good info.)
Today I used GF medium acrylic and it burned around the area I wanted a cut. I tried to guess based off of the google document but it didn’t work out. Can anyone help me figure out what settings I should use?
Thank you in advance.
I used 110 speed and full power.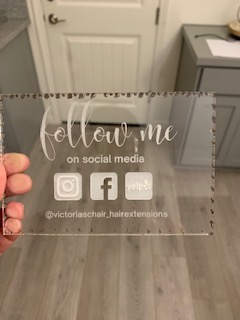
Proofgrade medium acrylic cuts using the default settings just fine. I cut some today (on my 3-yr-old machine). If yours doesn’t, the machine is not operating correctly.
You should use the programmed proofgrade (PG) settings if you’re using PG material because GF has tested it and knows what works best. The google document is for non-PG material that GF has no control over and can’t test. But FWIW, acrylic settings are generally universal and the PG settings work well on other acrylic of the same thickness. 110 speed is much too slow and that’s why you got “flashabck” marks on the material and I’m pretty sure the PG setting is 150 speed/full power. (Flashback happens when the laser beam hits the metal tray which heats up and it burns the material. You know that’s happening when the scorch marks are shaped like the honeycomb tray.)
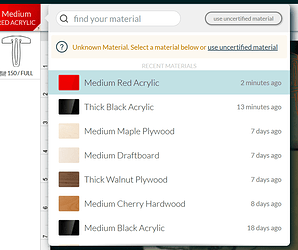
If your GF isn’t recognizing the sticker on your material, just click on the little box where the material should be listed (where my example shows medium red acrylic) and use the search box. If you start typing “acrylic”, the different options will pop up and you can select what you need. Just make sure you select the correct thickness.
Thank you for your help. How do I know that the default settings have changed? Do I need to just select medium clear acrylic and does it change on it’s own?
Thank you so much. I’m going to try this now.
Never mind my last post…I had to click on a back arrow from the material menu and now I see an area that says PF settings and it did change to 180/full power.
Yes, the GF will automatically input the correct settings.
Notice how I have PG material selected and under the little picture of my file, it just has the word “CUT”. That means it’s using the default setting for that material.
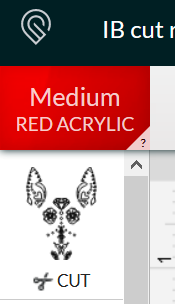
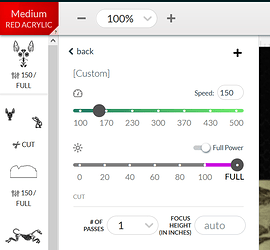
If you click on the image, it will pop out the setting window like this.
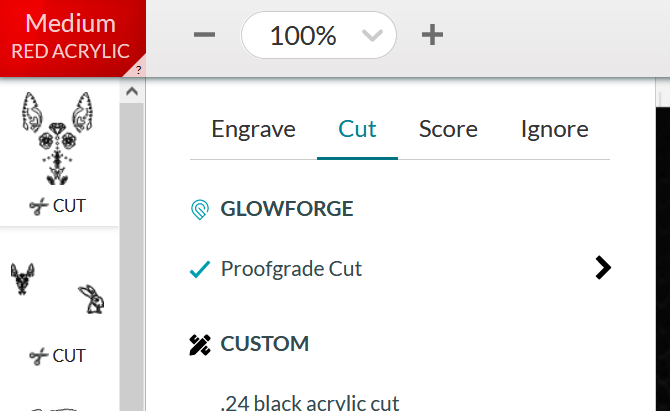
If you click the little arrow on the right side, it pops up the actual settings so you can see or change them.
When you do that, notice how the word “CUT” is gone and it’s been replaced by the actual setting numbers. That’s a clue that the PG setting may have been changed, so pay attention to it. I think a good way to learn about settings is to make a habit if checking the settings when using PG just so you get an idea about what works. So if you use PG medium acrylic, notice it’s 150/full and that gives you a very good starting point if you use some other brand of acrylic of the same thickness. And if you know medium PG acrylic cuts at 150/full and thick PG cuts at 115/full, you can make an educated guess if you use some other material that falls between those two thicknesses. (Hope that makes sense.)
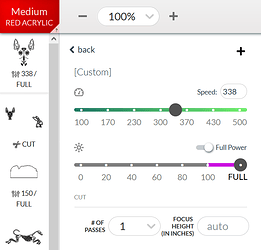
Here’s another example of what it looks like when I adjusted the setting. Notice how the speed is now different and it now says “custom” on the setting pop-out window.
Sorry, I was typing when you posted never mind.  Just double check your setting again because medium PG cut setting is 150, not 180.
How to begin testing the settings? I have some underlayment that won’t cut all the way.
Here are some very helpful tips. Pay special attention to number 6.
Search “test settings”. That should bring up some helpful info.
