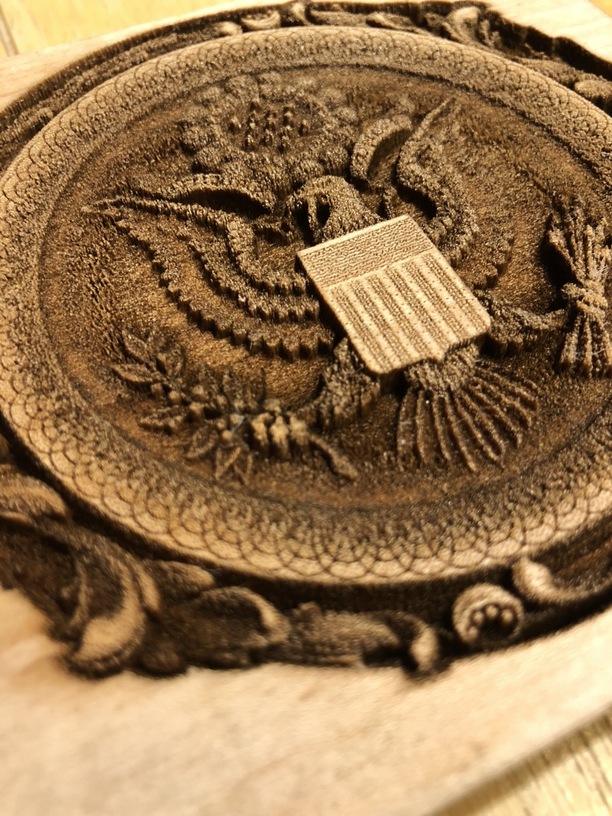
Part of the engraved flat background looks a little furry, so I assume I need to adjust my settings and try again. (or maybe do a 2nd pass). And I need to do a little more cleaning.
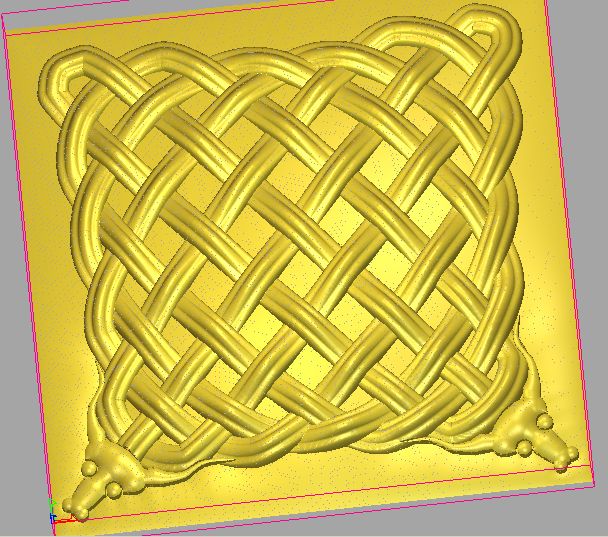
I purchased the depth map from http://www.gantryco.com. If you are thinking you might purchase more than two depth maps from them, look at their partner program. It costs about the same as two images, but once you are a partner, images are $39 each. (and yes, you can use these for paid projects).
It may seem pricey, but it’s cheap compared to the amount of time I’d spend trying to create this on my own. (I actually have a paid project for this and two other pieces of their art, so in the long run I’m saving money in design time).
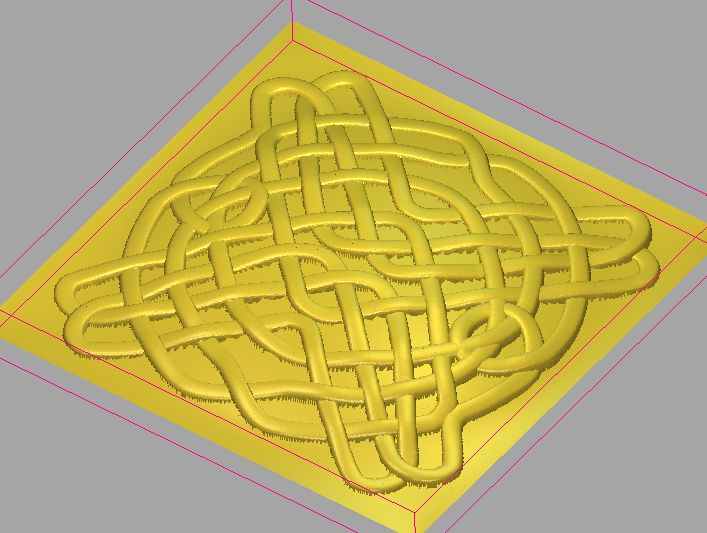
Artcam has a means of working that will turn out such grayscale works in high detail (and an app that automatically creates knotwork using math to figure out what ends up going over what, and then does it.) but it is very expensive as well. Those prices and a bit of effort would pay the way for that software.
I looked at Artcam. At $50/month for the software plus my time to find the art and make the depth maps, that site’s art is still cheaper. On their partner plan, images are $35 each. Their partner plan has already paid for itself since I purchased the 4 images that I can use on this paid project.
I understand completely where you are coming from. My time is stretched pretty thin these days, so anything to save time helps. I’ll probably get ArtCam down the road when I have a custom project that requires it.
If you reversed the grayscale so everything up went down making a negative and filled it with ginger snap dough then hard cook it you would have a high detail coaster that when you finished the drink you could eat the Coaster!
Very nice!
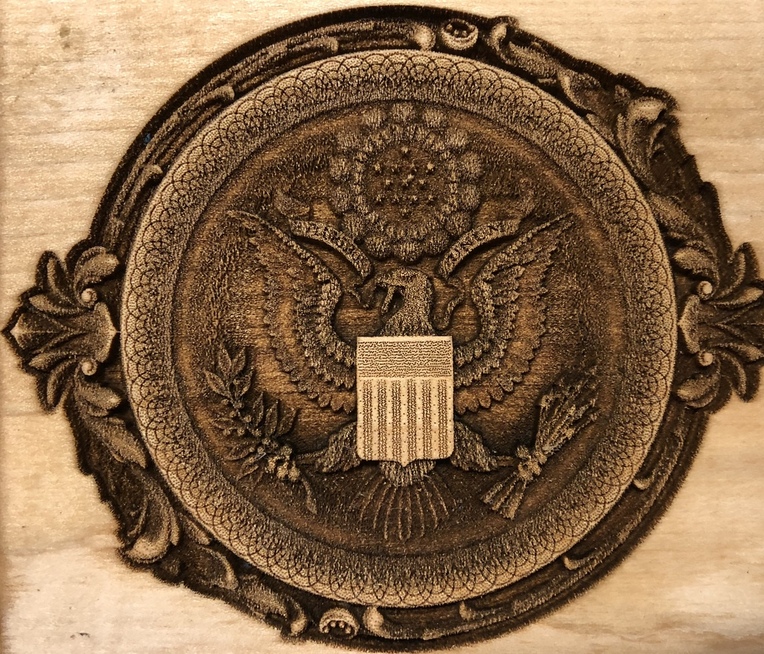
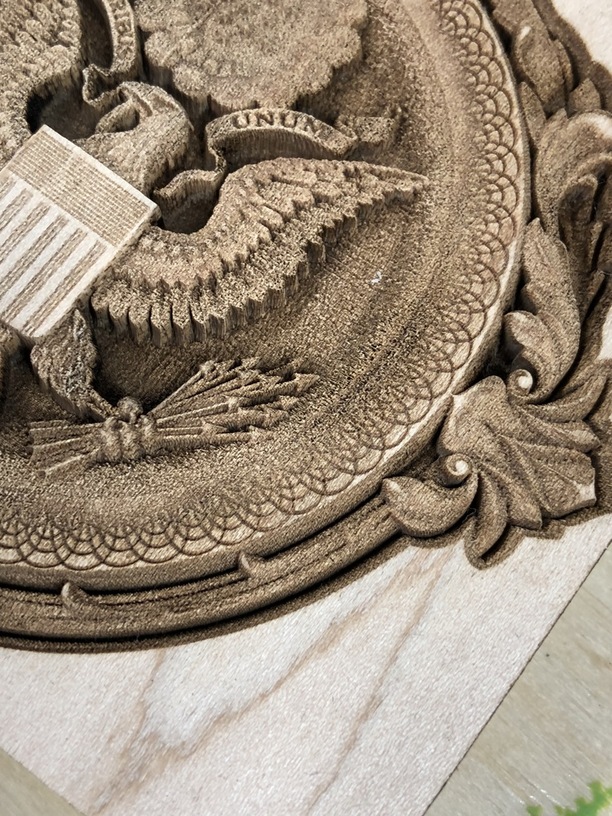
I don’t remember it all, but a lot of symbolism in the Great Seal. E pluribus unum referring to the original colonies that established themselves depicted by 13 stripes on the shield and the Stars appearing out of a cloud above the Eagles head.
The eagle is free-standing signifying no need of support. The arrows signifying the ability to defend itself, but with the Eagles head turned toward the olive branch signifying a preference for peace.
Great subject for a 3 D engraving.
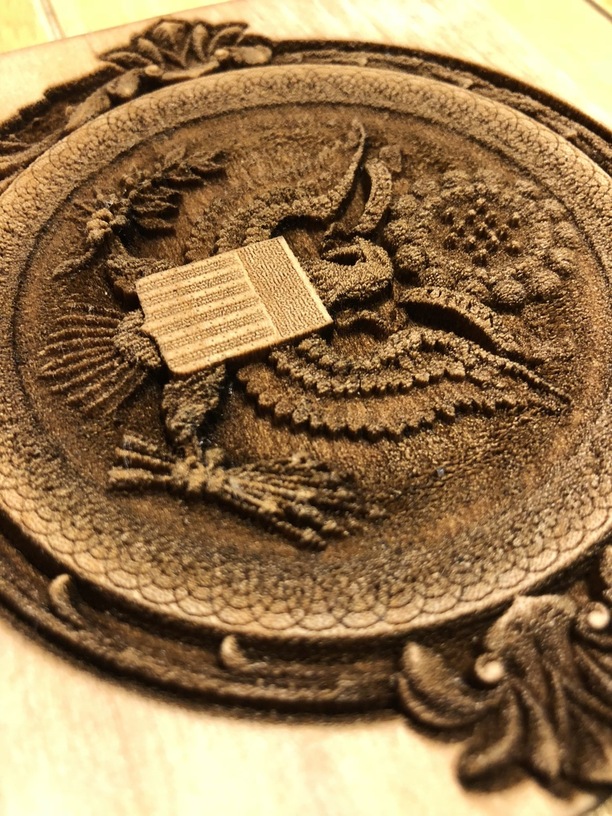
I flipped the board so the grain is vertical like you suggested, but in doing so, I saw that the art had reverted back to “convert to dots,” instead of “vary power.”
I know I selected “vary power” setting several times, because every other setting I changed caused this to revert back to “convert to dots.” So I must have missed the last time this setting reverted. These new photos are of the art at the same size with the vary power setting.
Detail on eagle and outer scroll is a lot cleaner, but detail is lost on the looping artwork on the edge of the seal as well as the star field. And the fuzzies on the background near the eagle are gone.
The vertical line in the artwork is a flaw/split in the woodgrain.
I want to make sure I start with that looks AMAZING.
But also, to continue the discussion of how to create depth maps, if you have a 3d model to work with, Blender (which is free) can turn it into a greyscale bitmap.
Obviously not a catchall, but a possibility for a partial solution. Opens up the library to everything on Thingiverse, which is free.
Getting the grayscale from a random model is a bit more complicated though there are phone apps that will build the 3D from enough photographs, and then you might be able to build a relief from that.
Which reminds me to ask if the GFUI can do anything with .stl files?
It’s supposed to be for converting topography maps, but someone in another forum said they used it for converting any STL to a greyscale depth map. I couldn’t get it to process any of the STLs I tried but it might be user error (First time using Blender) or my version of Blender being is too new and breaks the template.