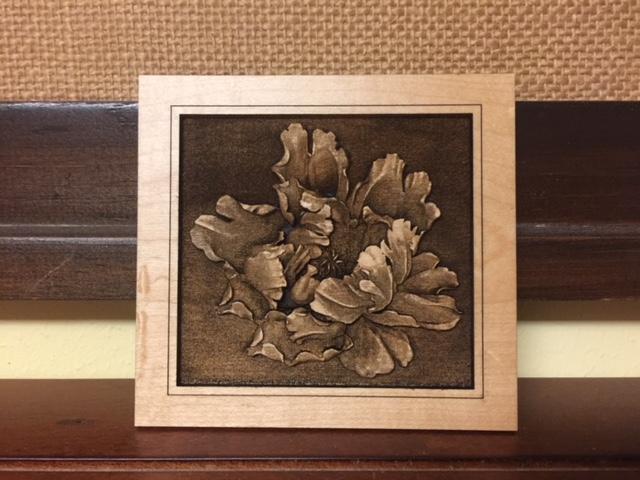
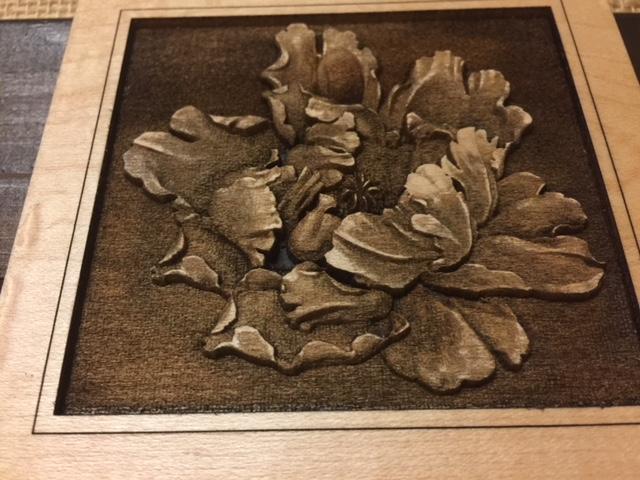
Well, it turns out you can get some very nice effects with 3D engraving using the Snapmarks…this little tile on Proofgrade hardwood maple looked a lot better with additional passes to sculpt the shape down. It was a lot less blocky looking.
It’s a flower. (And it looks better IRL, you can see the shadows.)
Unfortunately I burned through the Medium maple in a spot or two, so quarter inch material would be nice to get my hands on - I’ll have to try to find a supply online. (And re-run this one after making some adjustments to the files.)
Just trying to get this straight… did you just have the snapmarks on the wood and not the image? Did you just keep replacing the file and using the printed snapmarks alone on the wood? This never occurred to me.
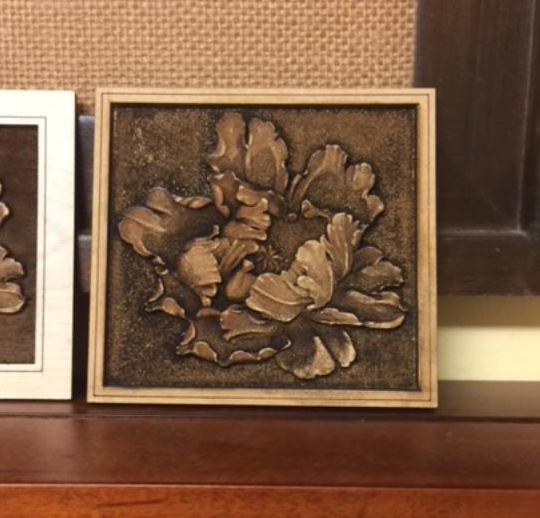
That is a gorgeous carving! I wanna run my hands all over it!
But I still don’t get why Snapmarks helped. I mean you could just layer all the needed images in the original file. Unless you are taking the tile out between passes to do something to it. Or is it that each raster image is so detailed that it needs to be in a separate file to render, is that it?
Awesome. Home depot and menards both sell maple 1 by boards which are 0.75" thick. Easily cut into squares. Sold by the foot. From 3.5" wide to 5.5" wide.
I would think that you’re right. My guess is the “didn’t feel like watching it all day” part, but one could always set the other parts to ignore each time. …but @Jules is a master sensei so…
Chuckle! I forget that other people are probably a lot more organized than I am…the additions came after the first pass, because I thought I could sculpt it a little more…
If I had known what the effect was going to be, I could have definitely set each one up in advance. But the way I test things to find out what works and what doesn’t is…I’ll try a base cut. Then I might think…“I wonder what would happen if I just darkened this part here, and not that one, because it’s deep enough?”… followed by " Okay, that worked, now I wonder how it would look if I did this?"…
So the whole design is adjusted on the fly and tweaked…it actually took a couple of days to figure out what was going on. (And it was my first real shot at adjusting an existing 3D file, so I was just fiddling around and having fun doing it.)
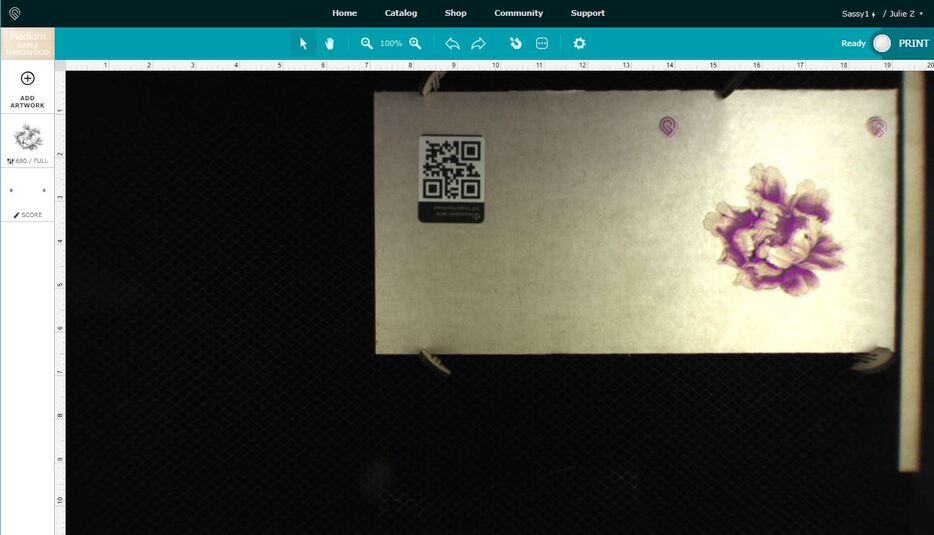
But anyway, I really liked the effects I was getting, and I learned a lot of tricks to improve on the 3D engraving process. I did think to put the snapmarks on the base file, so that made it very easy to make additional files to tweak it, and change the size of the cut around the flower when I decided I wanted more border at the very end.
(It also saved a ton of material, I didn’t have to re-run a different file every time I wanted to test something out…I was able to make the change to the original.)
This is one of the interim steps that I happened to snag a screen shot of:
Soon as I finish figuring them out…this is my first 3D file, aside from the awful ones I tested when the PRU was young. It’s more Photoshop work than Illustrator though.
I’m damned near hooked …the results are a lot more stunning than I expected. I need to get some thicker hardwood blanks
This could be accomplished using multiple layers without the use of snapmarks.
This is what make snapmarks cool though.
I’m wondering however, with the loss of the tiny bit of accuracy that happens when using snapmarks if it actually would help 3d engraves a bit instead of having the slight imperfections multiplied by exact multiple passes…
So while I think using multiple files and snapmarks here is extraneous, I think it could have benefits as well… definitely worth experimenting with
I’m going to be making more 3D engraved puzzles that are then painted. But, I’ll be sending the puzzles to an artist that I teamed up with. My plan is to score in Snapmarks on the project, so I can just pop it back in the machine, snap, and cut whenever it comes back to me.
Interesting thought about the potential offset. I could see how that could possibly improve the final engrave. Everyone gets so hung up on absolute 0.00 precision, but in the art realm, you often don’t want that level of precision.
That said, my Snapmarks seem to be the same over and over - very slightly off of the Snapmark if I rescore the Marks, but it does it the same every time.
One could also add multiple layers to the 3D engrave to simulate/test this. I wonder what the best way would be? I’m thinking you’d want to scale the file by a very small amount (say, just upscale a pixel or two). That would it would be more uniform (up, down, left, right) than just offsetting the design.
Yeah first thing I want to try it just a single image with snapmarks, resnaoping between engraves. Then if necessary, maybe multiple layers. I’m not sure if any effect that could be achieved by using multiple layers over a single one other than a flat black cleaning layer though.
You might find you’ll get less charring with faster multiple passes, and it’s easier to brush away the residue between passes with a soft toothbrush. Gives a more even engrave particularly on the front where the buildup tends to happen from the air assist.
It might not be feasible for commercial work that you plan to sell, but for something really special, I definitely like the results. I plan to do some more experimenting with it.
yeah thats definitely something to take into account, however when using hardwoods I dont run into that as much. the plys however, definitely its more an of an issue. I usually tend to go with hardwoods or acrylics for 3d engraves these days.
hows the overall engrave time though? faster passes = less depth = more passes. have you found cleaner results in the same amount of time with the engraving going to the same depth?
This method definitely takes more time. (It’s slow cooking rather than microwave.)
(Oh, and just in case it’s confusing above - none of the files used was exactly the same as the others, so the blending happened very naturally…one picked up only the light tones, one had a full range of tones, and one had a mid-gray for burnoff…I was running out of thickness on the sheet.)
Buy a planer and you can plane your own maple boards down to 1/4". (And then you’ll maybe also want a bandsaw, so you can cut 3/4" maple in half first and then plane it.)