Nice find. One of my two printers is missing a single foot, so I’ve got a spare piece of PG draft board under it to balance it. I’ve been looking for replacement feet. This looks like a good option.
I also added a glass bed. I have been finally vindicated for hoarding old equipment. I had an old flatbed scanner that was the perfect size, I only had to cut one end. It was the first time I had done that, it was really simple.
1 Like
You can easily solve wobble by loosening the left and right bolts on the base then push down and tighten them back up. I had about 2mms of wobble out of the box and now it’s rock solid. There are 2 bolts on each side of the middle bar.
1 Like
Thank you, I’ll have to play with those. I haven’t upgraded to the micro Swiss hot-end, I upgraded both of my FlashForge hot-ends so am very familiar with the setup. I might change out the extruder for the heck of it, haven’t decided yet.
When I assembled the frame I measured the distance between the verticals from top to bottom. These should be the same distance to prevent binding and premature wear on the v-rollers. The bottom was almost exactly 25mms but the top was about 28mms. When I tried to mount the x-axis I had to do some bending and the x-axis did not move smoothly. Apparently, Creality has issues cutting that bar end square. If you are an enterprising individual you could spend an hour sanding it square or, as I did, shim the outside to straighten it up. My frame is now perfectly square.
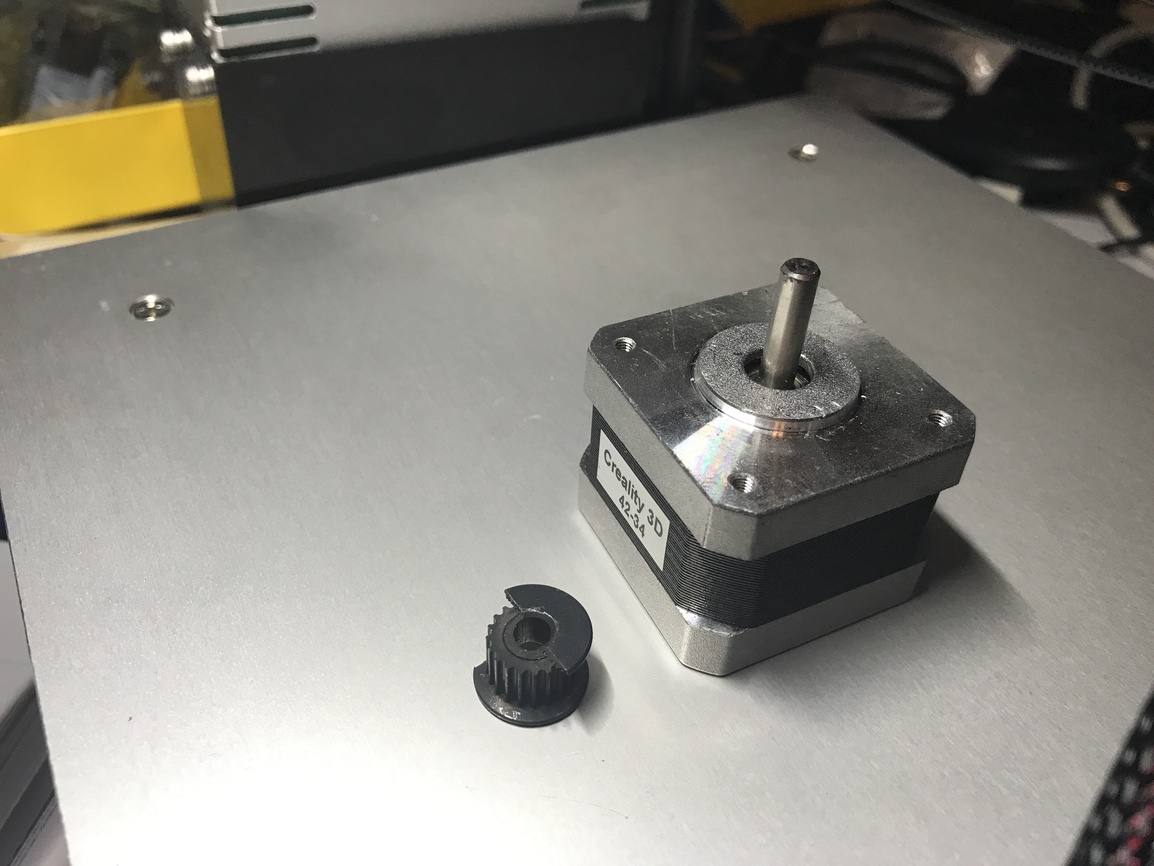
I decided to add the options that arrived yesterday. There are 2 issues I immediately encountered on this latest version of the Ender 3. First, the new bed frame isn’t dampener compatible on the x-axis, so out came the Dremel to notch the aluminum (bye, bye warranty) so the x-axis can zero (there are limit switch mounts on thingiverse to fix this but I don’t want to lose print volume which is the primary reason I bought it). Next, the y axis pulley on my printer is press fit and I don’t have a mini wheel puller, going to grab a faucet handle puller from Lowes tomorrow, I’ll let you know if it works. My new printer is sitting on my workbench in pieces and not printing… The LEDs and feeder will get finished tomorrow as well. I’ll take some pics so you can see what I end up with.
Since I use v-slot on my CNCs, I now have a setup that allows me to sand those in seconds on my table saw—I use a calibration disc with sandpaper adhered to it, and can square up the ends and make sure that multiple pieces are the same length. Before I had that setup, squaring up pieces was a pain.
But it this case it’s the verticals that need to be square. The top bar needs to have the holes properly spaced; I’ve seen a few people have needed to increase the size of two of those holes slightly because of improper spacing. I’m not completely sure if that’s the problem you’re having or if I’m misunderstanding.
I haven’t put dampeners on mine yet; they’re sitting in a box waiting. I guess I’ll have to deal with similar decisions over the next few days when I get home tomorrow.
The faucet handle puller mostly worked, I was able to remove the pulley but it’s very brittle. I’m rather disappointed that they made some great design changes and then skimped on the x-axis pulley.
This is what I ended up with:
Without a local resource I have to wait until Saturday for a replacement. The y-axis has grub screws as does the extruder.
I’ve been extremely busy at work lately, and have been limited in my participation here, and have had no time to enjoy my GF. Since this thread will automatically close soon, and I haven’t provided some of the information that I had said that I would, I am going to try to start posting to a new blog, to help me keep my projects documented–which is something I’ve always been bad about.
There’s nothing here other than a list of modifications that I have made to my Ender 3(s) so far. If anyone is interested, it will be located here: https://hobbyistmaker.com
4 Likes
Bought an Ender 3. Loved it so much I just bought another one. There are dozens of mods out there.
I’ve printed a few of the printable mods and just got the glass plate for the bed.
3D printing, if you haven’t tried it, folks, is SLOW. Makes your Glowforge doing a big engrave look like lightning in comparison.
One more bit of advice - if you want to dip your toe into the 3Dprinting pool, I recommend the Flashforge ‘Finder’. I have one of those. They hide a lot of the ‘behind the scenes’ adjustment of hardware and software, and you can reasonably expect to start getting a decent print an hour after you open the box.
I got cocky with the first pumpkin and ran it with no supports. That didn’t go well. Otherwise, it’s been fun. Slow, but fun!

Also just realized that the fish is upside-down. Oh, well.
5 Likes
I haven’t printed anything fun yet. I’ve been printing mods for both of the Ender 3s that I’ve setup so far, and using those prints to help me tune in my profiles. My son is anxious for me to start printing things for him to play with.
1 Like
I have no idea in the world how anybody would know that ![]()
2 Likes
Yeah, that sounded absurd without clarification.  I was trying to show the quality of the prints, but the bottom of the fish is covered in strings where the top is all clean with extra detail.
1 Like
Print the fish and the snake. @geek2nurse was right… MAGIC. My kids keep trying to steal them.
1 Like
One of the first things I printed, after mods, was an ocarina for my niece. She loved it.
3 Likes
I’m not sure I want to give him anything to make yet more noise. How can an “almost 8 year old” make so much noise? (We’re not allowed to say that he’s 7 anymore; he’s very emphatically “almost 8.”)
4 Likes
That’s the advantage of being an uncle. Give em the gift and scoot!
5 Likes
Yeah, I was wondering how your brother/sister felt about it!
My BIL once gave my kids train whistles. On vacation. With a long car ride home. His kids are older, so my revenge may take awhile, but it will come…
5 Likes
I received a new GT2 pulley from Amazon and got it installed.
Having purchased the 3 pack of vibration dampers I thought I’d throw one on the extruder but after many frustrating hours trying to get good prints I yanked it. I couldn’t get solid prints, they’d crumble when I pulled them off the bed. So pulled the damper, I then had to up the extrusion amount, for some reason the factory settings are almost 5% low (pushing 95mm of filament but turning 100mm). I upped the extrusion EEPROM setting to 95.1 from 93 and now getting consistent 1:1 filament output, this was after aluminum extruder upgrade along with the included gear, not sure if it’s slightly smaller than factory or not I didn’t measure it. Having the damper attached didn’t provide stable pressure on the filament, you could see the shaft move when releasing the arm. It IS a bit louder but still quieter than all the fans.
I’ve got the EZABL mini coming which will require flashing a bootloader so I’ll look at making the EEPROM setting permanent and not having to add it to the start script in S3D.
What speeds have been successful with this thing? I’ve gotten great .2mm prints at 60mm/s which is slower than my FFCP with dual heads. I’m guessing moving the bed isn’t quite as stable as X/Y head movement so I’m a little disappointed in the speed so far. Anyone try cranking it up to 80mm/s? Bowden seems a little quirky, 4mm extraction is quite a bit slower than 1mm too. I guess one has to pay for speed in the FDM world.
I had to up one of mine from 93 to 95.8 and the other all the way to 104; for some reason the gear on that one is slightly smaller.
I could have sworn that I was able to save the EEPROM setting before flashing the firmware. I’ll need to get my third E3 setup to test before I flash that one.
Hmm. Looks like this thread didn’t get reset (still set to close in a few days), but the other one did. Anyone else want to post in support and revive my thread about this? 
2 Likes