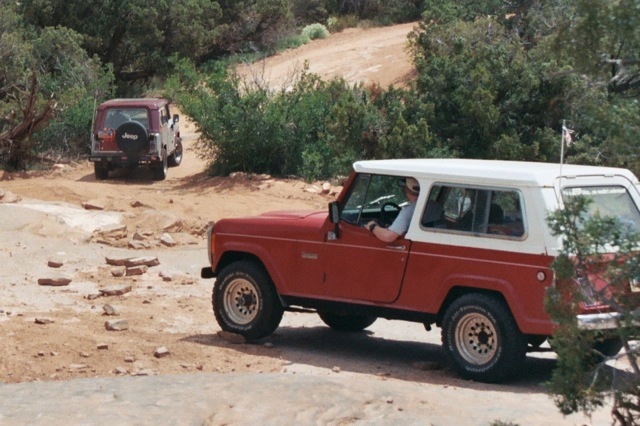
Old Jeepster Commandos from the 50’s and 60’s go into the Jeepster clubs; but by the late 60’s they dropped Jeepster from the name. After American Motors bought Jeep, the Commando line of 1971 and 1972 started to seem like it was assembled with spare parts.
Even so, for a couple decades before Jeep came out with 4-door wranglers, Commandos were sought by off-road enthusiasts because the longer wheelbase was more stable than the CJ-5 that was Jeep’s staple for years.
My dad and two of my brothers own 71 and 72 commandos. The one I plan to inherit isn’t pictured. They are money pits, but they are fun.
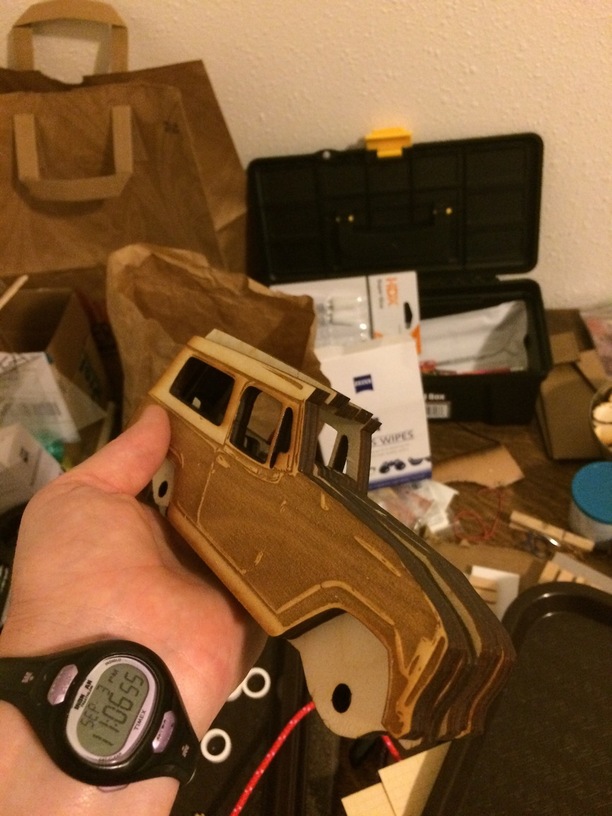
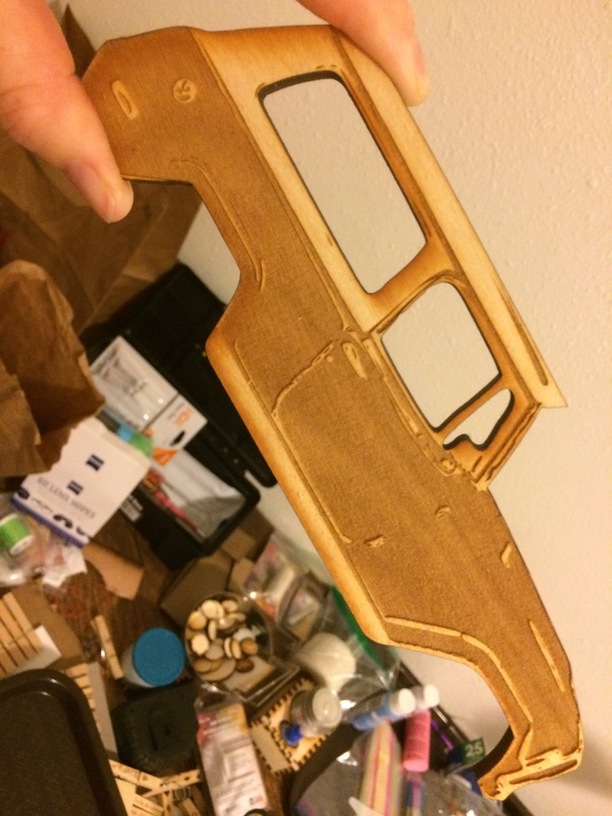
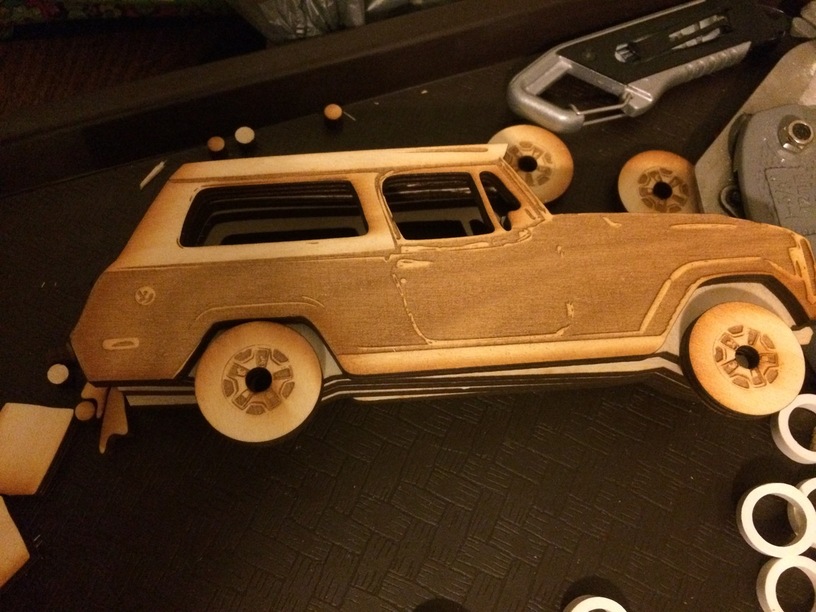
So, in an effort to develop some inkscape skills, I give you my 72 Commando.
Me either. I will make four as soon as the glowforge arrives.
I have the time… I may even get more complex and make the top removable - as it is on the Jeeps. My dad had a convertible soft top made for his, so his would be more true without the top.
I would undoubtedly learn more with that additional layer of complexity - And cut the top from a different material for different color.
OK, final assembly was probably in Toledo, OH, but I’m from AMC’s hometown in Kenosha, WI. My Dad could have easily had a part in assembling the engine for the Commandos. Go Jeep, I have a Cherokee now. Can’t wait to see the upcoming Wagoneer. I hope it has a woodgrain option.
I had a '69 jeepster commando for about 10 years. It had been sitting for four or five years after I got married and had kids. I finally sold it to help pay for a glowforge pro unit!
This could be a time to experiment with orthagonal construction. Most of the insides are uniform, so doing the proper scaling for along-axle dimensions would need a TON of layers.
But if you treat it like a staircase, with one solid layer on each outer edge, and only the minimum needed for support in between, then lay inner detail wood cross-wise (one piece for the bucket seat back, another for the seat itself, or maybe even a living hinge so it is one piece for the full seat)…
Features to make inside would be two sets of bench seats, a dashboard, and a floorboard. So 14 relatively small cuts for the cross pieces, two larger cuts for the walls, and maybe one midline support piece?
This also would open up the ability to use acrylic for windshields.
Oh, I forgot you would need to do the back hatch, hood, and grill. So about 19 cross pieces. That is a lot of gluing, but possibly less total wood (and thus weight) than pure layers.