I’ve been lurking on these forums since they existed, and was so excited to finally get my glow forge the week before Christmas.
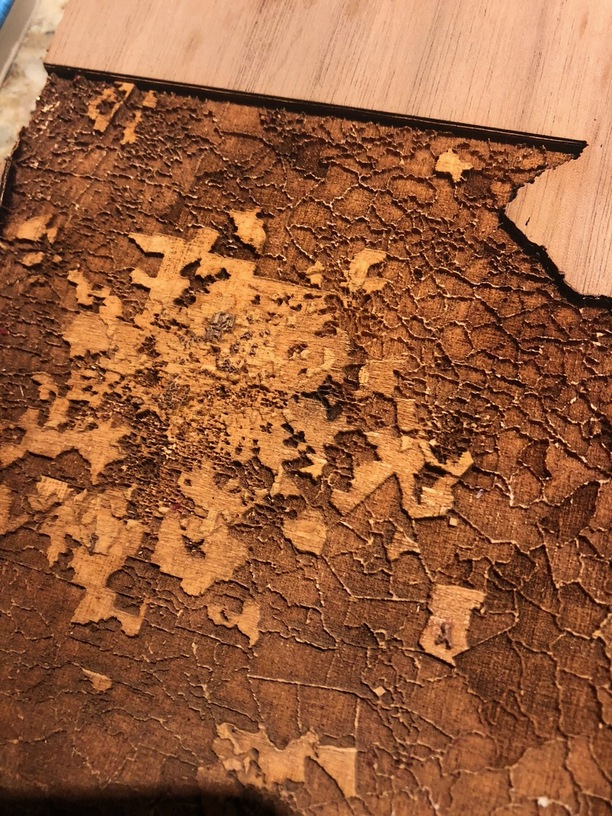
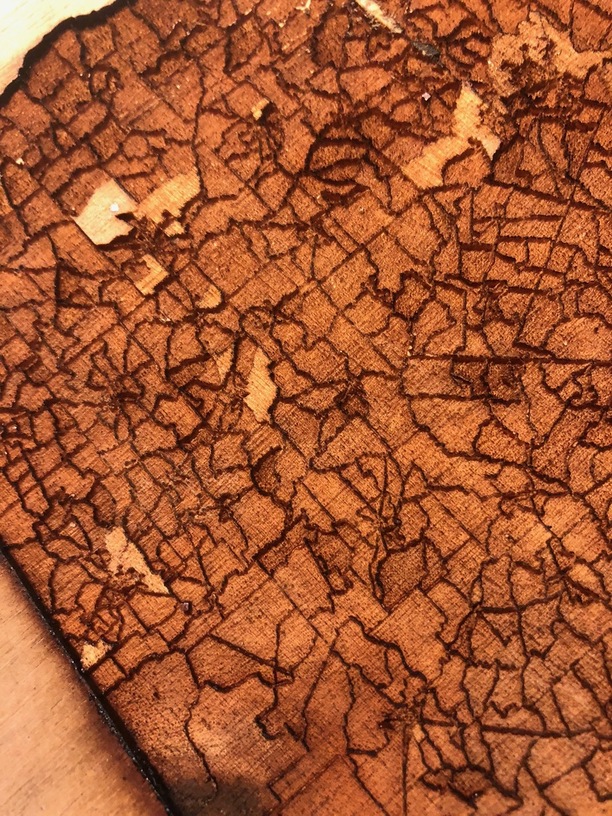
In a prior life, I worked helping the Federal government unlock lots of data from inside government, and making it accessible to developers. For my first project, I decided I’d make use of some of this newfangled data: in particular the Census’ American Community Survey Household Income Data by census tract. I’m no SVG or height map drawing expert, but fortunately ARCGIS lets you create maps or use pre-existing data on top of maps. Since the ACS data was already up and open on ARCGIS, this meant finding the area that I’d like to make a topology of (in this case, Georgia), taking a large screenshot of the area, cleaning up the map (namely, removing the other states), converting it to grayscale, and loading it into GFUI. The deeper the engrave, the lower the income is of the census tract.
I learned a few lessons here that may seem obvious, but I’m ashamed to admit that my house is covered in what looks to be burnt toast shaped maps of Georgia that I’d like to reiterate a few things to those that may be completely new to this and not know better:
- Different woods burn differently. The power settings for baltic birch plywood will not translate over to your walnut plywood.
- Cheap Plywood kinda sucks for 3d engraving. Expensive plywood is a bit better but still not ideal.
- Proofgrade materials for this kind of engraving aren’t necessarily ideal either – you really want to be able to custom finish these things to bring the colors out in the right way. They’re also very thin, so if you want deeper engraves, you need something thicker.
- Don’t be afraid to fail. Putting stuff in your glowforge and having it not work out is part of the fun. The more you screw up, the better you’ll be at this stuff. While I’m sharing some photos that look decent, there are about a dozen carves of this map that look terrible.
This is a half inch of walnut plywood. I found the best carves came out with 3 passes at full power and 750 speed with a “vary power” engrave. They were cleaned, afterwards, by just taking some denatured alcohol and pouring it on the map. The dirt came right off, and it looks great – except for this damn line that comes up right in the middle of the map. Strangely it is only doing it on my Walnut ply from inventables, and only at full power, so I suspect it has something to do with the wood itself. If anybody has any other ideas as to why this might be occurring please let me know. And any tips on how I could make this even better would be welcome and appreciated!
Thanks to this forum for all the advice I’ve been soaking up for the past 2 years!