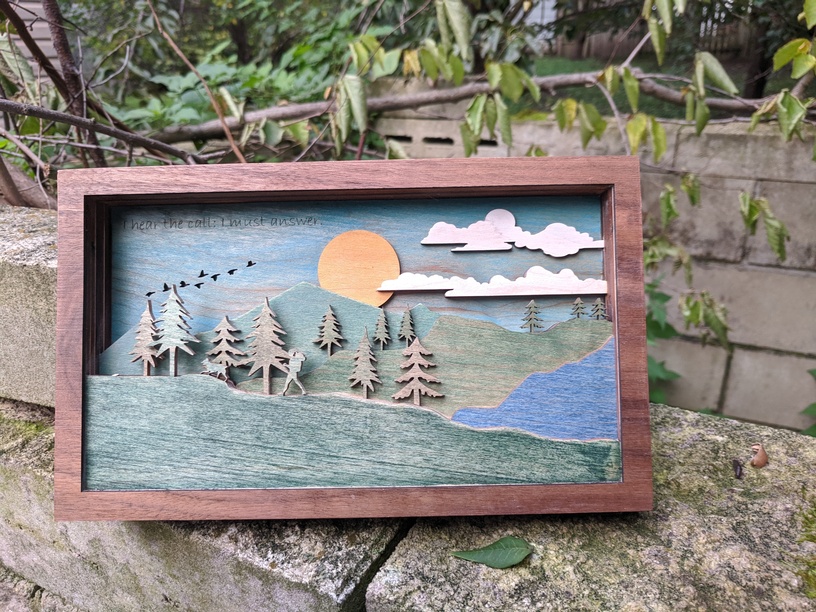
Inspired by this fantastic creation:
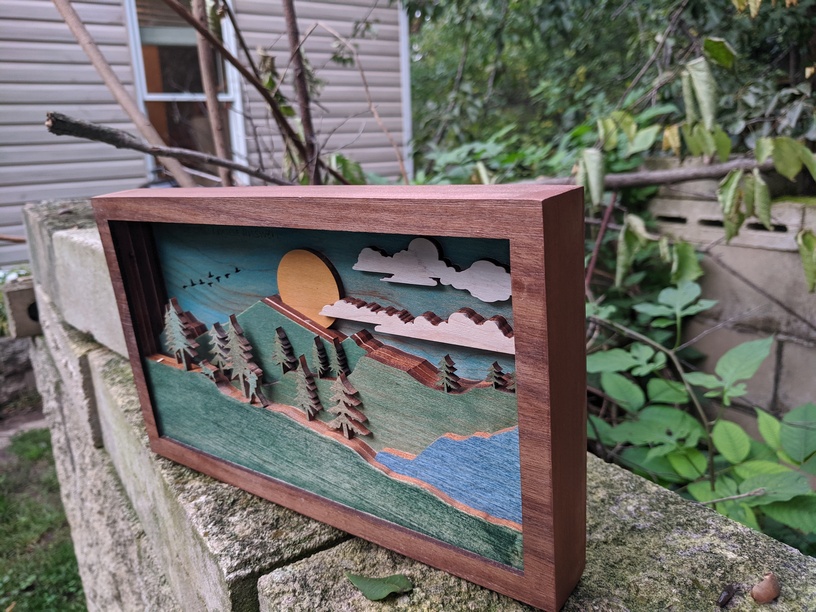
I thought how hard could that be? I found some vector trees, a hiker, clouds and a dog and using my own skills for hills and the sun, I had nine layers all laid out in Inkscape in less than 2 hours. I could have read up on shadowbox techniques from other forums dedicated to the art, but why learn from others mistakes when you can experience them first hand?
The inner seven layers are all 1/8" maple hardwood sanded to 320 grit on the presentation side. I then had to figure out how to add color. My plan was markers:

While they look fine on small pieces, when scaled up to cover larger areas they don’t look that great. At least not how I did them. I even went to the hassle of numbering each one with tape and then documenting their color and some blendings I tried. The most important thing to note here is that the negative space cut out of the maple boards is not scrap, it is practice coloring material! And when you break a tree off of one of the positive space pieces you’ve hit the coloring-material jackpot ![]() .
.
So what, besides stains, will color wood and let the grain show through? It took some thinking, but finally watercolors! Naturally, I went to the art store first and watched YouTube second, but it seems I bought okay water colors. Some more experimenting and while not particularly happy I decided okay for a first try. One thing to note: raising the grain was a concern, but not so much on a piece where I want grain under color - plus sanding the water color after it has dried on the wood lightens it. You may need that tip.
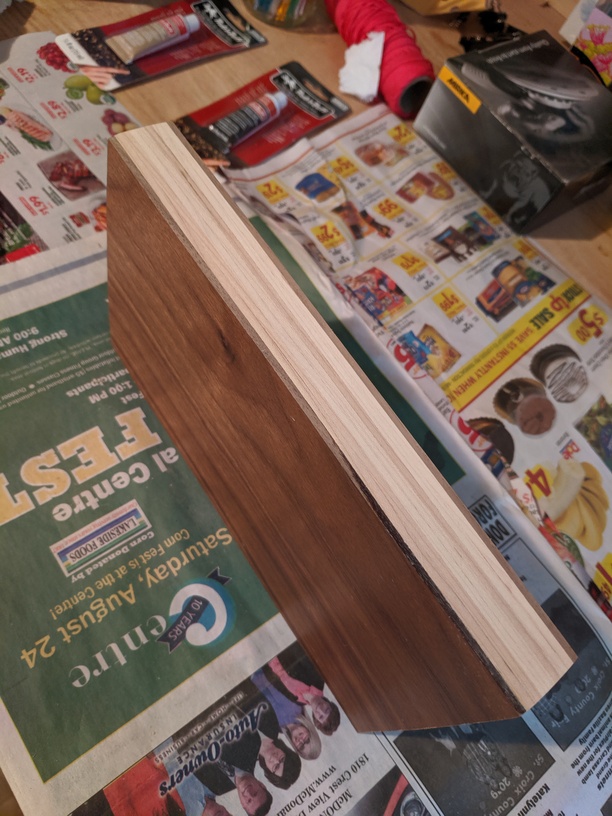
So the edges. I’d tried proofgrade veneer before, but it is some thick stuff. That’s not bad, but it is not good for edge banding. I didn’t have time to learn edge banding, so I went with something I’d read about on the forum: Rub’n’Buff. I’ve done several stacking projects and know to use alignment pegs (see the six rectangles cut in the big piece in the phote above - you can see five, the sixth is under the piece with all the blue.) In my limited experience your stacked edges are never going to be seamless and perfectly smooth no matter how tight your alignment pegs. Laser cut edges are not perfectly perpendicular to the surface of your material, it’s all about the shape of the beam. So I make mine a little loose. The point is to keep the material from going horribly awry when clamped. Loose works and tight just means you could wind up having to sand down the face of some pegs - not worth it. The front piece and back piece are 1/8" black walnut hardwood sanded to 320. The front piece has six rectangles, engraved halfway through the wood, for the six alignment pegs. Before I did the front piece I remembered to flip it in Inkscape in case the holes weren’t perfectly symmetrical. It turns out that when I designed this last July I had already done that and the top and bottom peg divots were not symmetrical - because double flip. Luckily the two side holes were symmetrical and it turns out I made far more alignment holes than necessary. So lessons learned: If you only cut some pieces right away and wait weeks to cut others, make a note if any have been flipped. The other lesson is you don’t need that many alignment holes for stacked projects.
Enough tangents, I sanded down the outside edges and watched one YouTube video on applying Rub’n’Buff:
Learned from the video: squeeze out a little Rub’n’Buff (autumn gold in this case) onto a palette.
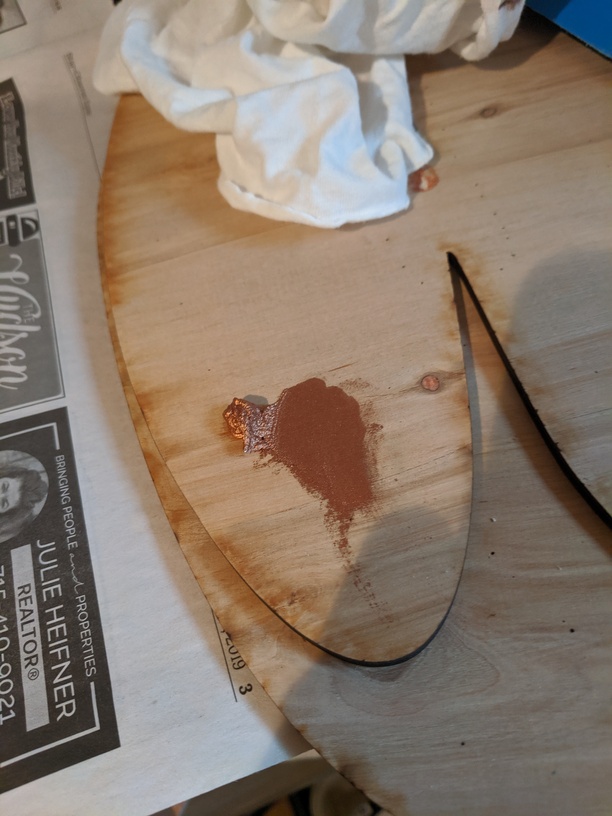
A little goes a long way, so don’t squeeze it directly on your cloth, finger or material. And the final result:
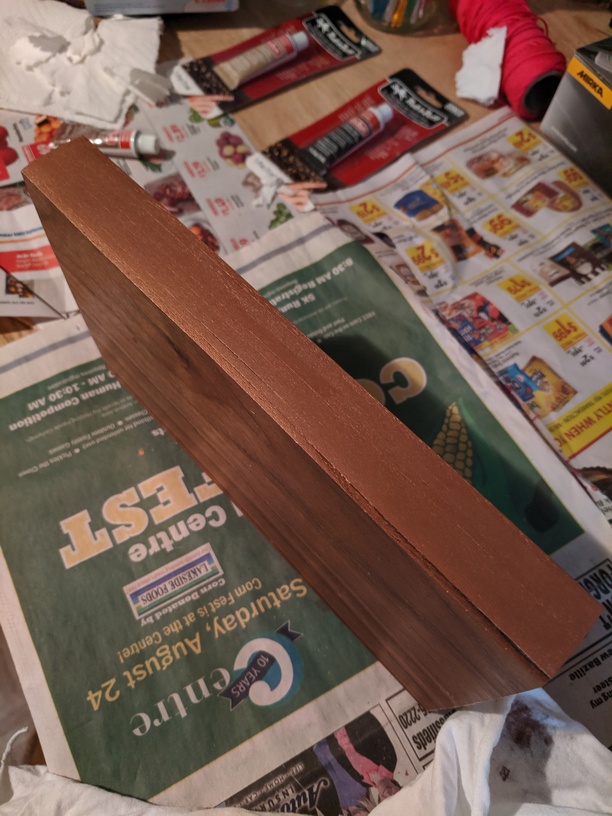
Just like with paint, if your edges have the slightest gaps between boards it will show up. Rub’n’Buff is not a filler, it is a wax/paint. Also, the back board could have been sanded more flush - it was the one board without any alignment holes/divots. I tried to use bar clamps to make the back flush, but as I should have learned from all my past attempts, not the greatest solution.
And a better shot of the front, to show how much I stole from @j.w.helle.