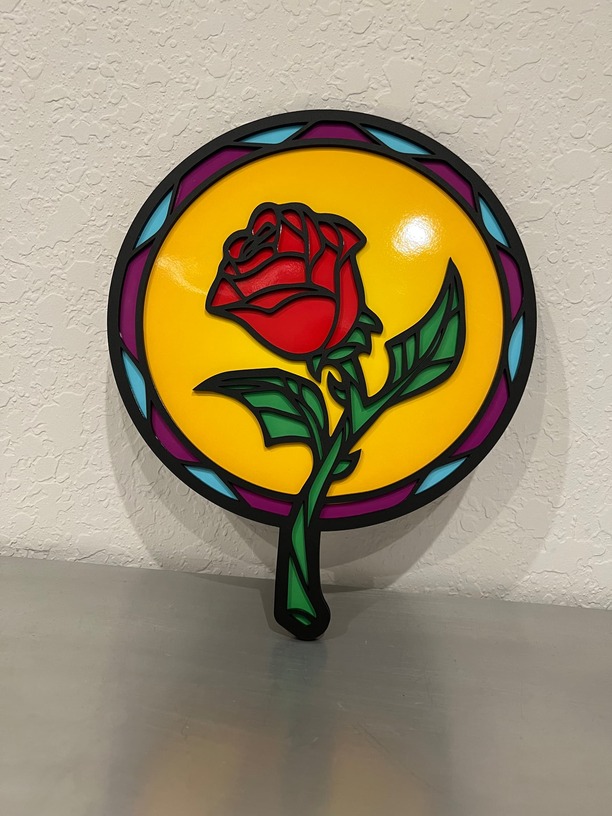
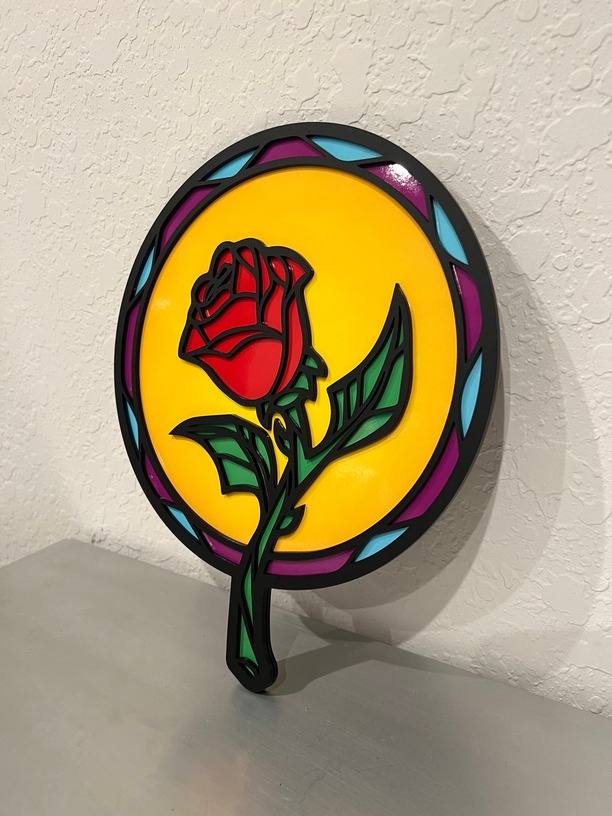
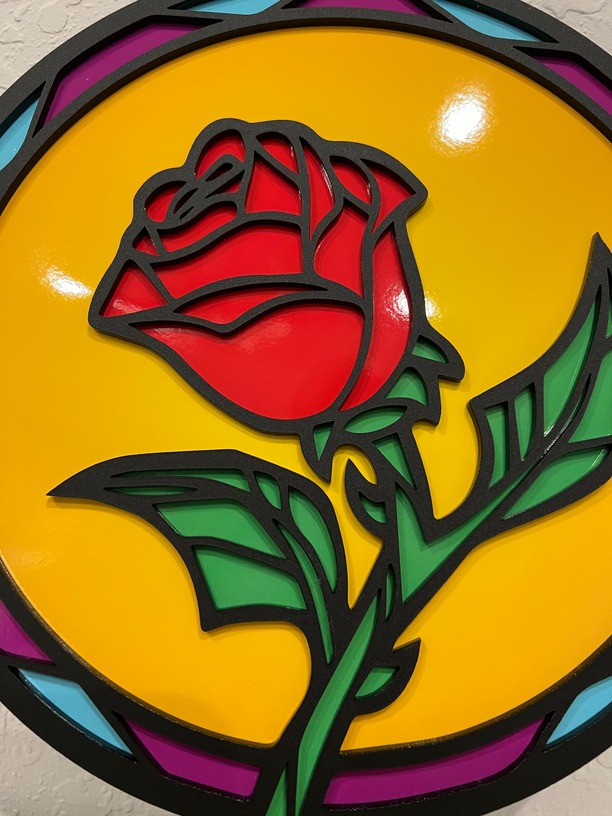
Came up with a few designs using layered acrylic but ultimately i chose to go with just two layers of acrylic with a printed layer of color sandwiched in between. This is from Beauty and the Beast.
I used some cast matte black acrylic which I think might be my favorite, way less prints than gloss.
This piece is about 10 inches in diameter.
I posted earlier about adhesive techniques I’m trying to sort out for intricate work. I’m really not having luck with anything Weld-On when it comes to perfection. I’m about to try the micro dots and see how that goes on something else but I know someone out there has some killer technique I’ve not heard of.
Thank you! It took a surprising amount of time to get everything just the way I wanted it. The art was inspired but something widely available, but I made it vector, cleaned a ton, widened and thinned various areas to give it an even look. I chose colors I thought I would pop but still give a stained-glass look.
I use 3M. I apply it to the back of my material before cuts, then just peel and stick. If it’s not clear acrylic, then you won’t have issues seeing it.
Get yourself a tube of model makers poly cement - the ones with the very fine metal needle for application. Very precise, very good bond.
Or, as suggested elsewhere, the 3M 486 is great too, but to my mind more fiddly for the kind of work you are doing. I use the tape for fixing letters to signs and it is great for that.
When you say you went with “a printed layer of color,” do you mean printed on paper? Just trying to understand. It looks so bright and clean. I love the black.
“Came up with a few designs using layered acrylic but ultimately i chose to go with just two layers of acrylic with a printed layer of color sandwiched in between.”
Can you elaborate? For some reason, I can’t visualize what you’re describing. Also, which supplier did you use for the matte black cast acrylic?
Yes! It’s printed paper. You can see in this image what I did is overlay the cutout on top of a completely solid piece the same outer shape, then cut polygons of color into it so that the seams will be hidden below the top layer. I went with this layout because the eventual goal is to cut these out of vinyl on the Cricut, apply them to the front surface of the back piece, then glue the two together. Vinyl would give this a whole range of textures I can’t achieve by printing, though I would loose the gradient yellow to orange background. I could see this done with some mirrored vinyl as well.
The hardest part for me is welding these two together. I like simple, repeatable processes. I’ve been toying with the idea of finding micro screws, maybe even something like a carriage bolt with a beautifully finished head and just use those with assembly. I’ve also thought of something that would be rather elegant but time-consuming…stitching. Cutting the holes with the GF and then stitching the panels together with leather.


 I love the black.