I happen to get some acrylic from work - it has plastic protective coating on it. Should I remove prior to laser cutting? Is it dangerous? I saw somewhere else on the forum that during engraves that it would melt.
Also, any suggested settings? 1/8" acrylic black, and other colors.
I’ve got a bunch of acrylic with this coating and I leave it on. I found it caught some flare up and made the final piece look better. That said, the acrylic I bought is specifically for lasering, so I’m not worried about it being dangerous.
If you’re cutting and are sure the coating is laser safe, leaving it on is probably the easiest. If you’re scoring and/or engraving, I’d recommend removing it. Otherwise it tends to melt into the engraves/score lines and is a #$%! to remove.
Since this is in BtM, I’ll just go ahead and say that I lie to my GF and tell it that I’m feeding it PG acrylic even when I’m not – they are an excellent starting place, and I haven’t found a single case where further tweaking improved the results. Caveat: I haven’t done anything fancier than simple cuts and a few engraves in acrylic, so YMMV.
I found a similar problem with some of the materials from Inventables. so I stripped off the plastic film and replaced it with transfer paper. Specifically, I use TransferRite 582U - you can find it on Amazon, although its kinda expensive:
It looks like the same paper used on Proofgrade materials, and lases very cleanly.
Has anyone used much of the inventables 2-color acrylic? They state settings like “…Engrave Settings: @ 40 power / 90 speed / 400 DPI Cut @ 30 power / 15 speed / 1000 hz.” Anyone know if those numbers correspond to percents? (what is “90 speed”. Just trying to find a good stating point to test… (how would you even set hz on the ?)
You can’t set the pulse frequency on the Glowforge unless you modify the firmware. It’s weird that they give power and speed like that without units since percent would vary quite a bit from laser to laser. Perhaps they are watts and in/min. You might have better luck starting with the proofgrade medium acrylic settings and adjust from there. The trick will be to get the engrave to burn away the front color reliably.
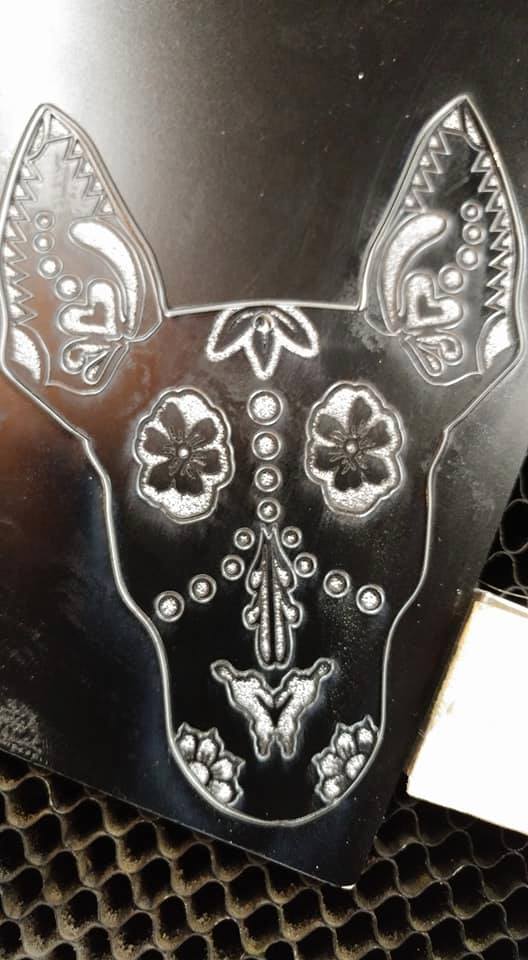
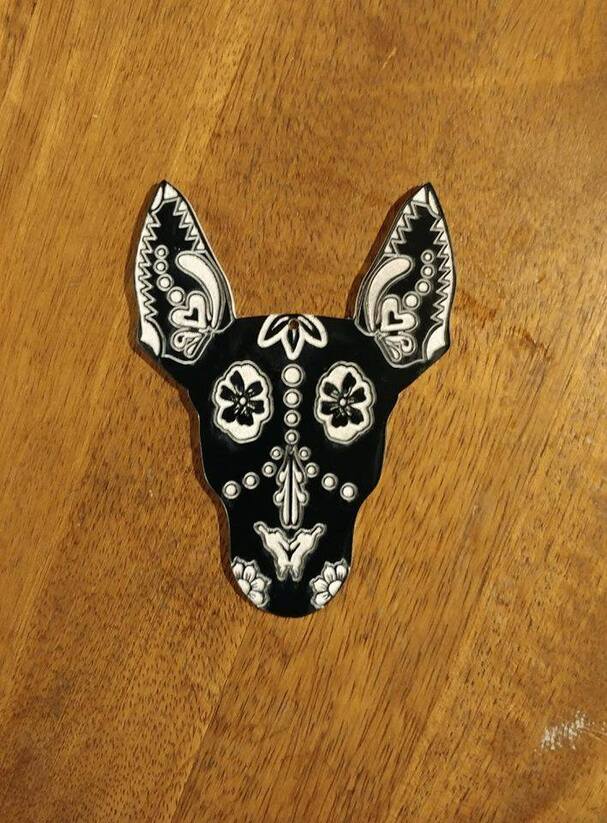
I had done a quick test a while back, but can’t swear it was from Inventables as I had some Rowmark stuff as well. I did a cut, score and engrave using the PF setting for black acrylic and only adjusted the height from .125 to the correct .13. The cut was fine. The score and engrave were just a hair shallow and left a thin bit of black here and there. Upping the power a bit would work fine I think. I did a second pass to get rid of all the black.
It had a plastic coating on both sides, which I removed and replaced with TransferRite 582U on both sides.
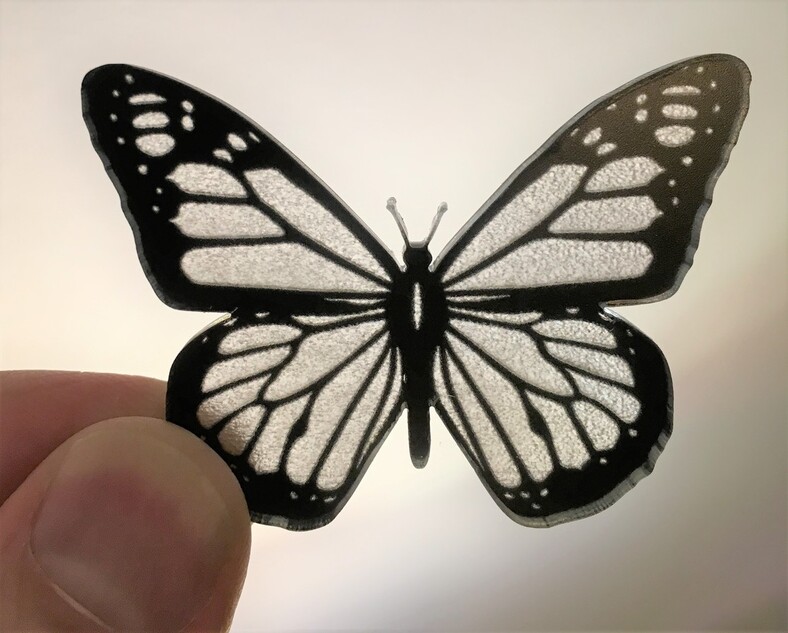
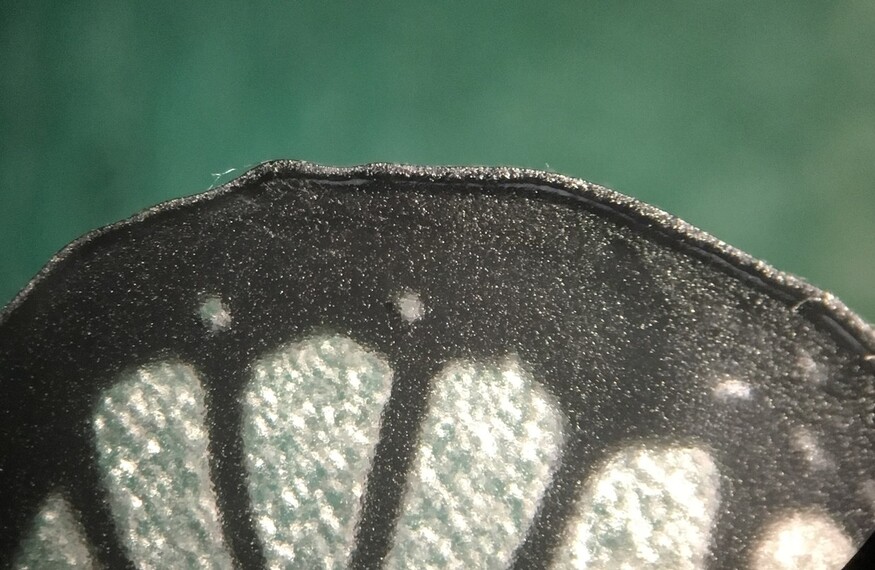
I used the standard Proofgrade “HD Graphic” engrave settings for the interior portions. Under other circumstances I would have defocused the beam to smooth the engraved surface, but in this case it adds a nice effect to the wing panels.
I used the standard Proofgrade “automagic” cut settings to singulate the piece. While it did the trick and the fiddly bits (antennae) survived the cutting process, there was a significant lip formed on the cut side opposite the laser (the bottom of the panel):
I tried doubling the movement speed and running two passes, thinking that might reduce the over-heating effect - it helped a bit, but the lip is still there. Still noodling on this one, and open to any suggestions for things to try.
i haven’t been able to experiment with acrylic in my laser yet, but here’s my advice based on previous Epilog experience.
engraving with masking is tricky, as it can get hard to remove after being lasered. like pulling off sticky lace, if you know what i mean.
however, if you want to keep the masking on for cuts, i suggest this:
use a low-level setting to cut through it initially. then, you can use higher-power passes when it hits the actual material.
if you use too much power right away, you will definitely get flareups. i’ve even experienced flames with some paper masking before.
as soon as i’m done with my project using paper, i’ll update with my experience, as i have a surplus of scrap plexi with all sorts of masking materials on them.
 ?)
?)