If you haven’t figured it out in a couple of hours, I’ll record a short video when I get to the laptop. Or text/screenshots - which is easier for you to follow?
I’m doing one now…if you’d rather handle it you have probably got the correct version of AI to help.
Either way. Like I said, I won’t be home for a couple of hours.
I’ll take a shot at it and I might not do the correct things. You can be on standby if it’s not the desired result. Between the two of us we should be able to get it 
Google is a great resource for any Illustrator questions you have, since it’s a general AI question and not specific to laser cutting. I’ve been using Illustrator for about 20 years now and I still google things on a regular basis!
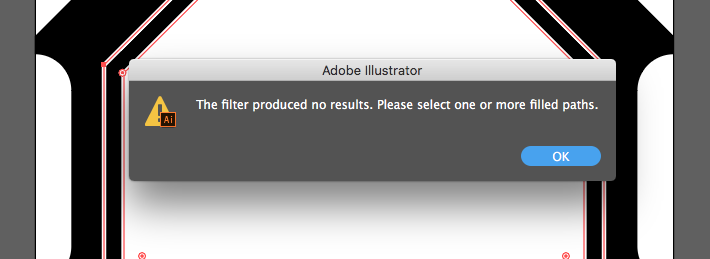
The doing it again idea was great. I was able to get the lozenges to work right, but now I’m trying to merge the center 2 sections and I am getting this. I’m using the minus back.
And thanks all for the help.
Okay, do you want to cut the center section out? That white line is just a white stroke, and that is going to cut, not engrave.
Let me ask you this, do you want to just engrave the black areas and then cut out around it?
Yes. That is what I want to do.
If you want to do that engrave using vectors, it’s going to create a nested compound path situation that is going to be difficult to explain.
You can also create a raster image of the interior and use that for engraving, it might be easier to understand, so I’m going to tell you how to do that first.
Rasterize a copy of the interior engrave.
After you have subtracted out the lozenges, you will be left with something that looks like this:
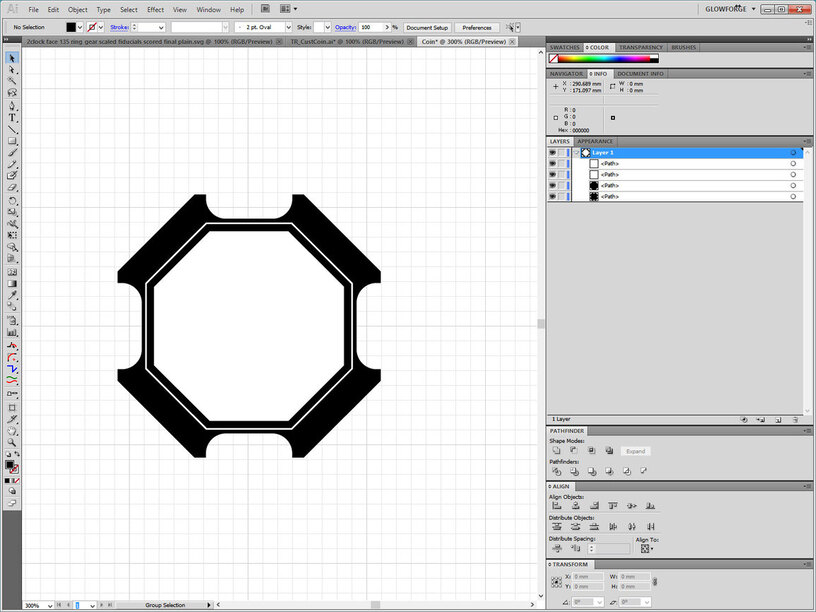
-
Select everything and make a copy of it and set it to one side.
You will remove the fill from the back octagon copy and turn it into the cutline later, but it’s a good idea to keep a complete working copy of the original. -
Select all of the originals and click on Object > Rasterize > Other (600 ppi) and choose a Transparent background. (That creates a PNG file and embeds it into the file.)
-
Now take or make a copy of the background from the ones that you set aside, give it a stroke color and no fill color. Make the stroke color red so you can see it, and you can make it kind of thick - the thickness of strokes does not matter.
-
Then use the Align tools to align the cut stroke around the image file.
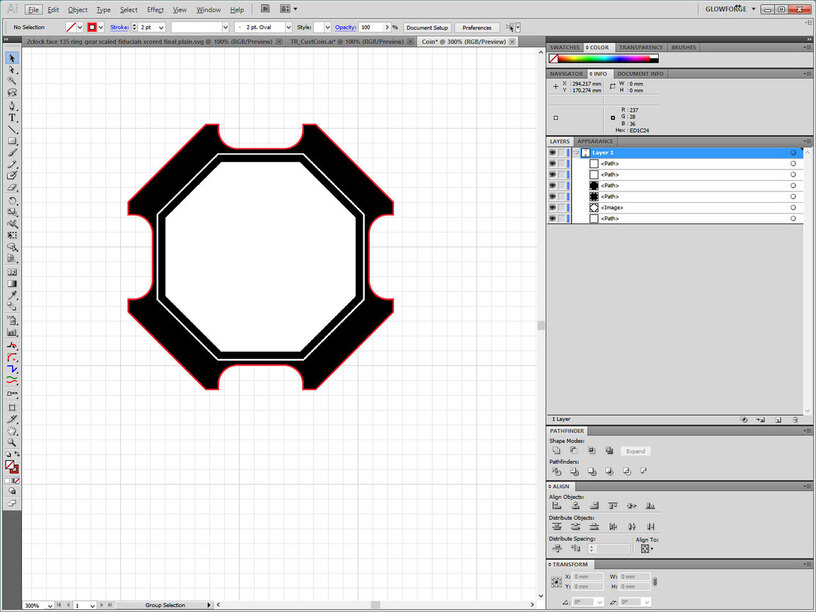
-
Save the copy in another file if you want to keep it to do further work on it, then delete it from the file that you plan to save as an SVG.
-
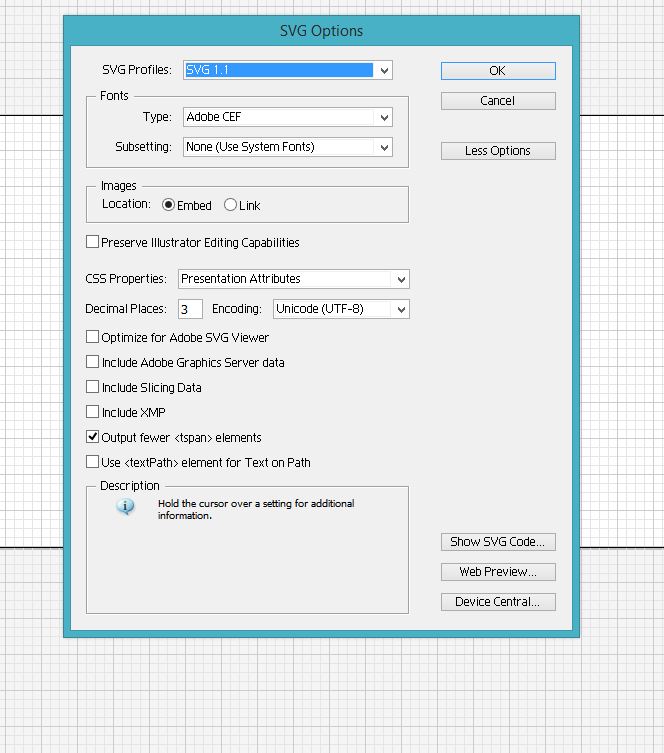
When you use Save As for the SVG, make sure that the Embed Images radio dial is selected in the Popup.
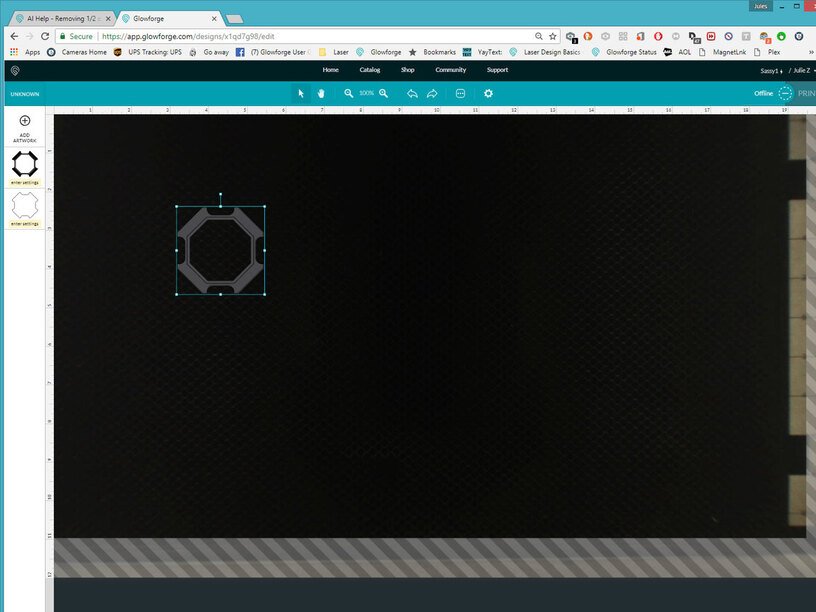
It should open in the GFUI looking like this:
That’s the easiest way to do it. If you want to tackle the vector subtractions, my way of doing it is going to be confusing. @jbmanning5 might have an easier way to do it, in which case, I wanna see too. ![]()
3 Likes
Alright, got the file loaded… you have a lot going on - that, sorry, will be reallllly confusing to a beginner in Illustrator.
Your easiest/fastest bet is going to be to rasterize it, as Jules said.
But, we can do it the other way, if you have patience.
First - let’s address the rounded rectangles since a lot of this thread was about that. I hope that this doesn’t confuse you more… you added it to a library, which makes it something called a linked asset. You got the intent right but the usage just a little bit wrong. When you drag it back into your document from a library, it’s basically treating it as a raster image (I think the most comparable thing might be a “smart object” from Photoshop, if you’re familiar with that - if not, ignore that statement lol).
You CAN do what you want to do this way, but to insert it back into your document for this type of usage, you need to hold alt (or option on a mac) while you’re dragging it into your document. This will create a copy of the library asset that is placed directly in your document and you can edit as you want, etc. - but primarily, it is seen as just a vector shape and you can manipulate it (and other things with it). The linked asset is basically just that - it’s a linked asset that lives in a library - whenever you make a change to that asset, it updates all of the instances of it.
The easiest way to just replicate your shape is to copy and paste it. It will make an identical copy.
You discovered early on one of the toughest things about designing for the laser… these shortcuts can work for print work but they don’t work for lasers because of the differences in what they are looking for and how they interpret the file. As we have the file designed right now, we have white objects that are overlaying your black background object. This will work if you send it to your printer because it’s either A. rasterized in the printing process, or B. white is set up by default to knockout the underlying color.
This won’t work on a laser because it’s only following the pathing instructions inside of the SVG that define the vector shape(s). It’s not knocking anything out below it - just stacking things on top of one another. Does that make sense?
So you’ve drawn out your general design and know what you want to knock out. This is where things will get a little tricky.
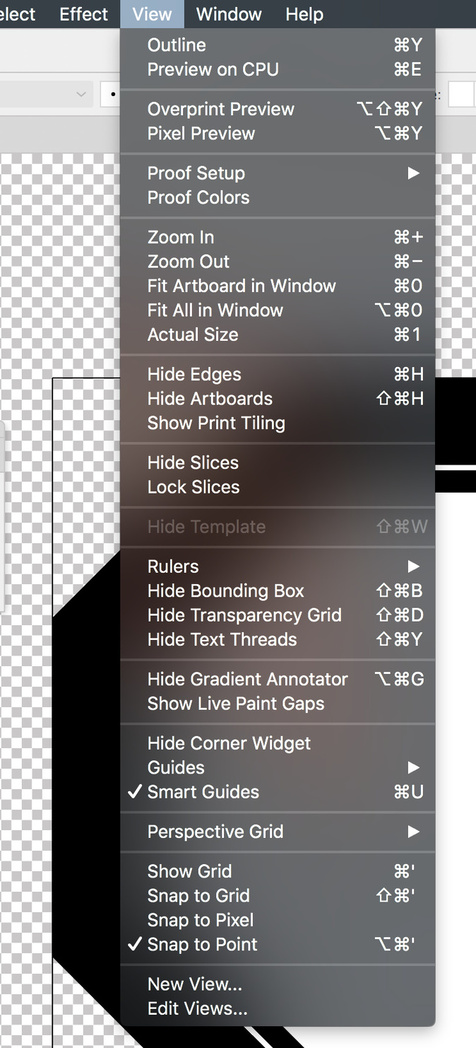
The first thing I would do is turn on your transparency grid… this will make it easier to see what is actually going on in the document.
Second, we need to start knocking things out. We can’t do it all at once - or at least, not in a way that I know of (except rasterizing, like @jules said).
Let’s start with the big piece in the middle and go from there. Let’s open our pathfinder palette by going to the top menu item Window > Pathfinder.
I want to select both of the items, the big middle piece and the black background shape. You can see what’s selected in this screenshot. And then, I want to hit the “Minus Front” button on pathfinder palette. We want minus front because the white shape you created, that you want to knockout, is located in front of the black shape. We want to minus the white shape in front out of the black shape.
Once we Minus Front, we get this. Notice how you can see the transparent grid right through the middle of shape?
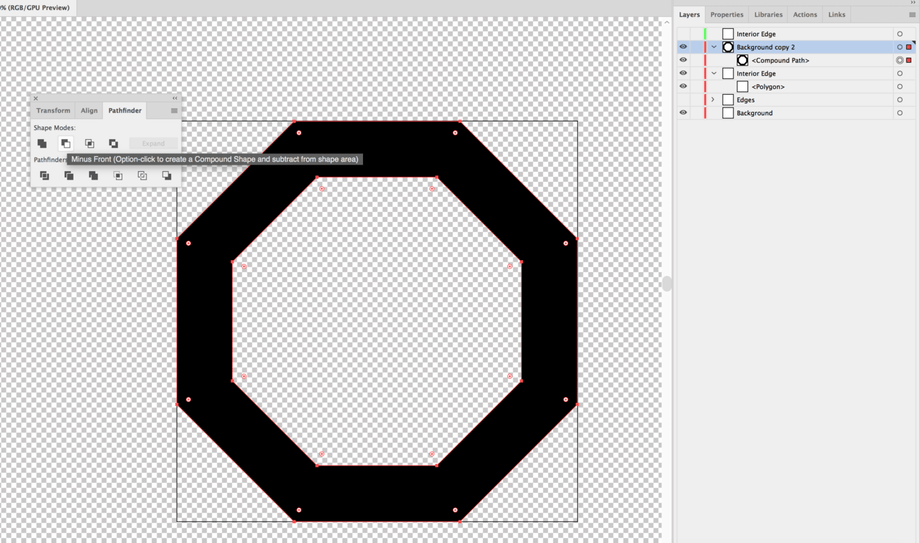
You just knocked the center out!
You might notice that the white bordered object that you had created earlier now can not be seen. That’s because we created a new shape when we ran the pathfinder operation and it put the new shape on top.
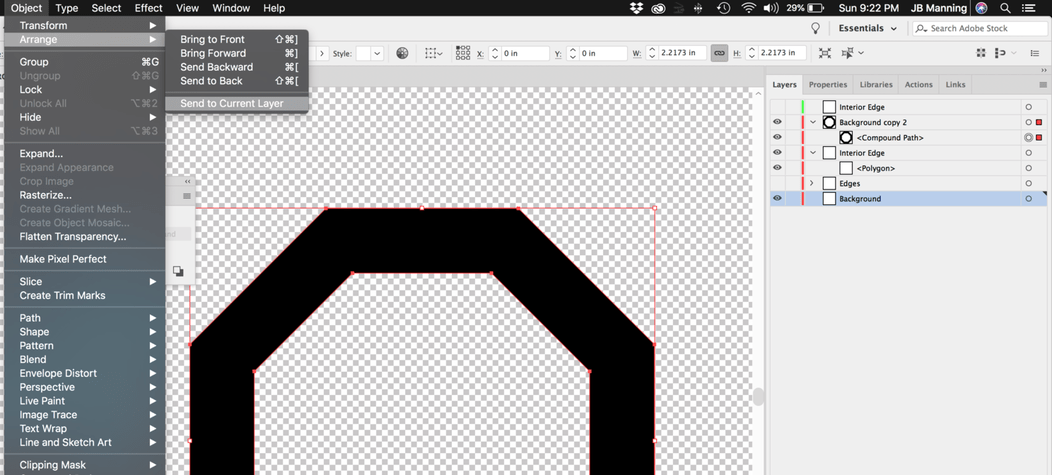
To continue using the “minus front” operation, we will just either drag and drop the layer in the layers palette to the bottom (effectively placing it at the back of the stack), or we can select the new object (indicated by the red dot on this screenshot, and then click on the layer name (Background), and go to Object > Arrange > Send to Current Layer
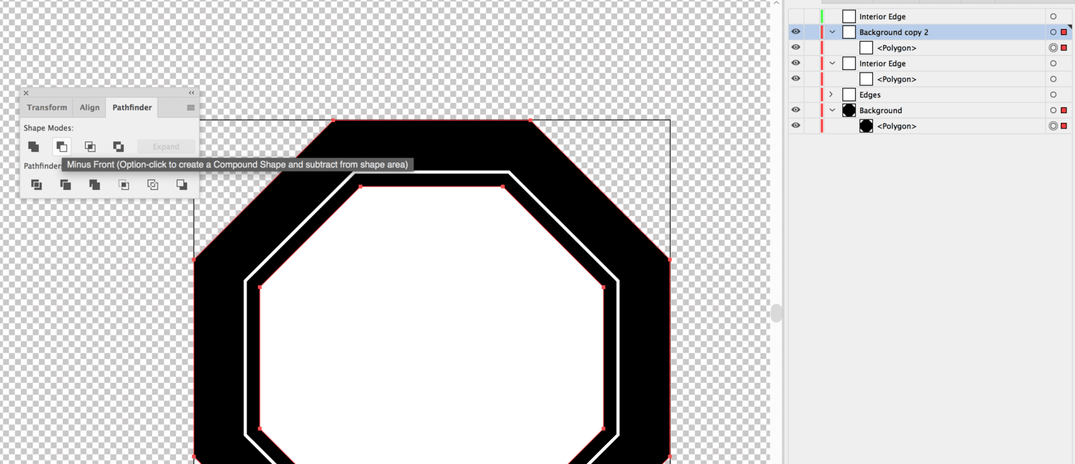
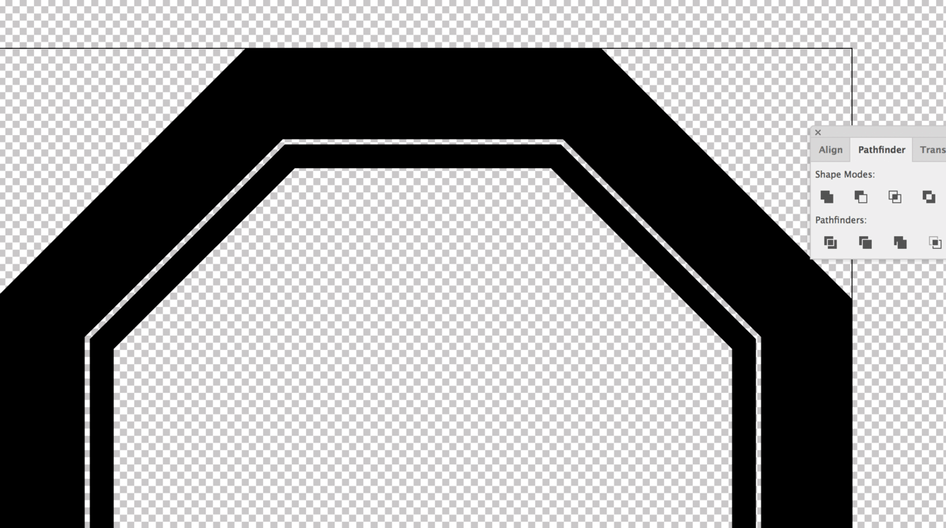
Now, we need to minus out the object that you created that has the white stroke. This one is a little bit different because the stroke is just an appearance that borders the vector path. What we actually want here is for your stroke to be an object that we can subtract, right?
So, let’s remove the black fill that you added. We will do that by selecting the object (as indicated by the red dot on the layers palette in this screenshot), we will go to the fill/stroke squares on the left hand side and make sure that we have the fill box selected (when selected, it’s on top of the stroked square) and then we will click the little None box that you can see in the screenshot (it’s an empty box with a red diagonal line). That will remove the fill. You can also hit the forward slash key to remove the fill (/).
This leaves us just a stroked object. To turn the stroke into an object, we need to go to Object > Expand > Stroke
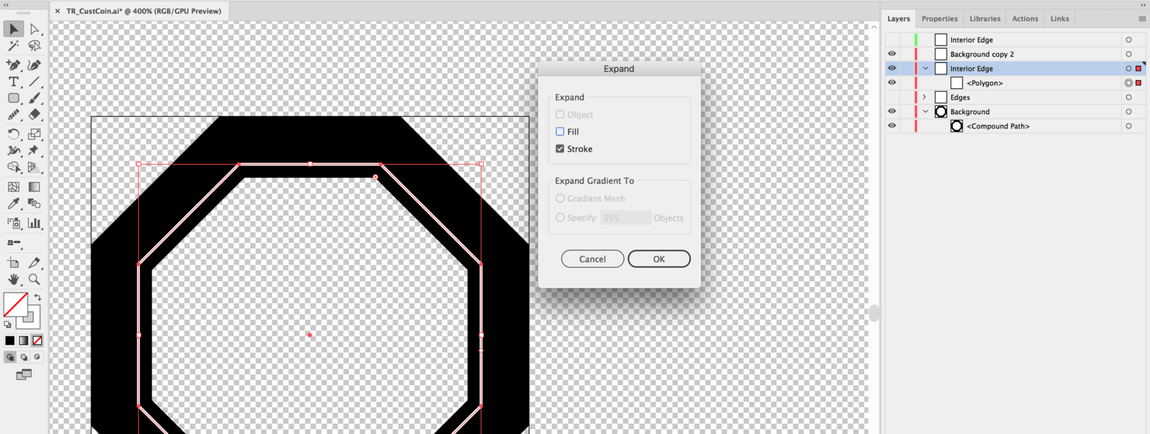
Now this left us a shape that is exactly like the stroke that you set up. With it being an actual shape, we can subtract it from the black background shape. All we need to do is select the two objects and then hit “Minus Front.” See how we have transparency now?
We can move that shape back to the back by using the Object > Arrange method that we used earlier.
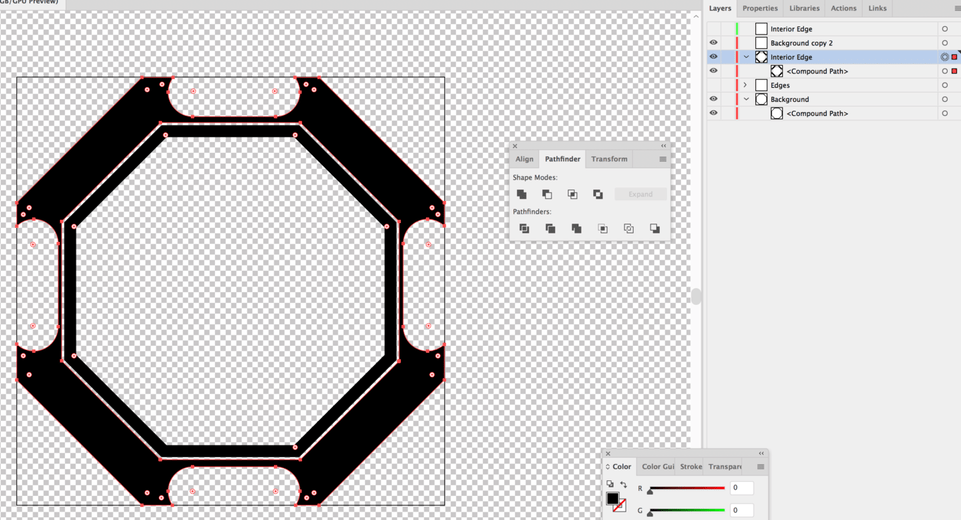
For the rounded rectangles, just make one the size that you need and then copy and paste 3 more copies. Move those to where they need to be.
We have to be careful subtracting these because we now have two compound shapes… we can deal with this two different ways. We can either A. select the rounded rectangles and the outside most compound shape and do our Minus Front command. or B. We can select both compound shapes, go to Object > Compound Path > Make (which will combine the two compound paths into one) and then we can finally select our rounded rectangles and the black background shape and do the Minus Front operation.
So here’s the thing - I’m not an Illustrator genius and there may be an easier way using some of the newer tools (like Shapebuilder, etc.)… and there are different ways the file can be arranged to go about things differently… but, I wanted to use your file, the way that you have it set up. This oughta give you the gist of how to use the Minus Front tool and what it’s actually doing.
5 Likes
Did I mention it really would be easier to rasterize it? 
3 Likes
You did a great job of explaining that! (Actually a couple of steps less than what I had in mind.) 
@cditty, did we lose you? I wanted to explain this in the simplest way possible, but for someone unfamiliar with Illustrator’s quirks I realize it’s a lot to swallow in one gulp.
All we are doing is forcing the top shapes to punch down through the bottom shapes, because the Glowforge interface wants to see nothing in the spaces that you do not want engraved. It treats white like any other color for vector work. So you can’t have a white shape sitting on top of a black shape and expect it to create a ring engrave - it’s going to engrave the thing as a solid.
It gets even more complex when you have a ring inside of a ring, because Illustrator does weird things with compound paths when it combines them - tossing things to the back that you have to know are still there and go in and look for. Knowing about that just comes from experience so it can be really confusing for beginners when their parts disappear.
The quick solution is to rasterize it (turn it into pixels) because the Glowforge interface treats the white in raster images as being empty automatically for us. So rasterizing can save quite a few steps, depending on the complexity of the image, and if you rasterize it at a high ppi, the results are the same as vectors when it’s processed.
We’ve got a lot of really good beginner tutorials that you might want to take a look at when you get a chance…understanding how the Glowforge software interacts with design software like Illustrator will save you a lot of discovery time… LMK if you want the list. 
Not lost. Just didn’t have time to look at this until now. I was able to get Jules method understood and will tackle @jbmanning5 next.
I have no problems with being told what to do, Illustrator is new to me so you aren’t going to hurt my feelings.
@jbmanning5 Thanks for the info. I’ll look at it in a few and see what’s going on there. Right now, I have a pet squirrel trying to get into my margarita. Seriously.
Pictures or it never happened. ![]()
(I tamed a wild squirrel years ago that used to beg for pecans, gently nuked.)

1 Like
Is there any other way to nuke a squirrel?
1 Like
Chuckle! No, the pecans were nuked, not the squirrel.
(I know you guys think I’m nuts…there’s your proof…stalked by squirrels.)
Amen. Every time I turned around, she was running to my cup trying to get more. I had to cut the little thing off or she would have had a hangover today. 
Next time she does it, I’ll try and get pics to post.
@jbmanning5 Gonna try and recreate the coin using your instructions shortly. I’ll report back.
Jules just want to say you are a freaking saint. I am constantly in awe at how many words you write and screenshots you post in so many threads helping answer people’s questions.
1 Like