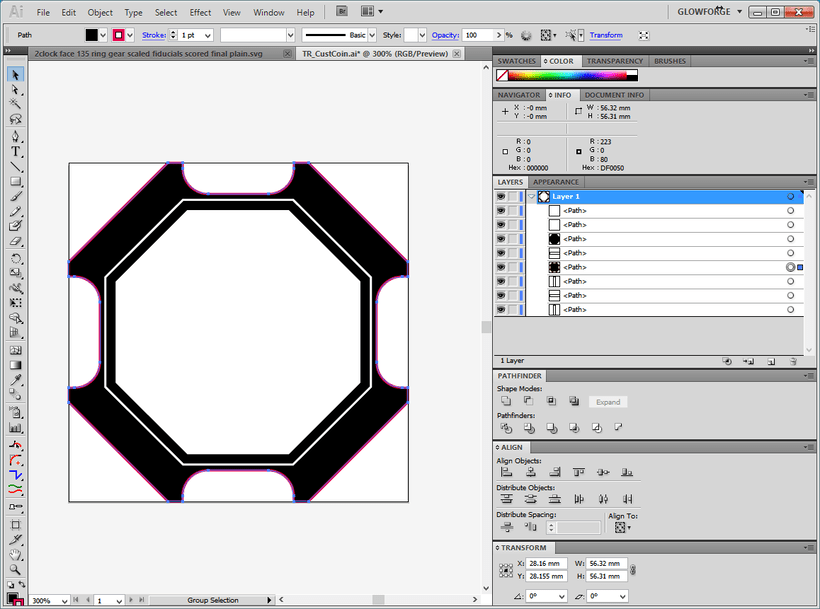
Can someone give me a hand with this? I’m trying to make a hexagon coin and want to cut the outer 1/2 of the coin off. I can’t seem to get Illustrator to do what I want. None of the online tutorials I’ve looked at work for me. It looks good in the preview, but when I save as svg and put in GF to do my stuff, the outer edges are still there.
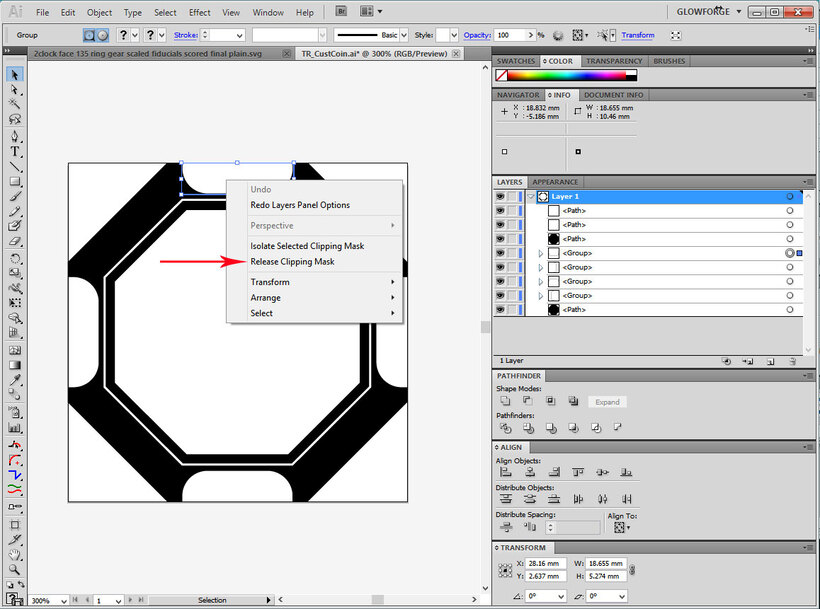
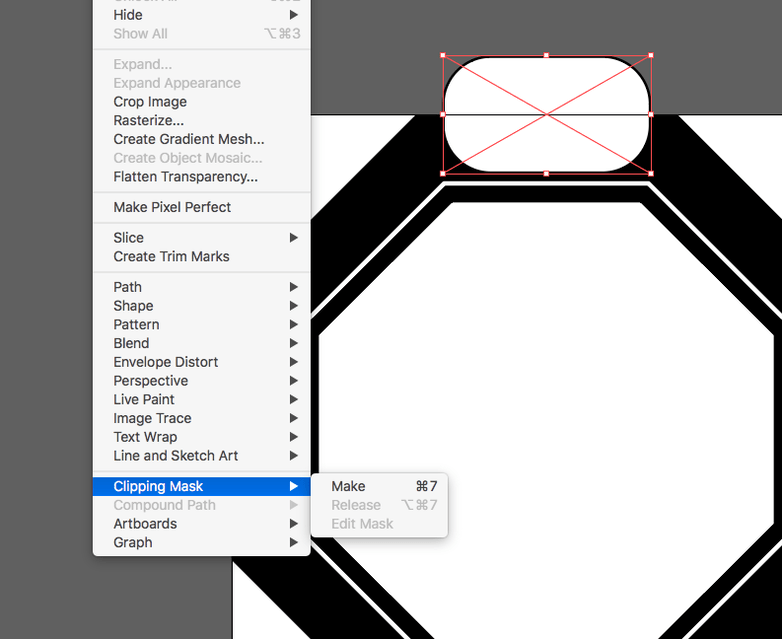
First off - you need to select the outer white filled “cutout” areas and delete the Clipping Masks on them. The GFUI does not handle clipping paths.
Then I’m a little bit confused as to what you mean by deleting the “outer” half. Do you want to remove the whole outer edges, or actually have half a hexagon showing?
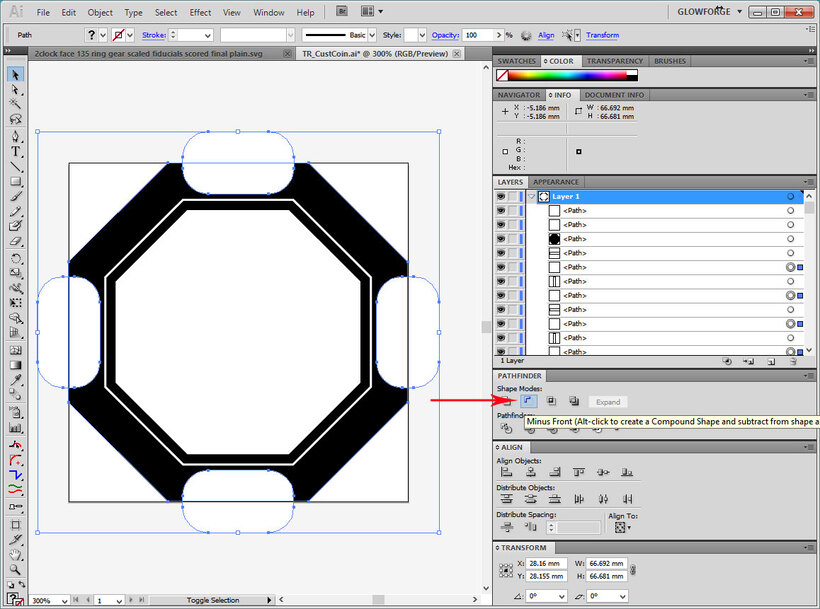
If you want it to look like what you have showing, you need to subtract the white shapes from the black rear hexagon using the Minus Front tool in the Pathfinder palette. It will punch those out where it overlaps the black hexagon.
Sorry, you mentioned Illustrator, I thought that’s what you were using.
You do the same thing in Inkscape. Remove the clipping paths and display the entire lozenge shapes with white fill in front of the black background. Select them and choose Path> Difference to subtract the overlap out.
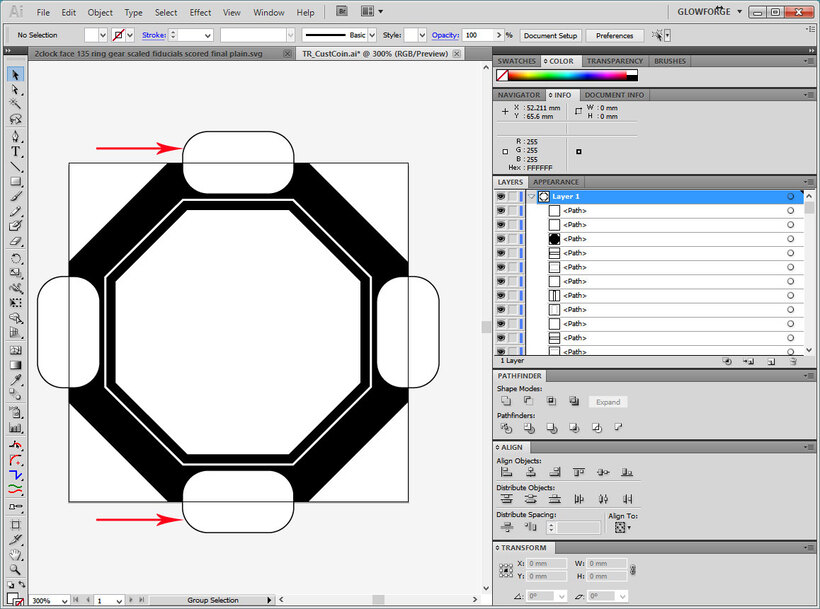
The lozenges appear to be a black stroke shape with no fill on top of a white filled shape with no stroke. I’m not sure if you intended to set up a separate score there or not, but when we use the shape subtraction tools it’s best to do it with fills only. From an engraving standpoint, it’s what you want to do, and if you need to create a cutline instead, you create it using the final subtracted result.
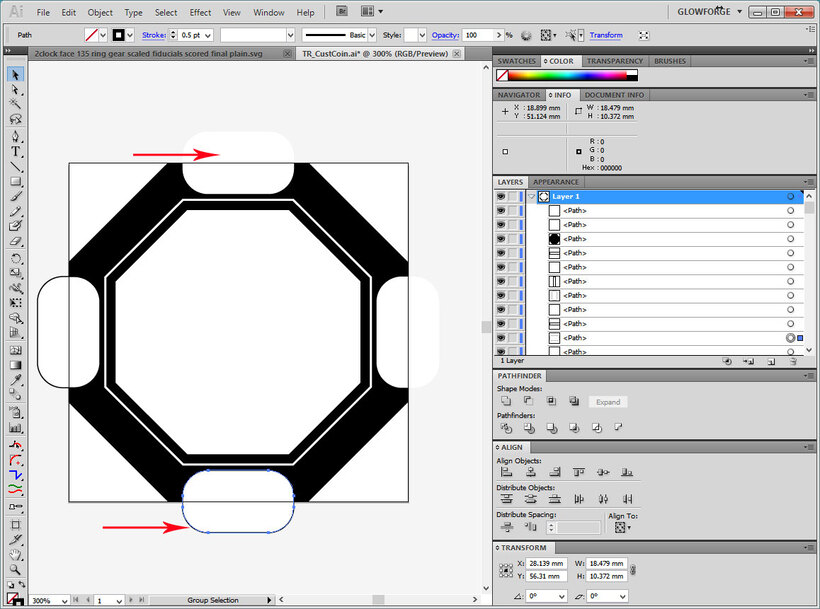
So if you don’t want to keep the scores, go ahead and click on the black lines and delete them. Be careful not to select the white filled shape inside.
Looks like that one might already be released. Try just selecting the black line and delete it.
Uh-oh, I vaguely remember that opening newer file versions in older versions might create Clipping paths where none existed before - you can probably skip that step for the clipping paths. (I’ve got to start asking what version of AI people are using before offering suggestions.)
Just looking at your screenshot, you don’t seem to have any clipping masks in that document (don’t know if you’ve made changes since you uploaded original file or not). That said, I’m not at computer so can’t look at file for you. But, it looks like you can just skip to the pathfinder operation with what you have.
No idea. We don’t have library capabilities on CS5. Try just using a non-library lozenge, no stroke color, and subtract it with the Minus Front tool. That should do it. (You can copy it before subtracting by holding down the ALT key and dragging a copy off to the side.)
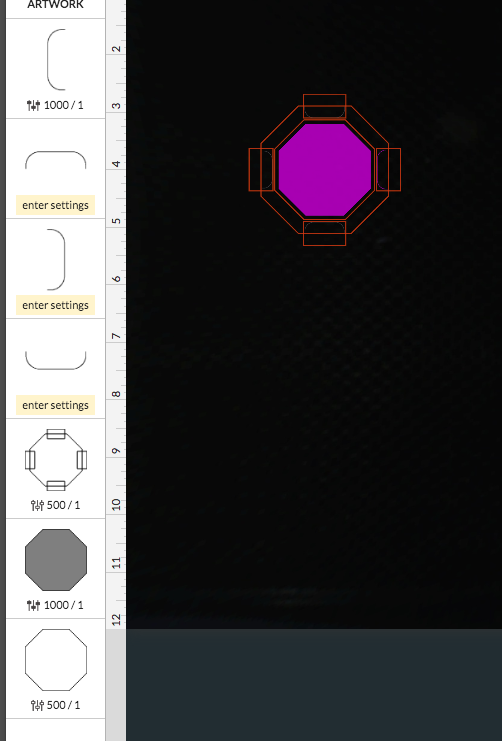
Grrrrrrrr. Now GF is telling me that it has to engrave it and not cut. This is so frustrating. I have no idea where some of these lines are coming from on section 5.
No, that’s not quite right. You didn’t punch the filled white shape down through the filled black shape underneath it. You’ll need to use the Minus Front tool. And you will need to make sure that both the objects on top, and the object underneath have fill colors when you subtract them.
You should start with a new white filled lozenge with no stroke color, place it on top of the octagon and then subtract it. As a matter of fact, use pink filled lozenges instead of white, it’s easier to see if you have subtracted them correctly. White lozenges on a white background are tough to see. Do them all at once or one at a time, it doesn’t matter.
The Glowforge interface will try to engrave fills. It will cut or score strokes. If you want a shape to cut, remove the fill color and give it a stroke color. So AFTER you have subtracted out the lozenges, then you set the stroke for the octagon to a color, and set the fill to null.