How do I get the stars and ‘text’ (converted it to path) to NOT print? IOW, I want only the skull outside the stars and “III” to print.
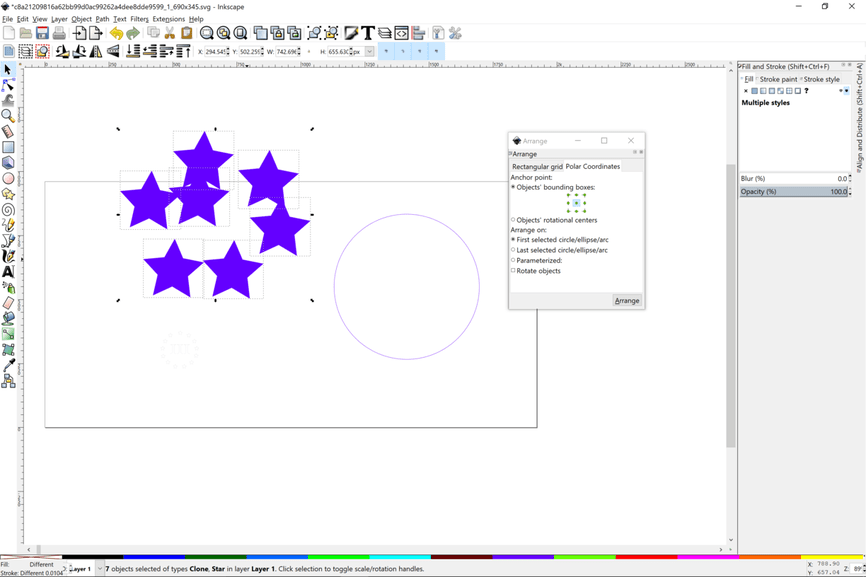
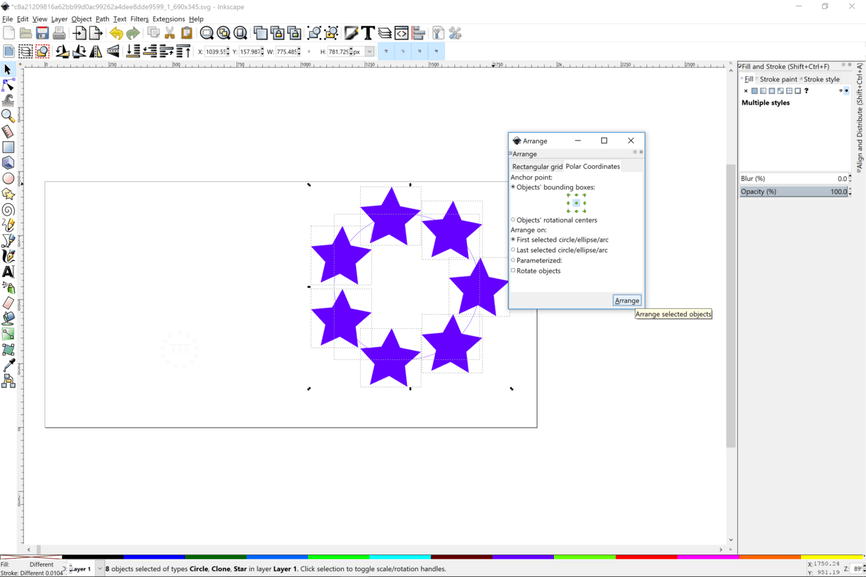
Also, is there an easier way to place the stars (other than manually) along a circular path? I ended up creating a circle, and then eyeballing the placement of each star to a grid, then deleting the circle and grouping the stars. Spacing looks fairly consistent, but there must be a more efficient and precise way.
If you color the elements differently in inkscape they will be presented on the side bar thumbnails as separate operations, where you can ignore any you choose.
Align and distribute would be the tool for placement, but I’m not strong enough with it to tell you how.
In Inkscape I had to ungroup all of your elements several times to get your stars, text and skull to be separate elements. Then selected the stars and text by dragging a selection box around them. Next selected the skull, and under path hit “exclusion”. Shows a skull with the stars and text cut out. Didn’t apply here but if you have real text in an SVG the GFUI will not process it. Have to convert most text to paths first.
Thank you so much! That did the trick…obviously still learning about illustrator programs and I appreciate the patience and guidance you all afford us newbies. Hope to pay it forward someday.
Duplicate as many stars as you want, Ctrl + d. It will stack them. You could also do the clone, but that adds complexity (is good to learn, but that’s another day.)