Another 3D Engrave!

Hi there!

Another random 3D engrave.

Wolf :wolf: and the moon :new_moon:

Really liked it and already amended the file to have both sides more similar do the right one on the engraved piece!

I hope you guys like it too!

Thanks!

36 Likes

very nice.

2 Likes

Reminds me of a neighbors house I had to go by on the way to school :scream_cat:

3 Likes

how did you make the engrave file for this?

Photoshop the image and Illustrator the cutting lines! :blush:

1 Like

Cool engraving!

1 Like

so I am about to try my first 3d engrave from just dragging a .jpg onto the GF UI. I think it will turn out alright. So besides the engrave, how do I cut it out too? I was thinking duplicating the item and changing the function to cut instead of 3d engrave. Problem is I cannot change it to cut. So my next line of thought is to convert the jpg into a simple vector and cut the outline in a seperate job. I just don’t see this aligning correcting.

Any pointers?

You have to have a vector shape for it to cut. Rasters (bitmaps) are always engraved.

That would be pretty easy for autotrace to handle in Illustrator or Inkscape.

RE: the image, if you don’t get quite what you want, you might try a touch of Photoshop, either through a curves or level adjustment so that you can broaden the range of tones which will accentuate the 3d effect. I’m not sure if you have Photoshop, but here is an example of what I’m talking about.

Using levels and the histogram, as it is: the left side of the histogram contains dark values, and the right contains light values - you can see the spike way over on the right, which is reading the white background

If you grab the right/white slider, and slide it to the left about to where the histogram drops off, you pull out a lot more detail in the image, and that will help accentuate the 3d effect:

And just because I had Illustrator open, here is a quick and dirty outline of the eagle. It has the white parts beneath the base of the eagle and in the chevron as cutouts… those can be deleted easily enough to just give an outline.

eagle_outline

8 Likes

Take the replies into consideration as the image as it is now, won’t do a great engrave as it is oretty much all “same values of black/grey”
For depth variation, you need to have an image that has “white to black” variations so it can look like a 3d object as the variation of this values will gove you tha depth you need and remember that white won’t engrave and black it will!
Hope that helps!

1 Like

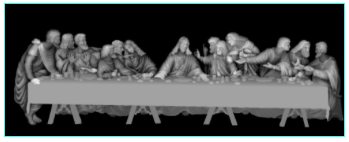
Just so you understand a bit better, this is how a 3D image would look like to engrave the attached!

37

https://community.glowforge.com/uploads/short-url/ftCdn11skW4M7M7zLMAc5Hd6V5V

Also, I’ve added a post of how I check the file before I Print that you can check it here:

4 Likes

Yup, as @jbmanning5 laid out, you will want as many shades of gray as possible in the piece and most pixel programs will do a pretty good job and Inkscape would find it an easy trace to get your vector.

I would go about looking for places like the eagles head and neck that you might isolate in gimp and play with a bit as the lower and outer parts are light and the center of the neck that should be high will be a low place. the photo has light sources on each side of the piece so it looks right to the eye but will not necessarily translate well in a 3d engrave.

As a bottom layer in Gimp, you could blow it up really huge and bit by bit change ( in new layers so you are not messing the original) the grayscale to match the different heights you really want. Or you could just keep the engrave very shallow and cut it out as is so at least the eye will see what is feathers etc,

2 Likes