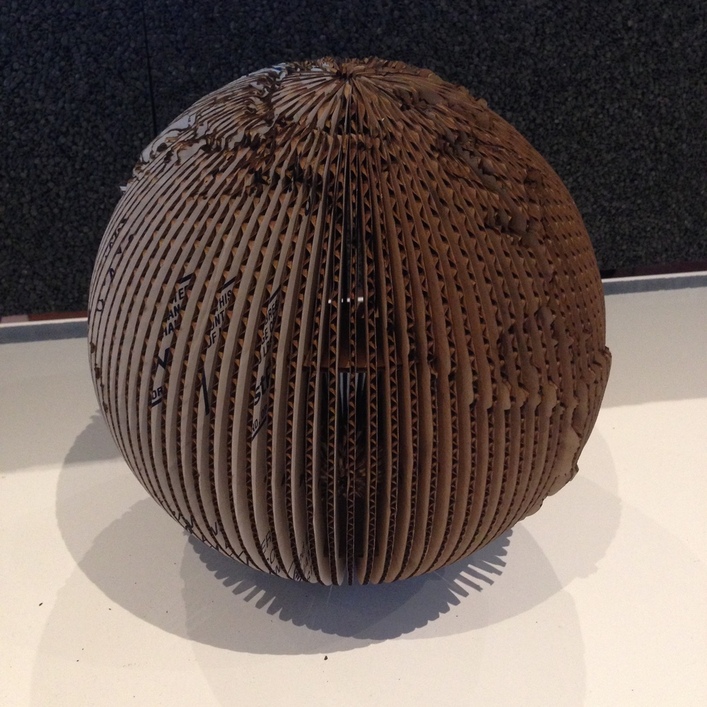
I was looking for a project that would give me lots of opportunities for making mistakes (aka “learning”), and came up with this. I’ve been dying to try out Slicer for Fusion 360 to make something with the huge pile of cardboard I’d accumulated, and for lack of anything more inspired I went with a globe. I was kind of disappointed at first because it really doesn’t look like a globe, wrote it off as a failure but a good learning experience, but as I look at it more… it’s kinda cool! From a distance it’s a weird brown ball, then you realize it’s made of (scrap) cardboard, then only after looking at it for a while at the right angle do you notice it’s the Earth. I like how it’s just complete enough that you can make out the shapes of continents in the surface, but also see it as a stack of cardboard wedges.
I’ll go on a bit about the process in replies, in as much boring detail as I can summon.
I used the Earth model from Globe Lamp - Earth by ClassyGoat - Thingiverse and ran it through Slicer, immediately discovered that the shell was too thin for how I was going to build it. So I got it into Fusion 360 and learned just enough about how the mesh tools work to remove the inside shell. I don’t know enough about F360 to plug the hole in the bottom, so I figured it’d be easy to jump over and patch it in SketchUp. …Except that there were way too many vertices for SketchUp to handle. I think then I used a tool in Fusion for downsampling meshes? Anyway, I got it into SketchUp and patched over Antarctica then added the inner shell I guess in Fusion. I can’t remember exactly because I wound up redoing all of that work in 2D in Inkscape. I might as well have skipped all the Fusion and SketchUp.
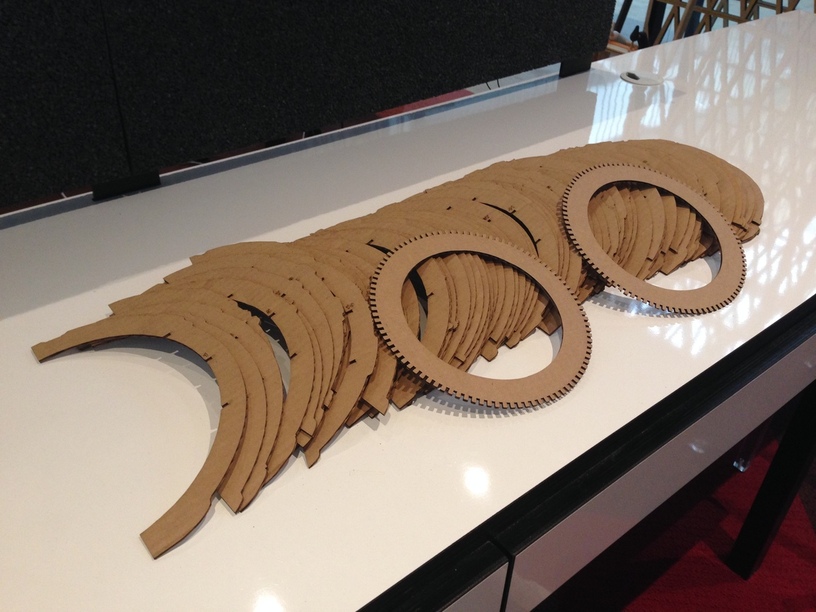
So now I had a model I can slice up. I wanted the “end grain” of the cardboard facing out radially, and the scraps I’m using are the bottoms of the cardboard carriers for the LaCroix (grapefruit, thank you) we get at work, roughly 10"x15", grain lengthwise. So that put my diameter constraint at 10 inches. I scaled the model to 10" and played around with the slicer to see how many slices would work best for the internal rings. 128 was too tight: the slots on the rings took up more space than the support material between them. 64 was a little too sparse. 96 was a good compromise, and now we’ll get into a bit of number theory…
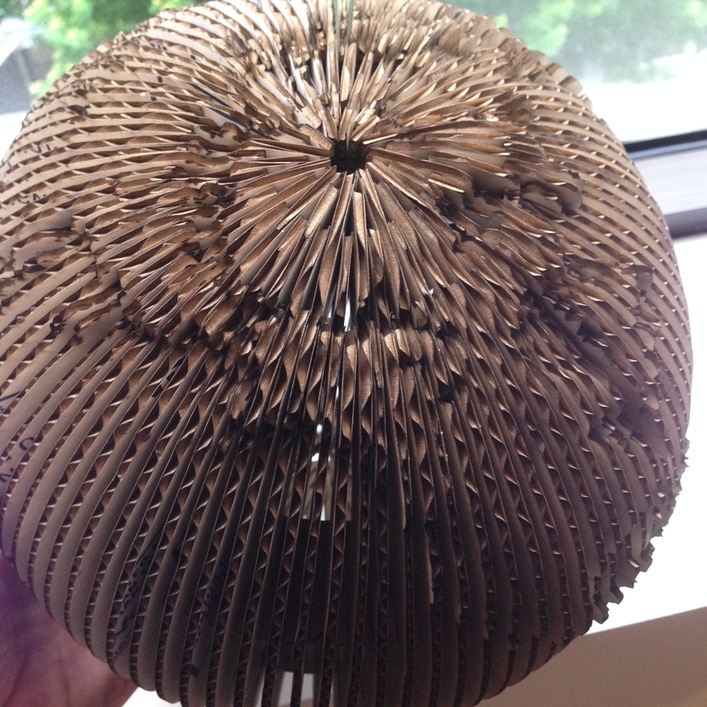
The way the slicer works (in radial mode), we get a bigger hole at the top the more slices we do, because they all extend the same distance up. But say you’ve got an even number of slices all joined up squished together equidistant from the north pole. Why not let every other one keep going until it meets its neighbors’ neighbors? And if we have an even number of those, do the same thing again with every fourth slice… So I was looking for powers of two, numbers that could be divided by 2 all the way down until I have two slices meeting at the poles. 96 was a great compromise because it’s allllmost a power of two, just off by a single three. (96=3x2x2x2x2x2) In the end I went with the formula 96=12x2x2x2—that is, first 12 slices, then 12 subslices, then 24 sub-subslices, then 48 sub-sub-subslices—because it’s a bit less hassle and it also leaves a little bit more opening at the poles in case I want to try feeding a light into the center.
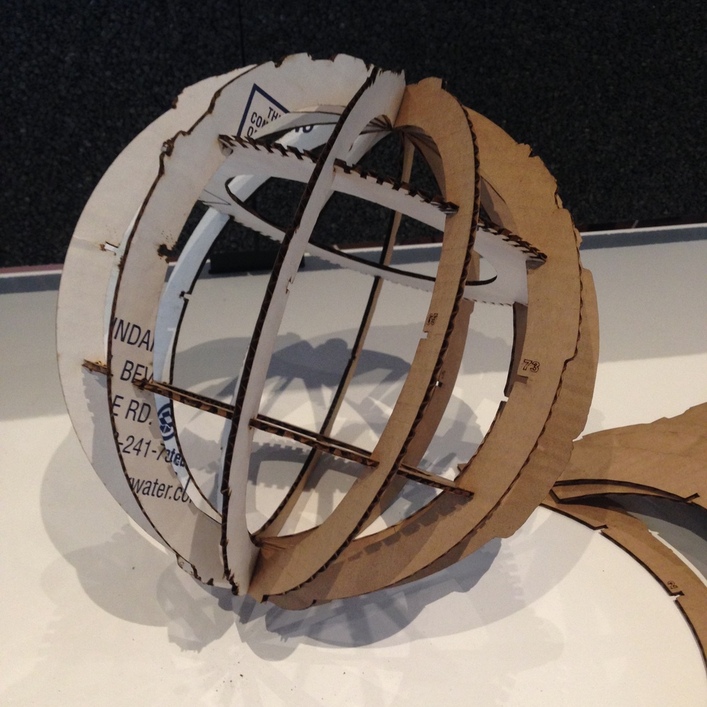
There’s the first 12 slices (1, 9, 17, 25…) in place. Next came the 12 sub-slices (5, 13, 21, 29…) then the next 24 (3, 7, 11, 15…) then the final 48 (2, 4, 6, 8…).
I ran Slicer at 12 slices, then 24 and 48 and 96 slices, then sorted out which slices I needed into a master Inkscape doc. (Half of the slices in the 24-slice version were copies of those in the 12-slice but didn’t extend as far, half of the 48s were in the 24s or 12s, etc.) At this point I saw that the inside contour was all over the place because I hadn’t aligned the model perfectly on the north/south axis. I couldn’t bring myself to start over, so I fixed it in 2D, aligned the 96 layers and replaced the inner section of each one. Tedious, but kinda zen? This is what I meant about all of the F360/SketchUp being for naught: I could have used that original model if I was going to replace the inner shell in Inkscape anyway. So I learned a lot about Fusion and Slicer and [begrudgingly] Inkscape and that was the point of the whole project, so… success!?
Excellent job using Slicer! It does take some fiddling to get used to how it works. I’ve not tried the radial option, that looks like fun. Your globe came out great!
In F360, did you try making a new body with, curving the top with a split body command and a curved line, then trimming and joining the bodies? You could probably also make a nub in the sculpt environment then do a similar trim and join on the globe, then shelled the whole shebang in Fusion.
I’ll give it a try! (As soon as I can figure out what all that means. ) I’ve only used Fusion’s sheet metal tool for folded cardboard designs, still need to learn the rest of it. It’s a really cool–and powerful–program!


 ) I’ve only used Fusion’s sheet metal tool for folded cardboard designs, still need to learn the rest of it. It’s a really cool–and powerful–program!