For my 50w china laser, most of my cost was in a vacuum dustcollector. Acryllic and wood leave too much film behind for my liking.
Ok, first cut was today and was very straightforward, hooked up the water pump and fan and cut a few circles. No electrocution, no burning down the house, didn’t laser my eyes. And the software actually isn’t so bad, it just looks bad, there isn’t much for instructions and there is a lot of hard to understand parameters but there seems to be only a few that you need to get cutting. X/Y origin, speed and # of passes.
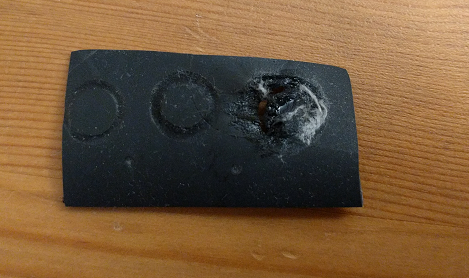
I burned some nice circles into a piece of wood then tried to actually do the cut I wanted in a thin rubber mat (used as grip at the bottom of a housing). First few passes just kind of melted the top layer, then as I ramped up the power I mostly just set the rubber on fire (see pic). Soooo, glad to do that on a $300 laser and not a $3000 laser! I might need to wipe the mirrors, but they still look clean.
I’m very happy to have picked up the K40 to get started now though. I can start working with the materials I need now (and screw up at low cost!) and I’ll have a better idea how the GF stacks up when it comes in. I like the idea of not needing the water pump and the GF filter looks like it should work a lot better than the K40, and hopefully the cloud software works better.
Can anyone suggest what parameters work best to cut 3 mm acrylic and a 0.5 mm rubber (no chlorine in it but not sure the actual material)? What power level / speed / # of passes might be needed? I have the mA dial that goes from 0 to 30. I suspect the focal point might not be at the exact right height either.
@less3go - I just bought it off ebay for $366 + $30 shipping, took a week to show up.
Maybe you should be asking that question on the forum of that makers product?
We have no clue of what it really is or what it can do.
But maybe for $<400 that what you get… Your kind of on your own.
As you have already pointed out, some of the parts used are not what you thought you were getting, so who knows what you have.
I would suggest making a cut pattern blank and doing a few tests.
They are a pain:
@less3go Because they are in a strange middle zone between Open Source and Plug-n-play. Like a Walmart bike that needs a tune-up after every ride.
Or the girl that’s a t-shirt and sweatpants person in private, but wont leave the house without 3hrs of primping.
Or the broom that’s decent at it’s job, but requires you stop every few feet to screw the handle back down.
Wait no. I got it.
Ikea furniture. It’s a pain in the same way as Ikea furniture: “Wow, look at that! And the price! Some assembly? I don’t mind.” then next thing you know, you’re saving up for hardwood furniture and counting down the days until you can post your Ikea stuff on Craigslist Free.
2 Likes
“Rubber” is a pretty broad term. You need to be checking MSDS. E.g. NEVER cut pvc, it’s corrosive and will kill your machine. And your lungs. I suggest you start with natural materials only, while you get used to settings (wood, cotton, leather, etc.) If the rubber is anywhere in the realm of neoprene, you absolutely need to clean the mirrors, even if they look clean, because it’s slightly corrosive.
Your settings are based on the chemical properties of the materials. If your cut software doesn’t have presets, then you need to research the temp thresholds, offgasses, and flammability for yourself. If you aren’t sure what it’s made of DON’T CUT IT. There are some serious health consequences from being “meh” about safety. Better to read a data sheet now, than find yourself setting regular appointments with a neurologist.
If that’s a TL;DR task, I get it, but it also means you should wait until you are using a machine/software with default material presets.
2 Likes
It only took the glowforge team a week to figure out their chocorockets, so at least you have a goal to shoot for 
Thanks for safety feedback! I’m safer than it sounds, I outsource the current cutting of these rubber mats to a laser cutting shop. So while I don’t know exactly what material they are, I do know the laser cutting shop cuts them and does a perfect job of it, so I figure they’re likely safe to cut. I guess they say something about 'ass’uming but I’ll dig up the MSDS sheets on it as well.
You don’t have to dig hard. Ask the cutting shop you use. They are a business, so no way that they are using that stuff without an MSDS on file.
There is a Facebook group “Laser Engraving and Cutting” that seems it may be a good resource for using this type of laser…
@LaserNewbie - One thing you should do is properly ground the machine. Although it likely came with a grounded plug, I found that there is some leakage to the case. Run a wire from the rear grounding lug to a good ground - either a water pipe or a copper grounding rod. The rod is something like 8’ long and you pound it into the dirt. Costs about $10 at Home Depot. Obviously easier to do if you’ve got your machine setup in the garage like me and can run the wire through the wall pretty easily. Also, if you do keep it in the garage & you live where it freezes, add some antifreeze to the cooling water so it doesn’t freeze in the tube on you (cover the bucket so pets can’t drink it).
I would not add a new ground rod. Using multiple found rods isn’t really good for sensitive electronics. The ground is not 100% conductive, so it is quite possible to develop a difference in voltage between two earth ground rods, that voltage difference can cause havoc with logic circuits, and also create galvonic corrosion. Water pipes may sometimes be used in a pinch for a ground, but a lot of pipes these days are PEX,and the only conductive thing in the PEX is the water inside.
Dan said they are working on determining a suitable antifreeze for the coolant for the Glowforges. In an earlier post he said some of the pumps wore out prematurely from the viscosity of the Propylene Glycol. Shipping Beta units in the middle of winter to the frozen north will be a good test of the coolant they select. Often stuff is delivered here off the truck so cold your tongue would stick to it.
While I agree with the theory (I’ve had the galvanic corrosion issue with my boat docked & hooked to shore power), this was specifically directed at the cheap Chinese K40 machines and in my case I discovered the leakage by leaning against the machine while standing on a damp garage floor. Whatever grounding was being supplied (or not) through the 3rd prong of the plug wasn’t catching what gave me tingles from the case. I added the grounding rod and tingles went away.
BTW, also an “in practice” vs “in theory” example in my case was when the electrician installed my standby generator (we used to lose power a fair amount during the winter) he installed a dedicated ground rod for the generator. It’s about 40’ from the main house one (and on the other side of the house) and 25’ from the one I just added for the laser cutter.
Thanks for feedback re: grounding. I was quite puzzled over that tab. In my online searches it seems like it’s provided because in China the electrical wiring doesn’t always have a ground properly connected in buildings through the electrical plug, so the extra option allows you to do so yourself. In North America our electrical code is pretty standard so shouldn’t need the extra ground (as mad macs says possibly leading to ground loops). I just plugged into a 3 prong outlet and it worked fine.
Apparently, generators are a different set of ground rules since they are power feeders, it does appear that permanently installed generators do require a nearby earth ground.
The ground supplied through your duplex outlet is likely all that you need for bonding the chassis. You can use a wire with an eyelet terminal on the end, and attach to the outlet with the center screw. The center screws in a duplex outlet are by design a ground point. We use them all the time to ground ESD mats. Make sure the terminal is tight and well insulated.
15Kv is not a pleasant shock, I know from the experience, but it’s pretty low amperage, I’m assuming the current is DC like a TV.
In any case, if you are unsure of your ground quality get someone local who has experience in equipment grounds come to help you.
Well I’ve had some time to work with it and after a few lows I think I’m getting the hang of it. The K40 works out of the box, just need to figure out the software and the cutting power/speed through trial and error. It’s been an excellent learning tool, such as how not to light materials on fire, find the focal depth and how to clean the focusing lens when you fog it.
It was definitely a nightmare getting my designs into the software, I think I transit 4-5 intermediary programs. However, once the designs are in the software it’s just click, cut, repeat. It is certainly not as user friendly as it looks the glow-forge is going to be. If any one is itching to get started in home-laser cutting I highly recommend it though, it’s a low price to get started.
I’m still going to hang on to my GF pre-order, and might upgrade to the filter. I’ll see what the reliability of the K40 is over the next few months and how well it cuts various other materials.
Thanks for all the feedback above.
3 Likes
I hope you do stick with the GlowForge, and come back for a compare/contrast after you get it in hand.
1 Like
I agree they’re a great way to get your feet wet. No way am I considering not keeping my GF though. The bed size is a huge bennie (I have a similarly sized bed on the 60W laser I use in the local makerspace). The 8 1/2x14 size is odd. I can do a lot of stuff making it in parts & pieces but a bigger bed makes for a quicker project because there’s less setup & prep. As you noted the software is a PITA as I have to export the AI file layers into individual files to be drawn/cut and have to be careful not to disturb the piece between files.
Definitely worth the $400 if you’ve never lasered before. Just getting comfortable with the software and processes is a huge help so you can then concentrate on the creative side of things.
1 Like
Anything new to share with us on the ebay laser @jamesdhatch?
Just use the ground of your outlet. The issue (assuming your house meets modern code) is that the machine ground may not be connected not that your wiring is faulty in your house. Having 2 ground references can cause havoc. If possible connect the internal lug into the third prof inside the case and if not put a grounding line to the center screw of your outlet (verify ground) If you are really concerned add a gfci to detect ground faults (eg you) and cut power.