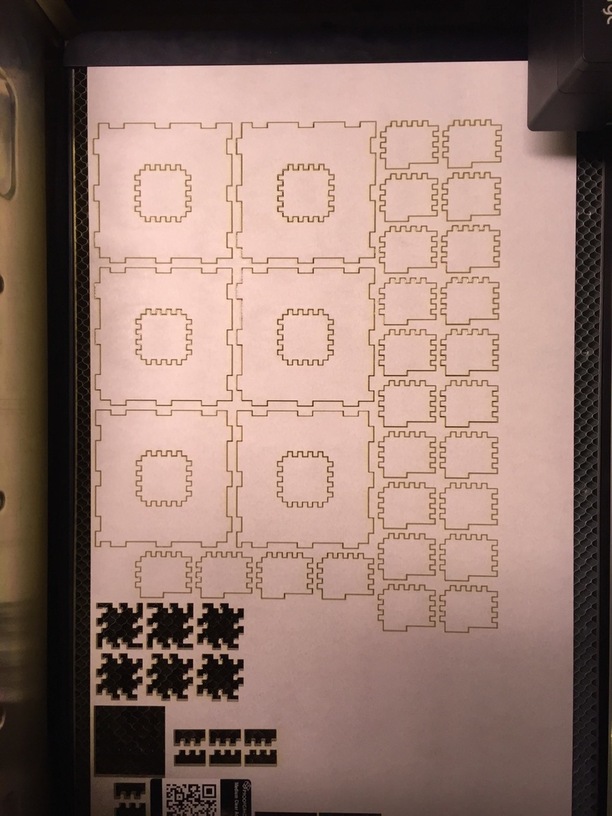
This is the full cut, which analogizes pretty directly to the smaller version above’s cut. Same set of six outer faces (with four and two respectively of two sliiightly different designs) and twenty-four inner pieces, same basic toothing relationship between the inners and the outers.
3 Likes
I’d originally prototyped it with a design with far fewer teeth on the inner bits, just to do a test cut out of cardboard and see if my basic assumptions about geometry held. Turns out they did, but the lack of teeth on the inners felt like asking for trouble since the shape was less self-reinforcing that way. So I added some more jagginess all around, which felt like the right move once I was putting together the final acrylic product.
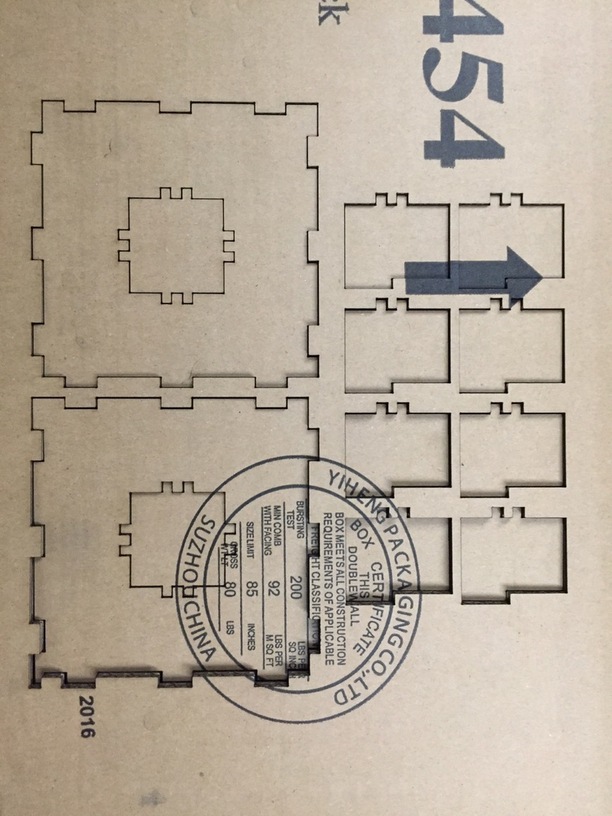
I could see reworking the outer perimeter of the large faces to be similarly toothy as well; if I’m honest I didn’t do so on the current path mostly because I didn’t want to have to do the cleanup involved in rekerfing the new edges, which is pretty darned lazy on my part but so it goes.
9 Likes
I love this. The symmetry of the design is so satisfying.
3 Likes
Awesome design. Waiting to see a jelly bean picture! 
Still haven’t gone and gotten those jellybeans! But I did manage to get some progress done on designing the 2-iteration complication of this design.
Did some test cuts today on the reworked and new pieces I came up with extending from the larger 1-iteration design above, incorporating the small elements in the original small 1-iteration design up top.
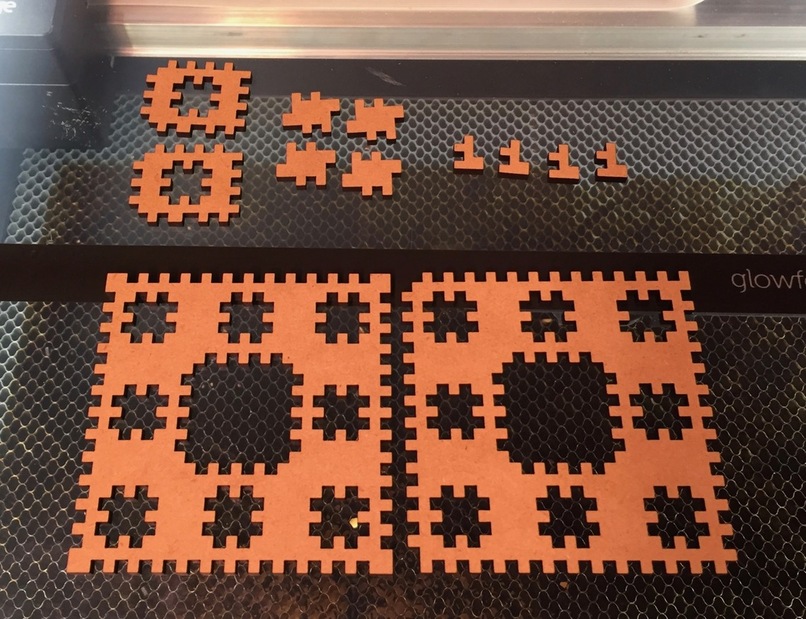
New version involves four major pieces – large outer faces (which I once again have more than one design for; in this case, I’m doing three variants, one for the walls, one for the top, and one for the bottom, mostly out of a kind of laziness because I didn’t design the side parts such that symmetrical top and bottom would work and I don’t want to go fix it), medium inner-tunnel parts, and then the smallest bits from the original small design and some new smallish bits that comprise interior tunnels and which are basically two of the smallest bits “glued” together conceptually.
6 Likes
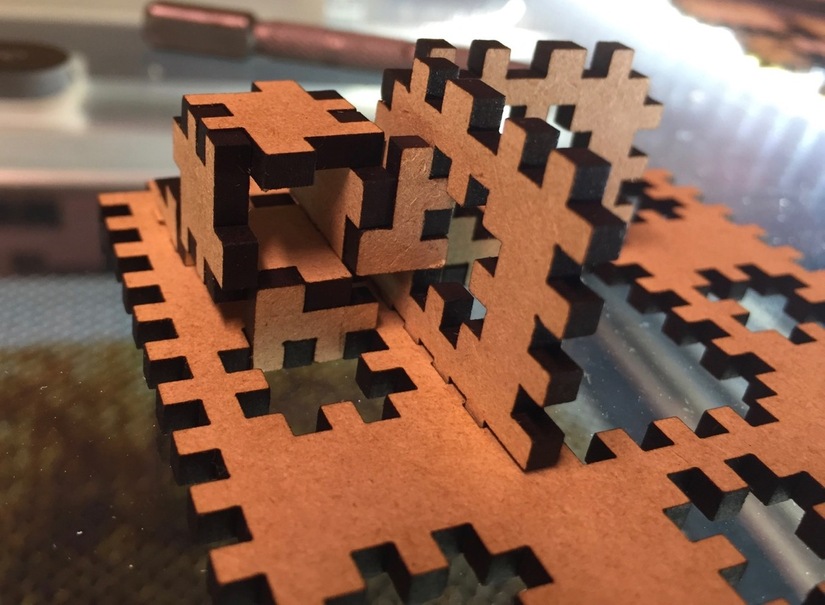
This cut was just enough pieces to check my geometry, since I reworked the existing pieces and added a couple new ones. You can see here the basic sub-assembly that I needed to test, which worked like a charm to my relief. It’ll be essentially 24 repeats of that inside an assembled sponge.
The total material will be 414 pieces (almost all of them copies of the smallest piece, which recurs a lot in the 2-iteration construction), which would just about fit on a 20x12 sheet though I’m gonna split the job up into smaller pieces to avoid potential interruption-related frustrations.
8 Likes
(While I’m beavering away on the full cut, I’ll report a bit of followup on the Discourse forensics: I was looking at code, and looking at badges, and realized that along with not having the Basic badge, I also don’t have the Owner badge.
Which, well, I do indeed own a Glowforge! But I bought it second hand off a friend, and Support promptly got me set up as the owner in the system when I wrote in about it. But whether because it was just a missed step (no biggie) or not part of the Support process for resales (more of an issue because I won’t be the last resale GF owner), I didn’t end up with that switch flipped on Discourse.
Which might be the root of the rest of it! Or might just be a coincidence. But the number of folks with Basic and Owner badges is very close, within a handful out of the 7400 or so folks with either/both at the moment, so it’s a possibility at least.
In any case, I tossed Support a line about it with the details in case they end up being helpful on their end, and they hooked me up with the Owner badge just now and we’ll see if Basic follows naturally or if I need to ask 'em to kick the machine on that one too.)
2 Likes
Many years ago I ran across this site and made some Menger Sponges from business cards:
http://theiff.org/oexhibits/menger02.html
Cool to see what you are doing with lasered bits, Josh 
2 Likes
I didn’t design the side parts such that symmetrical top and bottom would work
Ugh! Well then I take back what I said earlier!
Just kidding, this is awesome. My wife did metalwork, and she says she would make paper models first, sometimes working for days in paper figuring out a piece. I’m not sure that would test all the things you want to test in this particular case, but I suspect that reaching for the draftboard will be a premature step for a lot of laser projects.
Oh for sure. I do a bit of sketching on paper and in Inkscape and have cut cardboard a couple times to test ideas. I go to lasering at basically the point where my I stop successfully working through the 3D projection in my mind, more or less.
If I was facile with a 3D modeling/manipulation program I’d probably get some more pre-cut mileage out of literally pushing clones of a proposed piece together in simulated space and looking it over, but so far the need for that has outweighed my disinclination to find and learn yet another tool right now.
3 Likes