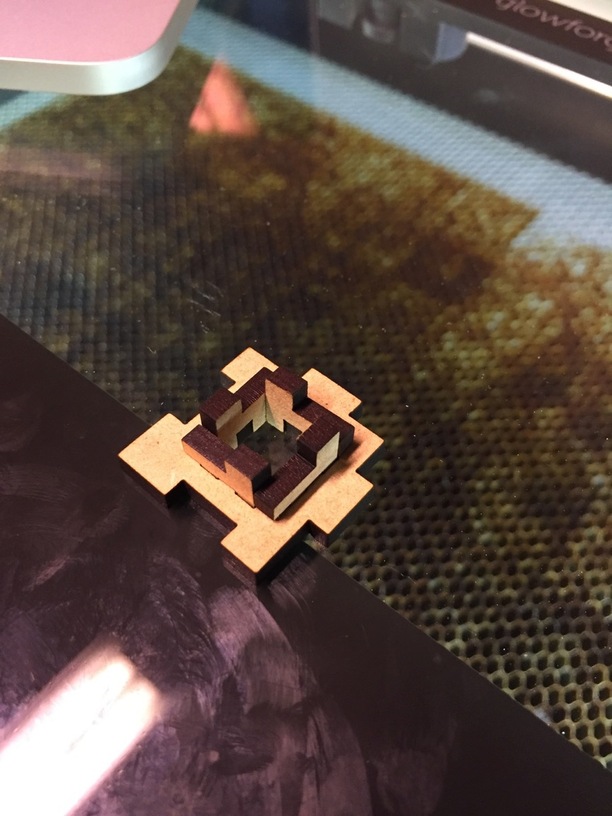
Just about the first thing I did with my glowforge was cut out some fractals, which I’ve posted about a bunch in this thread. That included some variants on what I’ve called a Menger pseudo-sponge: basically a small box that’s a modified six-sided cube with holes that mimics the exterior of a fractal object called a Menger sponge. It looks pretty cool, but…
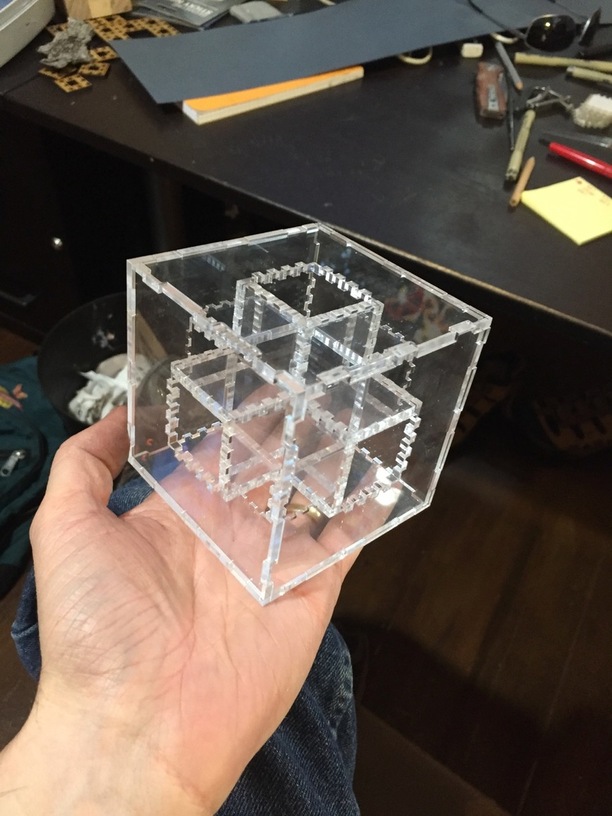
But I wanted to push my Menger pseudo-sponge into a proper Menger sponge with internal walls. The inside of a Menger sponge, the bits that you see when you look into the holes on the exterior, should be an enclosed series of square tunnels.
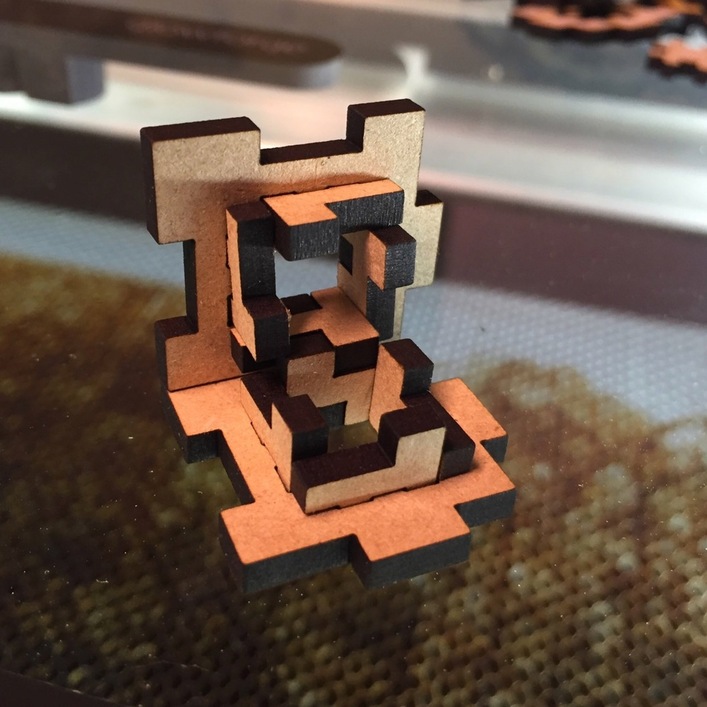
Which is a much more elaborately 3D object than the boxy shell I started with. And the glowforge isn’t a 3D printer, so I had to figure out a complicated assembly of flat parts for something much (relatively) larger than the thickness of the material.
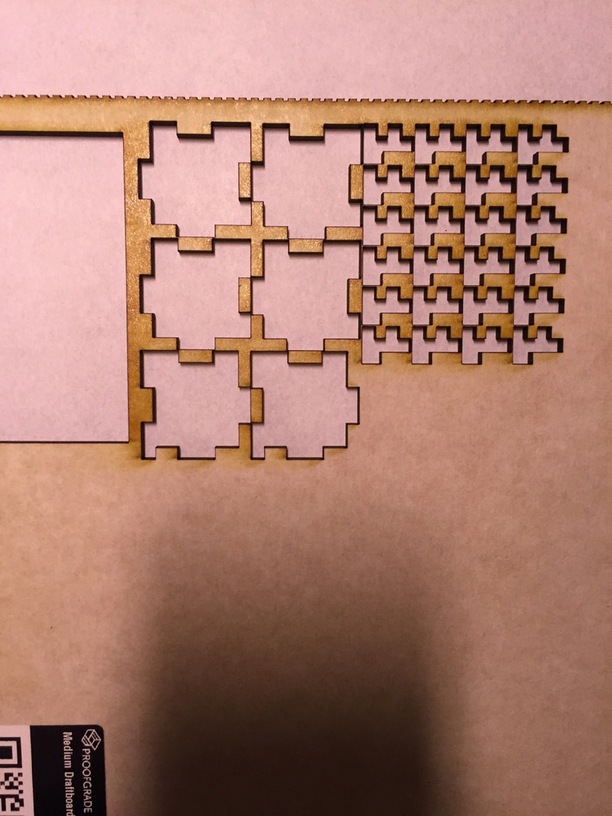
So I spent some time the last couple days working out drafts of the pieces required to assemble one.
What that shook out to was: there’s six outer cube-like faces on the sponge. Each of those has a tunnel in the middle, like a square donut, and those six tunnels each converge at a central open space in the exact center of the cube/sponge object.
One image per post, so I’ll lay out a bunch of replies here for the details.
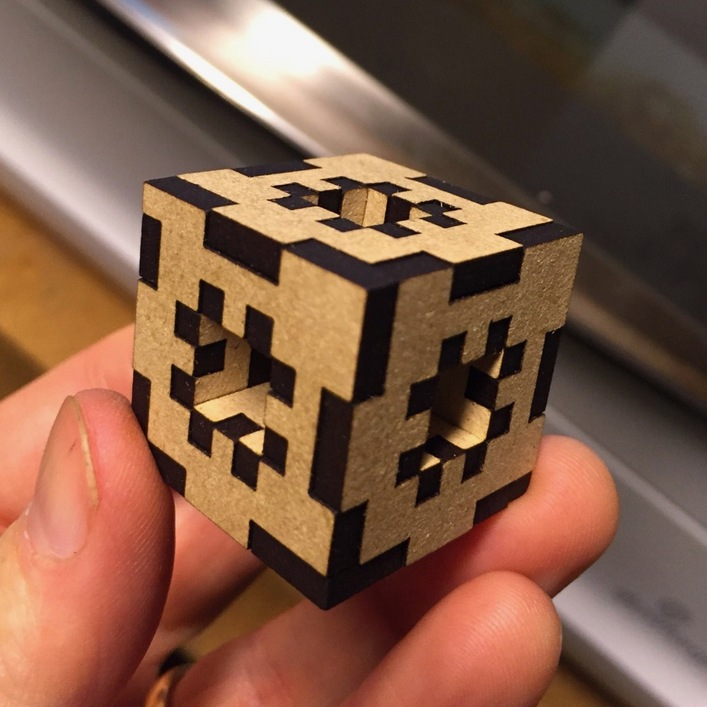
So while my pseudo-sponge had 6 pieces, for the six outer faces, this proper sponge adds an additional four pieces per face to create the four walls of a tunnel.
Each assembly looks essentially the same, and outer face with a little carousel of the small inner tunnel wall pieces slotted in. Though (for reasons I talked about while building the original pseudo-sponge version) the outer faces have two slightly different designs, one for the four “walls” and a different one for the two “floor” and “ceiling” pieces, to makes sure all 8 outer corners of the resulting object are occupied.
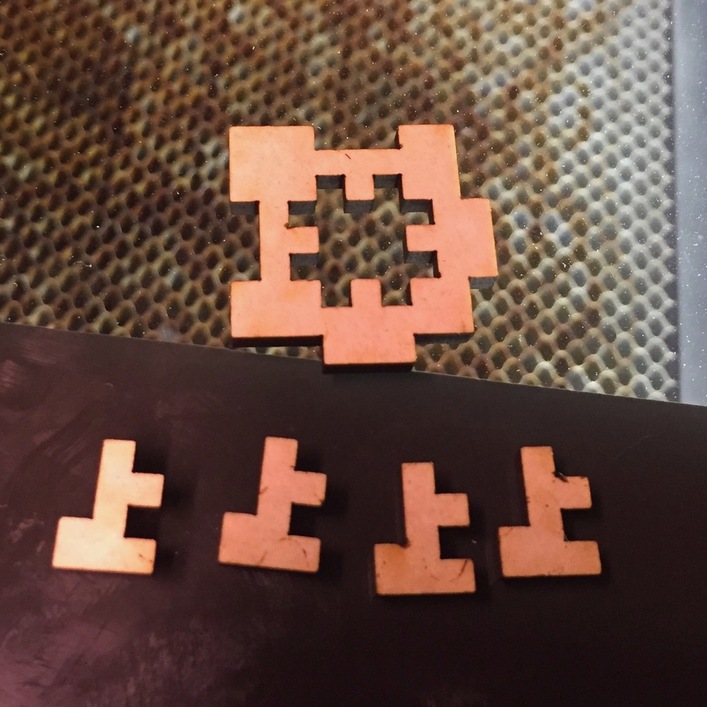
The shape of the inner tunnel pieces is cut so that they butt up against each other in their per-face carousel for a bit of extra stability, and so that when two faces get folded together they snug up half-and-half on the inner tunnel edges. It was important to me to come up with a design for that inner part that could be symmetrical across all 24 pieces rather than requiring any sort of “okay but WHICH small piece do I need here?” hair-tearing, even if it made the one piece slightly more geometrically complicated than either of a couple of alternating designs might’ve been.
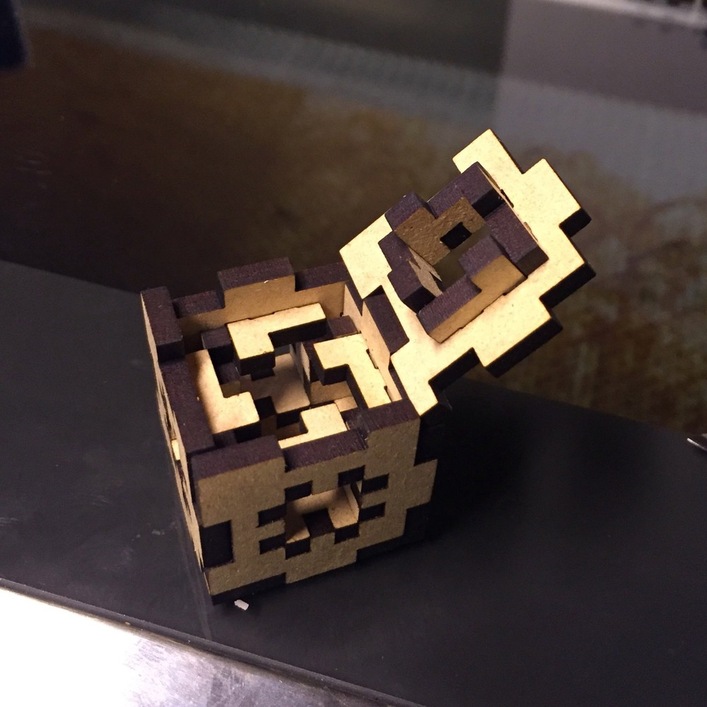
All in all it came out pretty well. I even got the kerfing just about right, so it holds itself together very well without feeling like it’s gonna snap in two during assembly.
I’m going to experiment with a couple other materials now that the draftboard version went well; I think it’ll look pretty great in acrylic. And after that: scaling up. It’s what fractals do, and I think a one-step-larger version of this would look pretty tremendous. But the parts will scale up too so that’s gonna be, oof, several hundred pieces? May take a while to work out the design, will definitely take a while to assemble.
I might not understand… You can upload as many pictures per topic/post as you wish. One at a time, or by selecting multiple pictures with every upload.
I gather its tied to Discourse user account status; mine is new enough that I get new user restrictions when trying to add more than one image per post. Presumably will age out once I spend enough time/activity as a member, though I don’t know if this forum’s thresholds for that are posted publicly anywhere.
No, using the Upload widget in the toolbar. I can try the other way next time I go to share some images. To be clear, though, it’ll let me try to put in as many as I like during post/comment composition, without complaint; it’s only once I hit go that it gripes about the limit.
For the sake of forensics, I’ll report back on the Discourse-being-Discourse front: verified that upload widget vs. drag-and-drop makes no difference to the 1-image-per-post new user limit (which is reassuring in a consistency sense at least!).
And a new discovery: maximum 3 user replies in a row, to someone else’s thread, which I discovered when pasting some related images into evansd2’s L-system fractals post.
Noting this stuff mostly out of a professional curiosity (for work I manage an online community running on its own custom forum software). None of it is a problem or anything; I can live with the temporary posting limits etc. Just my first time spending serious time with a Discourse instance, which I’ve known about for years. It’s interesting seeing it in action as commodity forum software.
(Narrowing it down: it looks like the new user restrictions are tied to whether one’s earned the “Basic” badge from the Trust Level set. Text of that suggests that my limits will go poof once I hit whatever activity metrics the board is quietly set for. In principle I’ve got capital-o Opinions about not communicating hard/numerical limits to users where they exist, but it’s a pretty low-stakes context for it so I won’t dig in on that here. Practical outcome is: I’ll just keep participating in any case and the limits stuff will sort itself out in time presumably.)
Anyway, Menger sponges! That’s what I’m really meant to be on about, and I did some more work today to scale up the 1-iteration design above by a factor of three, in anticipation of moving on from this to the self-induced headache that will be a full 2-iteration rework of the design.
It’s fully-enclosed, though I wouldn’t assume water-tight; the kerfing was pretty good but I’m not sure it’s even possible to get it that good even if it was better than this is. But I may pop a side of and fill it up with jellybeans or something tomorrow to emphasize its containerness.


 Practical outcome is: I’ll just keep participating in any case and the limits stuff will sort itself out in time presumably.)