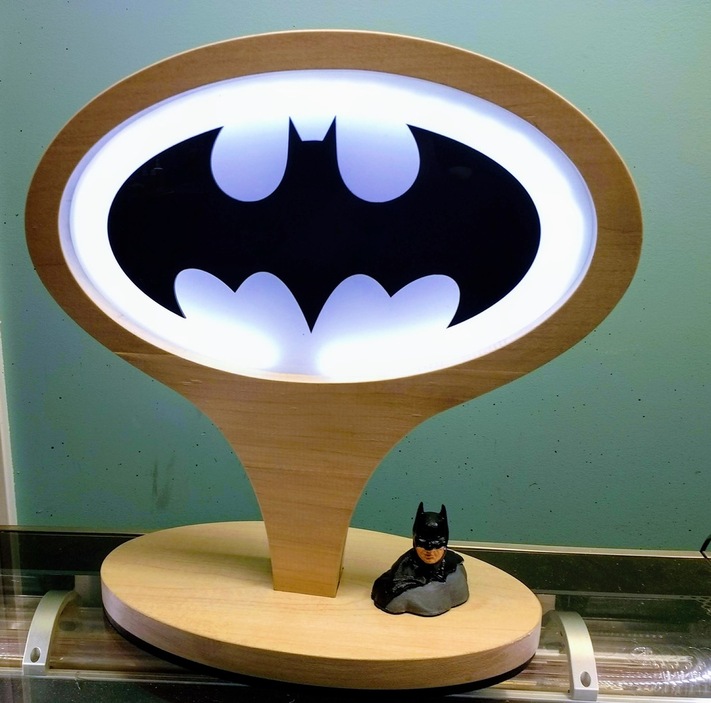
Well… made with a great deal of assistance from a Glowforge:
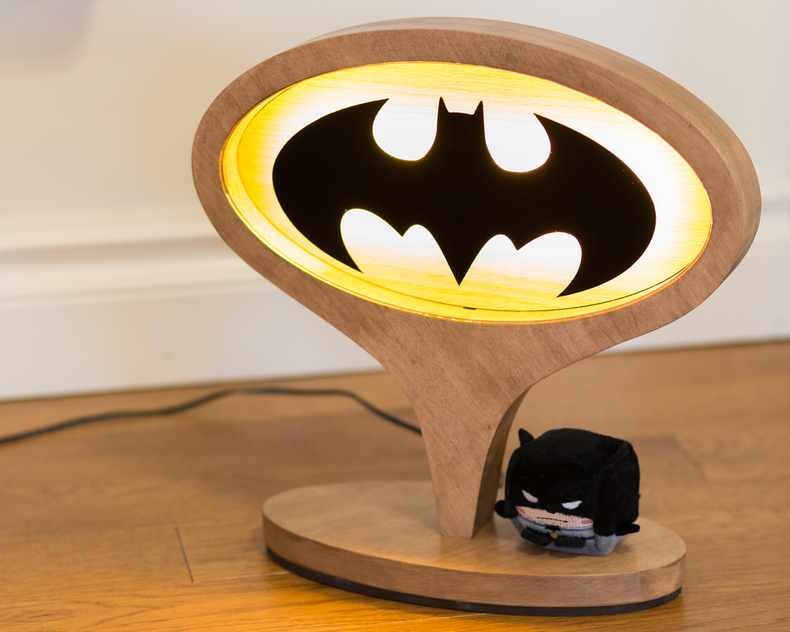
The lamp is solid maple, made from 3/4" thick boards. I used the Glowforge to cut out templates, and then used a router to cut up the maple. Who needs an X-Carve or a Shaper Origin? (The answer is me. Totally me. ![]() )
)
The little Batman cube isn’t just decorative; he’s actually the switch:

(Youtube link, in case that video doesn’t load for you: https://youtu.be/f_72eWaWQDY)
Back in November I made a lamp for a wedding gift. The friend I went to the wedding with kept saying she was bit envious that I made a lamp for a total stranger but didn’t make anything for her. A while later I was at the Comic Book Shop and came across this little plush Batman cube. She’s a huge Batman fan, and I thought “This would make the perfect switch for a Batman lamp!”
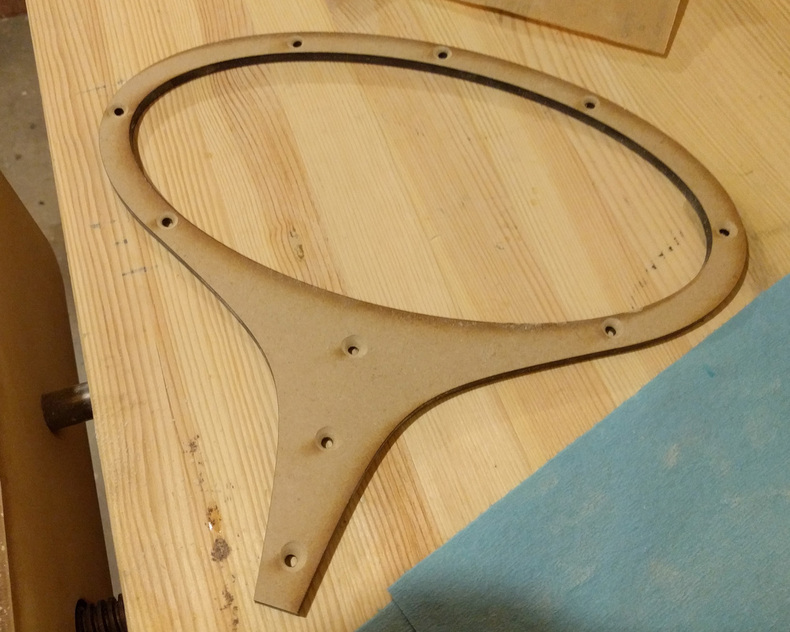
I’ve never done any work with router templates before, so I had a couple of false starts. I originally tried attaching my template to my work piece with a few dabs of wood glue, but in the end I decided to use screws. I used a brass template guide (D from here) with a fairly low height so I could cut the templates out of 1/4" draft board.
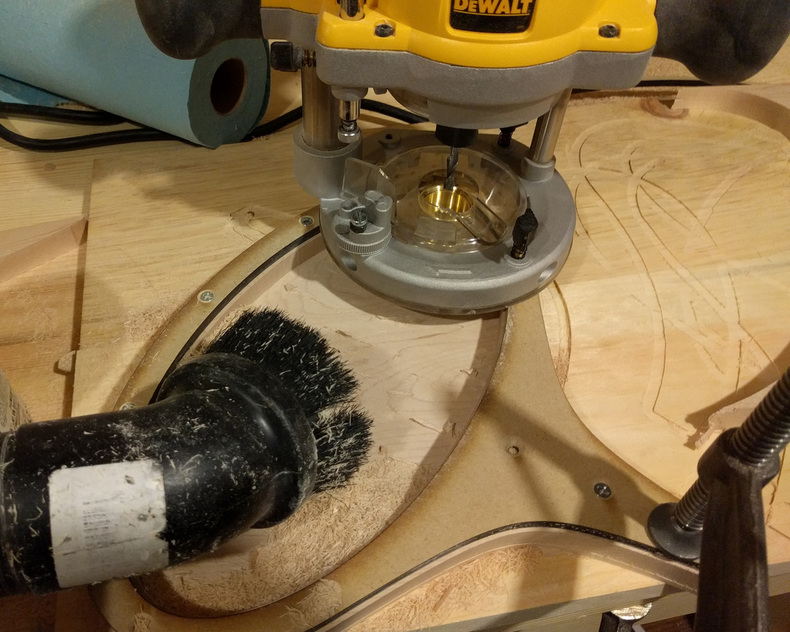
My very first attempt, I was using a 1/4" end mill with a 1/2" shank and I seemed to be having a hard time getting all the way through the 3/4" stock. I realized it was because the shank was bumping into the brass template guide, and was heating it to nuclear temperatures. I only melted the plastic base plate of my router a little bit. O_o I went and found a longer 1/4" endmill with a 1/4" shank after that.
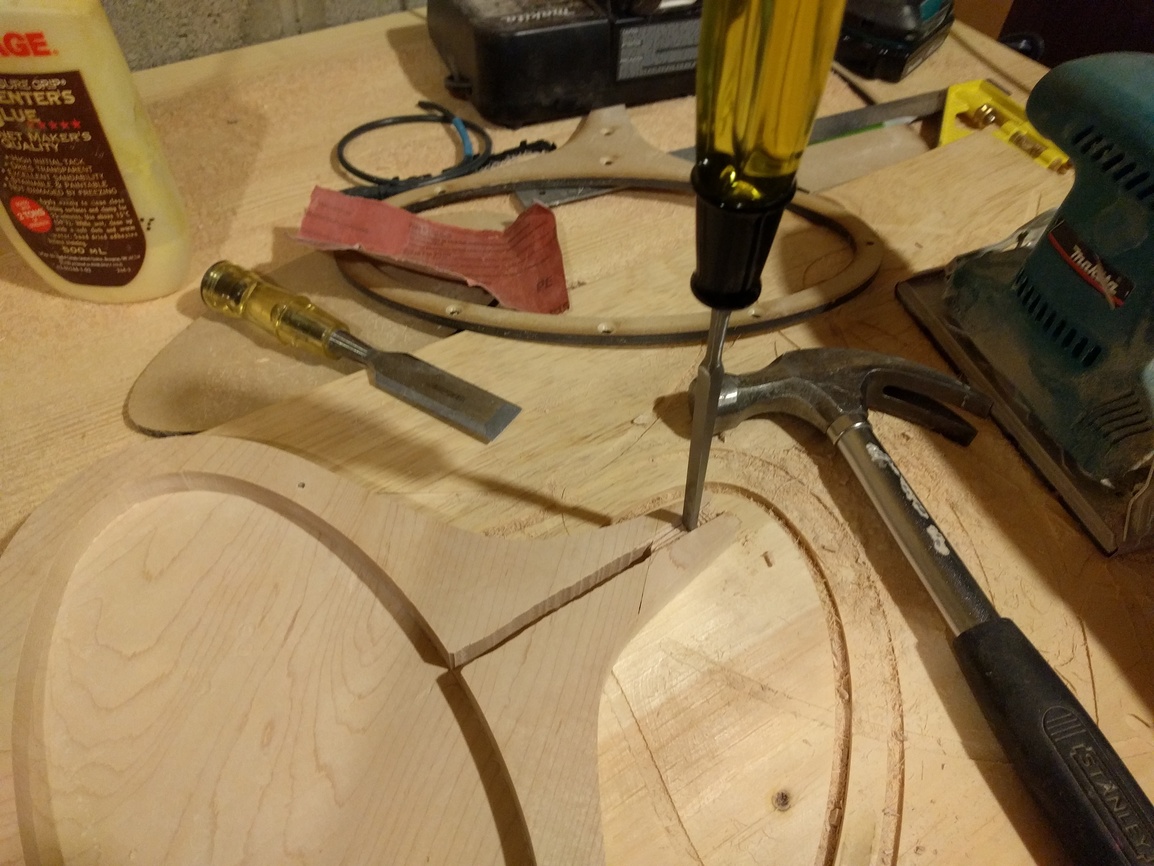
Here I’m chiseling out the last little bit of the center section, which will let wiring pass from the top of the lamp down into the base. If you look closely, you’ll see that I had to replace a little bit of the bottom part of this piece; I did most of this with the router, and as I got close to the end I thought “I should probably stop here. This work piece is getting really skinny, and I don’t want the router to destroy it.” I thought that about half a second before the bottom bit exploded. -_-
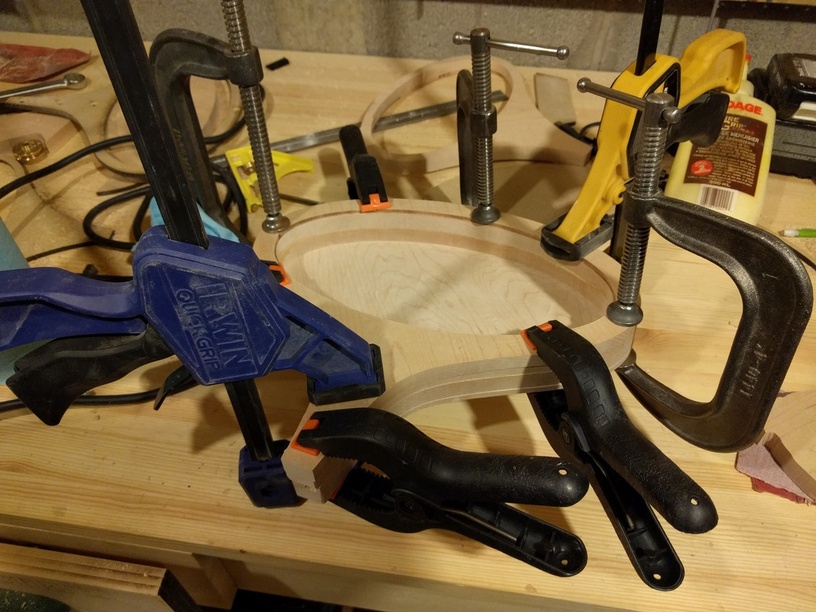
The main body is made up of two “hoops” glued together - one cut all the way through, the second I milled out the center but left the back. The wiring channel is hidden in the middle.
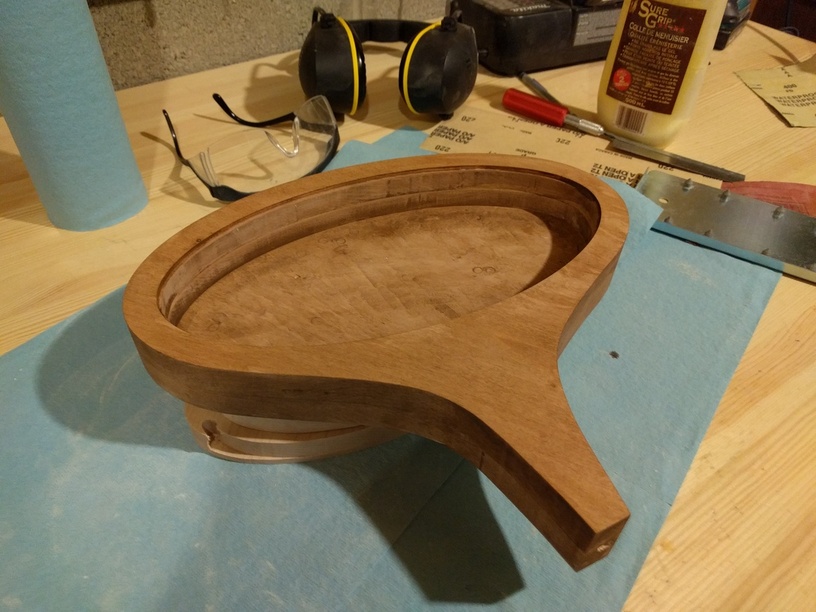
After some sanding and staining.
I used more or less the same tricks to make the base.
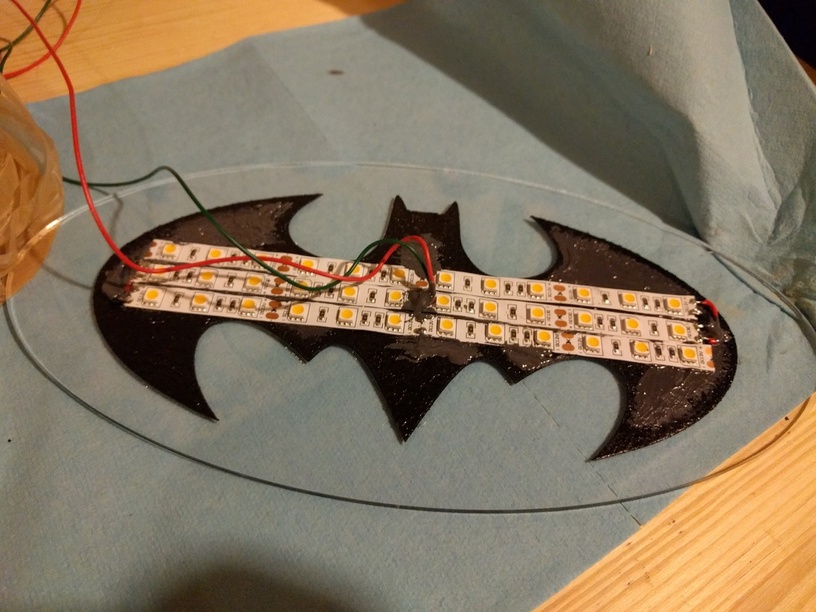
For the Batman logo, originally I tried cutting a logo-shaped hole in a piece of clear acrylic, and cutting the logo out of black acrylic. This looked really good, but I had some problems with the clear acrylic cracking at the pointy bits on the wings. So instead, I scored the batman logo into some clear acrylic, then only removed the protective backing paper from the logo, then I spray painted the whole thing with some black rubberized undercoating paint, and finally I removed the rest of the backing paper. This let me use the backing paper as a mask, and got me a nice black logo. I did have some problems with surface tension in the paint causing little tiny pinprick holes without any coverage where light would shine through, but I fixed this by being a bit liberal with epoxy when I glued the LEDs to the back of the logo. I carefully cleaned this whole thing with a Zeiss lens wipe before final assembly, but I still managed to get some dust on the back inside of the logo. ![]()
The base has a magnetic reed switch embedded in it, and then Batman has a little rare earth magnet sewn into his bum:
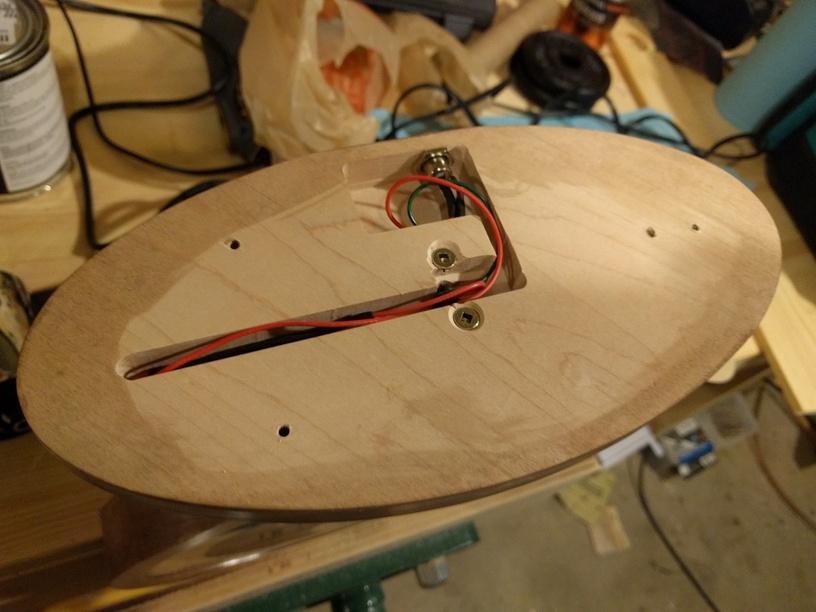
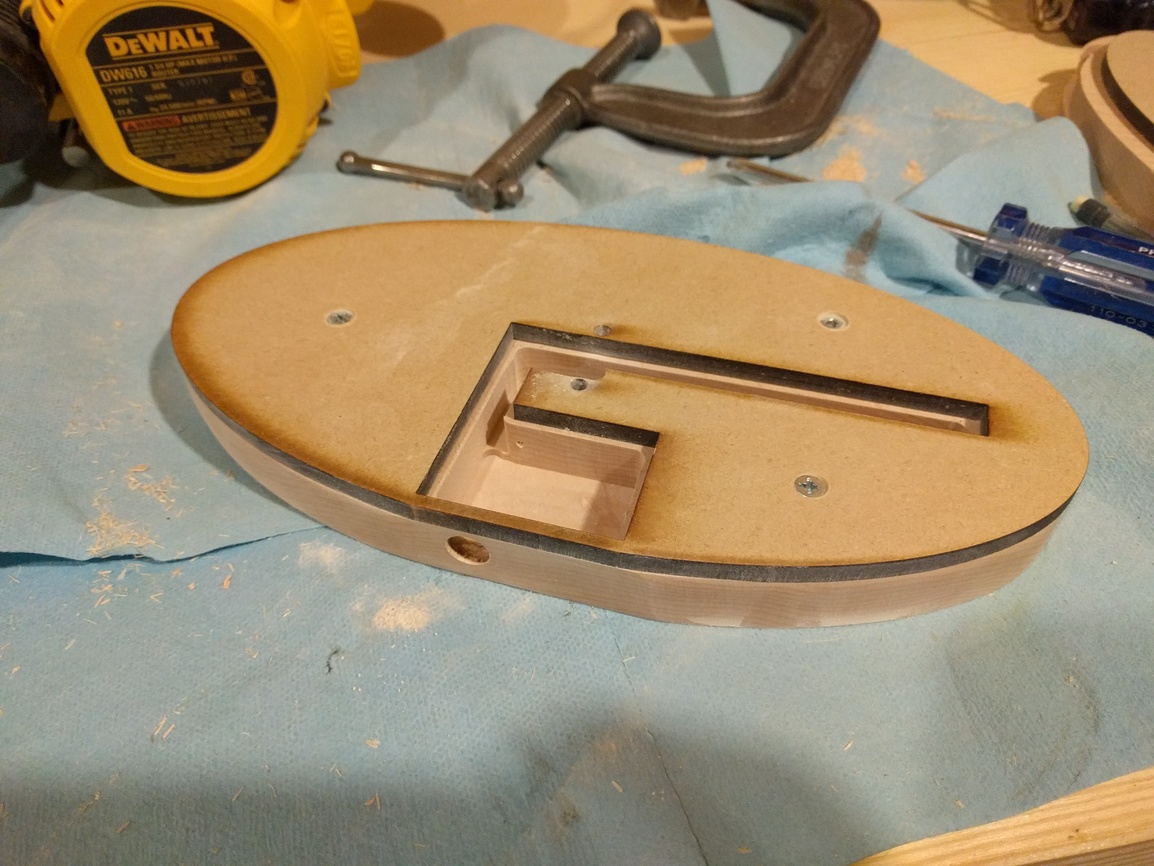
After that, I cut out a base plate from 1/4" draftboard to hide all the wiring, and added some sticky-back felt pads.
If you’ve read this far, thanks for reading. ![]()
Edit: Fixed a photo.


 I was thinking about doing a Hello-Kitty shaped lamp along these lines for my daughter, and was going to do white acrylic, because I won’t be able to hide the LEDs behind anything.