Bendbox experiment

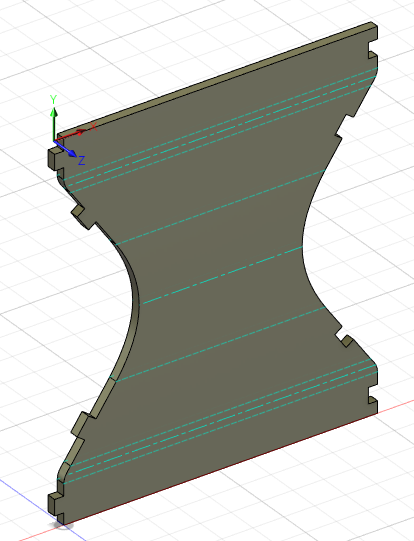
I’ve grumbled several times about the steep learning curve of Fusion 360, but it keeps drawing me back, like Don Quixote to a windmill. So I present to you the Bendbox (aka the “Box-on-a-Diet”), which represents my stab at learning the sheet metal tools and the colorific plugin for the Glowforge:


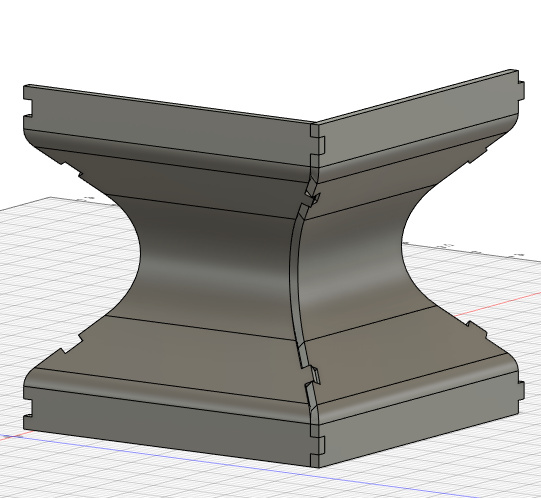
I started with a “simple” sketch of the profile of one side. (It was simple in appearance, but fiddling with properly constraining the relationship between curves was fiddly.) Next I swept a surface and used rotated copies as snipping tools to carve the side into its hourglass shape:

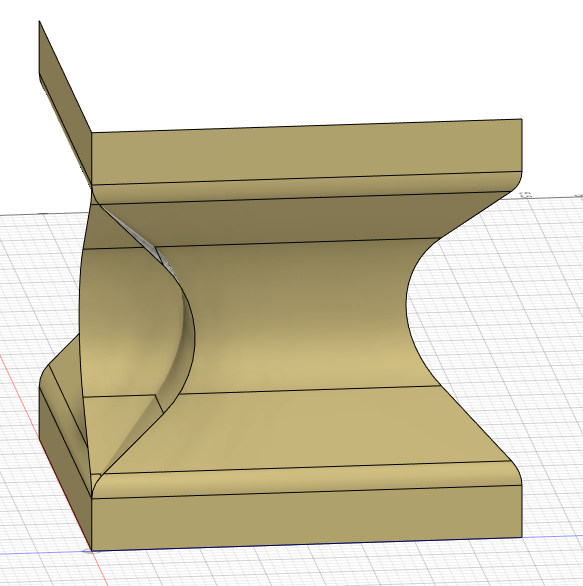
The top and bottom tabs were easy enough, but the curved tabs are tricky. Not only do the sides meet there at a non-square angle, but one side curves over the edge of the other:

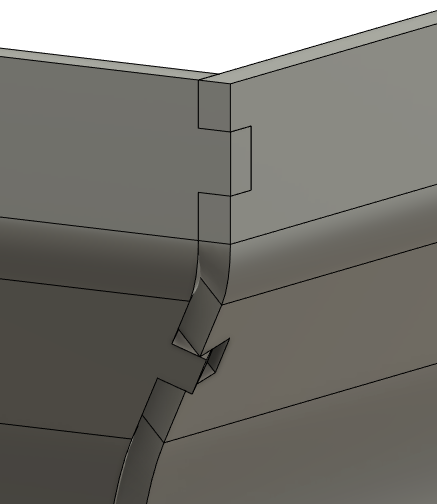
This is where Fusion 360 really shines… I could make modifications to the sketch and instantly see them reflected in the rendering of the 3D corner as they were propagated forward through the entire construction history. So cool! A quick interference check let me know exactly when I had things adjusted properly. (My Inkscape workflow would have required lots of tricky math or, more likely, a series of prototypes as I honed in on the right values.)

Finally I converted the thickened side into a sheet metal part and generated an unfolded view:


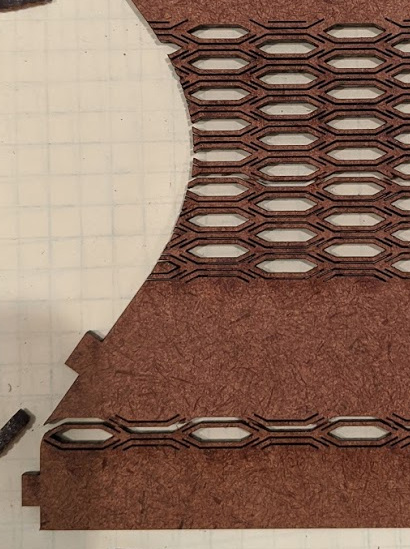
I used the colorific plugin to export an svg and experimented with living hinges in Inkscape. (This is where Fusion 360 comes up short… I was not going to fiddle with cutting profiles with that many cuts, as that part of the system is still very manual.

My first attempt was a hexagonal living hinge (from the Obrary swatches), but it was far too fragile even for my gentler bend radius:


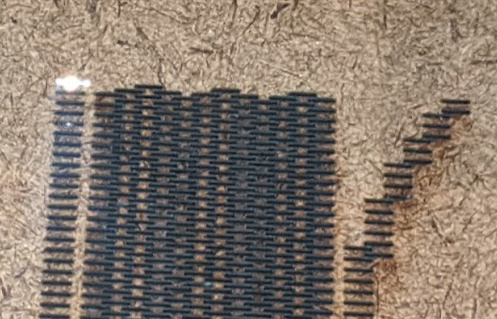
So instead I made a fine mesh of offset dashes for maximum bend-ability. (My prototyping material of choice is Home Depot 1/8" chipboard, not a high-flex material.) Here’s the mesh mid-burn (gotta love that burn ordering algorithm):
image
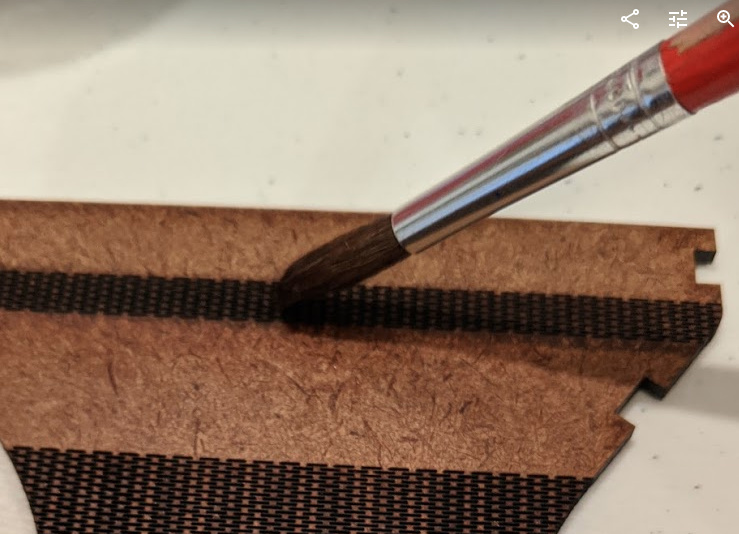
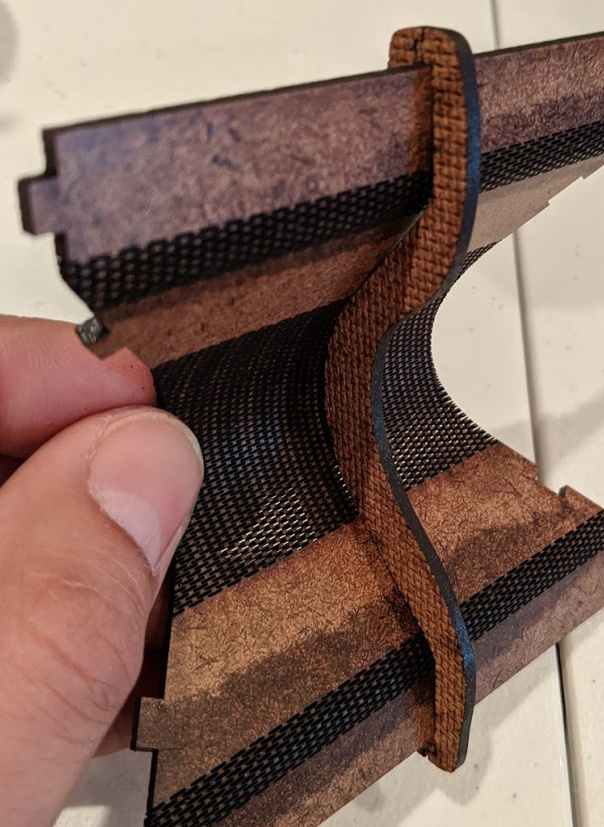
Next some alcohol on the tight bends:

And then into the jig (a Fusion 360 quickie that snaps together at top and bottom):
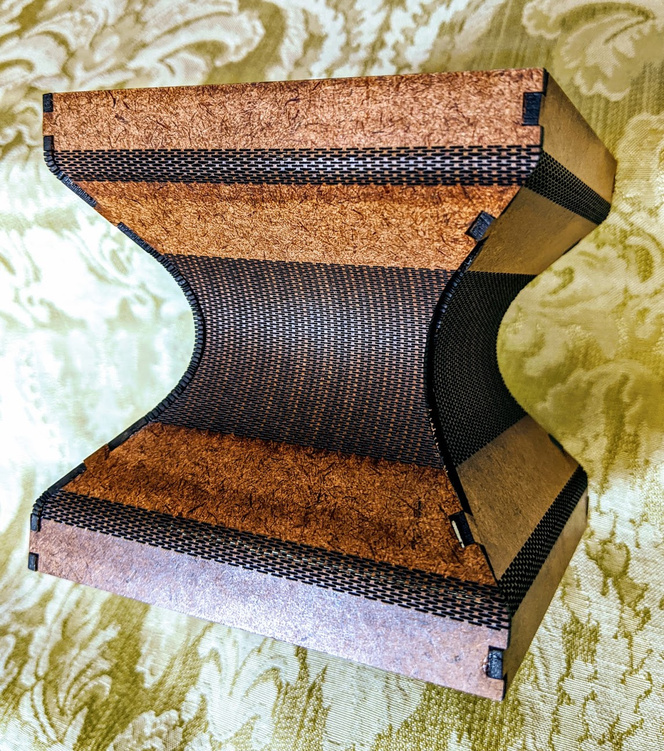
And then assembly:

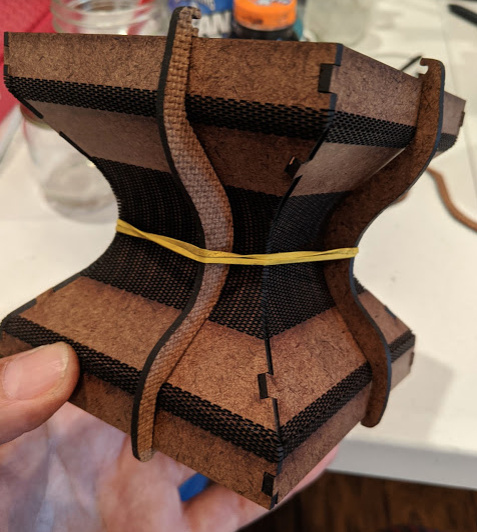
And that’s about it! No adjustments were necessary, everything fit perfectly just as Fusion 360 showed:
image
It’s definitely a nice tool to have in the arsenal!

51 Likes

Impressive mix of techniques… but what is it?

A learning experiment… Right there in the title! :wink:

9 Likes

I use SolidWorks and don’t know Fusion well at all. When I have to do patterns, I make a seed and then use the built in pattern tools. Makes it a lot easier to adjust later. This may be what you did also.

When I prep for cutting, I create a new sketch on the surface of the flat part and then use the SW built in “Convert Entities” function. This creates a new sketch on the edges of the existing sketch, including curves, holes, etc. Then I offset that sketch for the kerf adjustment. Then I create a drawing of the part and add a sketch over the second sketch, but this one in the drawing. Then I can hide the base sketch and set my colors to control cut priority. Depending on your complexity the extra time can really be worth while.

4 Likes

Fusion has a whole workflow tab for manufacturing, including profiles accounting for kerf in cutting scenarios. It’s impressive, but not built (yet) for thousands of tiny cuts. No problem for me, I just want it for its 3D smarts!

4 Likes

Wow! Nice corset box! You pulled off some serious curves on those sides! (Rather like @rbtdanforth’s cylinders.) :sunglasses:

6 Likes

Wow, your Quixotic quest is paying off!

I love both your use of the SM tools in Fusion 360 and your use of jigs in assembly.

Like so many things posted here, I don’t have a use for a corset box, but the technics you have shared will stick in the back of my head and be used at some point.

Thanx

7 Likes

That is really cool! My first Glowforge project was to do something like that only round. It did not work out near as well :cry: I had visions of a box with a colonnade around the outside. Kinda like a Greek temple.

5 Likes

Whoa! Nice work, baby bro!

5 Likes

Wow. Love this. Great curves

5 Likes

Amazing! Kinda looks like an architectural piece on the side of a building to me.

I wonder if one could make living hinges right on the tabs, to make them match the curves and slants better? Probably not, or at least not without plenty of glue.

3 Likes

This is a terrific piece and write up. May be showing my age but looks like Mae West box to me.

4 Likes

With a fine-cut hinge like I used, it might work…

2 Likes

Do it! Do it!

3 Likes

A quick Google search for Mae West box (or corset box, mentioned earlier) was unproductive… Though it’s a stretch to call mine a box when it has no top or bottom in this iteration!

1 Like

Mae West was an old time movie star - silent to talkies) and the nick name for a life jacket.

3 Likes

Major kudos! Love your experiment! I get very excited with Fusion possibilities, have zero time to get where I’d like to be.

2 Likes

You could try making various shapes, instead of four sides, try 6 or eight, or an odd number. The more sides you have, the more round it becomes, until you have a column. Experiment with different materials like acrylic and now you have the potential for colored lamps.

2 Likes

Did fusion 360 come up with the stagger logirythem?

1 Like

There is also the possibility of soaking or steam bending like so

Though I was not able to get more complex than cylinders :stuck_out_tongue:

3 Likes