Here is my stuff from the first day of Forging! It’s all pretty basic, but I’m looking forward to getting into more complex stuff today!
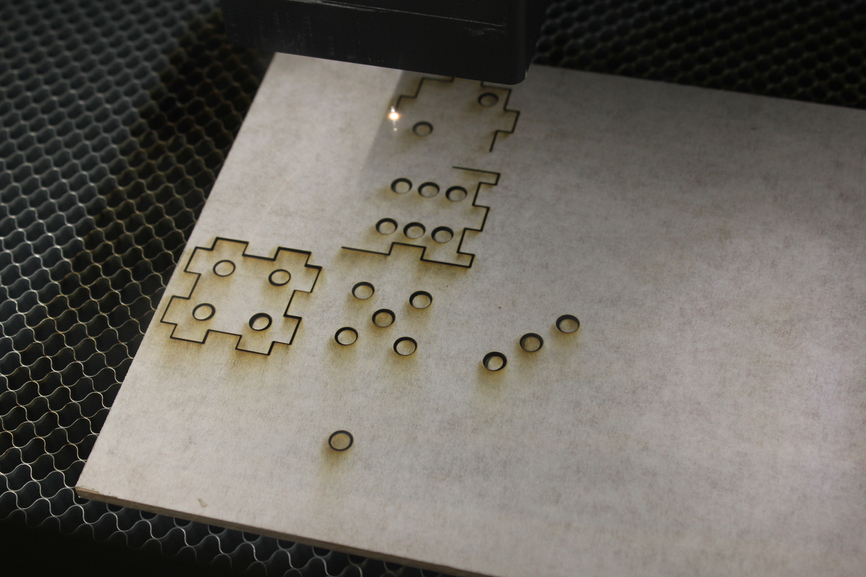
#1 - D6 (1/8" hardwood)
I had this designed previously. It didn’t account for material thickness so it is very loose. I am going to work on redesigning this today.
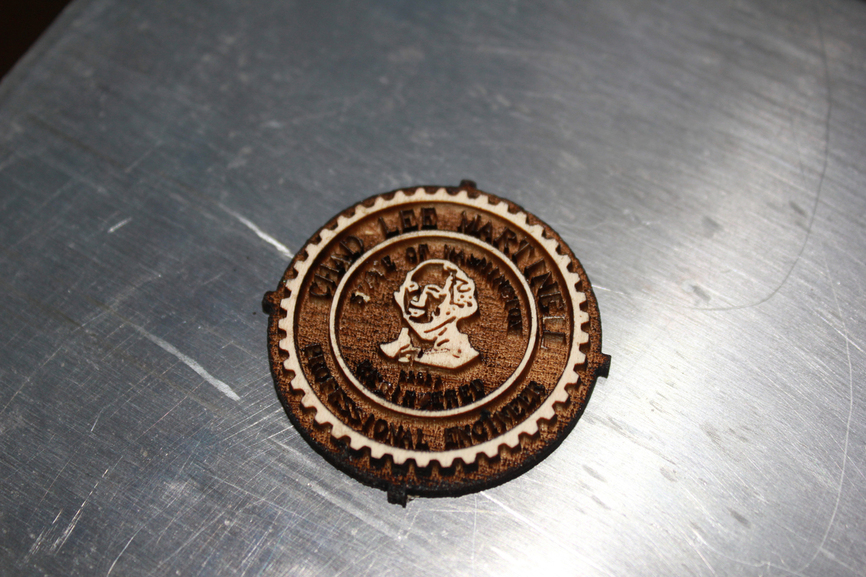
#2 - PE Stamp (1/4" ply)
I wanted to attempt the PE Stamp that @dan graciously cut and video’d for me last week. I set the engrave to the deepest setting, and I also had a score and an engrave.
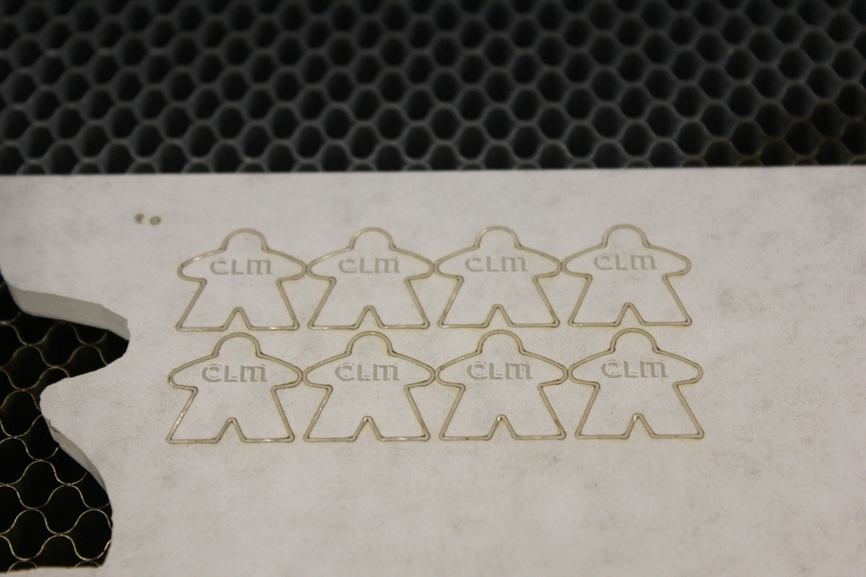
#3 - Meeples (1/4" Acrylic)
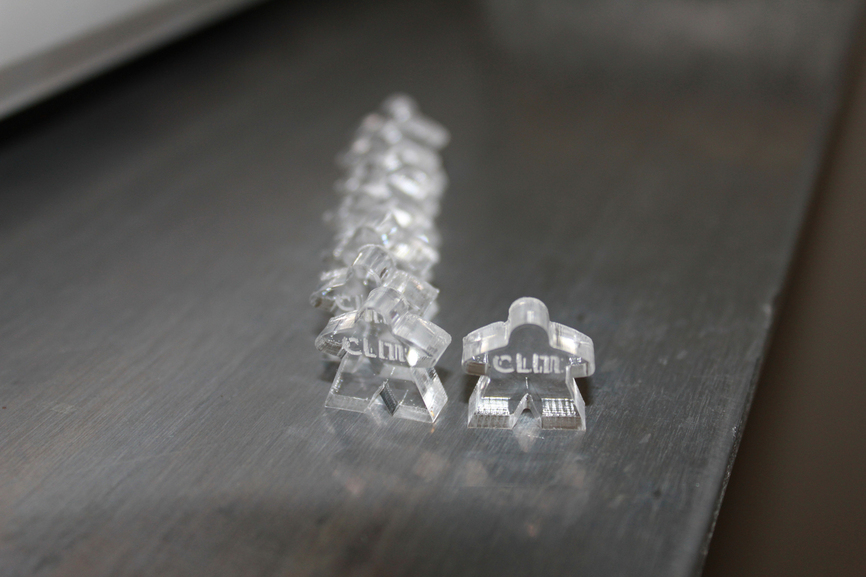
I decided to make a custom set of meeples with my initials. 1/4" acrylic is a little too thin for meeples, but they would be capable of standing on end, so why not? THey stand on end, but they all lean, some more than others.
Are the Meeples flat? The one on the front right looks like its arms curl forwards but it might be a fisheye camera effect. I am just wondering why they lean so much. I would expect the beam to be tapered but not that much.
More cool tests…I’ll be poring over the photos closely…(thanks for testing thick acrylic!)
Regarding the leaning…
Can you tell me if the focal point on the laser was at 3 mm for the 6 mm acrylic when you did the test? (Roughly midpoint on the overall thickness?) Or do you even get that much detail shown in the software at this point? Is it automatic for the poofgrade?
Thanks for the info if you are allowed to impart it…if not don’t worry, I’m patient. (And getting more antsy every day.)
I think if you can set the focal point at the exact midpoint of the material, the cones on the beam will offset each other and give you a level bottom. But I don’t know for certain, and it might be harder to hit it in practice than in theory.
It’s probably going to be more pronounced in thicker materials, and 1/4 inch is thick for a laser beam.
Haven’t studied that part of it yet. (Still working on parametrics for now.) I do plan to read up on it a bit more when the time comes. I think I saw one link to a discussion on it here on the forum, but now I can’t find it.
(And I might be totally wrong…like I said, I only read one article about it and that was a couple of months ago…my memory might be faulty.)
My understanding is that there is a slight angle to the laser. For the 1/4 in material, the bottom would be slightly angled. If you flipped it over and somehow got it aligned perfectly, I think there would be a high point in the middle and the meeple would then be tipsy. I just don’t know how to get it level, maybe angle the material to compensate?
I’m guessing we’re still encouraged to direct questions to Dan, instead of the beta testers.
I get the impression that the taper might be more complicated than just tracing the profile of the laser beam. I cut everything I do with the laser focused on the top surface, yet the taper that is produced angles outward. (The cut makes something that resembles a deep valley. There isn’t an overhang.)
Then again, I’m gauging the focal point with the “stick” that my primative laser comes with, so maybe I’m not really focusing where I think I am.
As a reminder, we’ve asked @chadmart1076 and the rest of the beta crew to focus on their own designs & leave Q&A about the Glowforge printers themselves to us.
Proofgrade materials will give you automatic settings that adjust all the variables (speed, resolution, power, focus) automatically so you can just pick a result - light engrave, dark engrave, draft, high resolution.
Right. The easy way to imagine this is that the top opens up, and the second the bottom opens up too you’ve cut through and you’re done.
You might be able to use the hourglass shape of the beam to sculpt the cut to be more X-shaped than V-shaped - I haven’t tried - but it would mean moving much more slowly. Your Glowforge printer has manual settings so you can experiment with things like this as well!