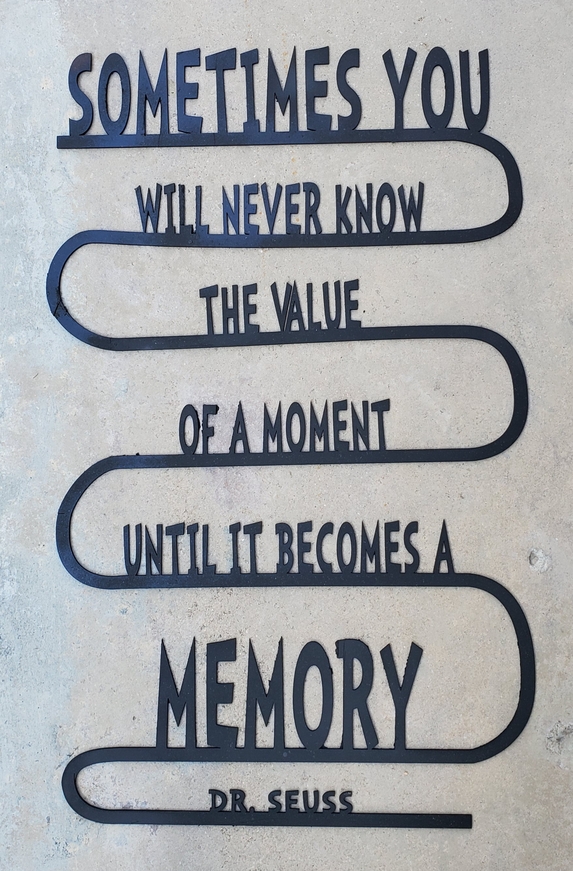
While visiting our twins’ godparents recently in their new home, the godmother asked me if I could make some word art for a blank space on the wall in their family room. She gestured with her hands for the size and told me she wanted a specific Dr Seuss saying. Oh gee, that would require use of the pass through, a road yet untraveled by me. Challenge accepted.
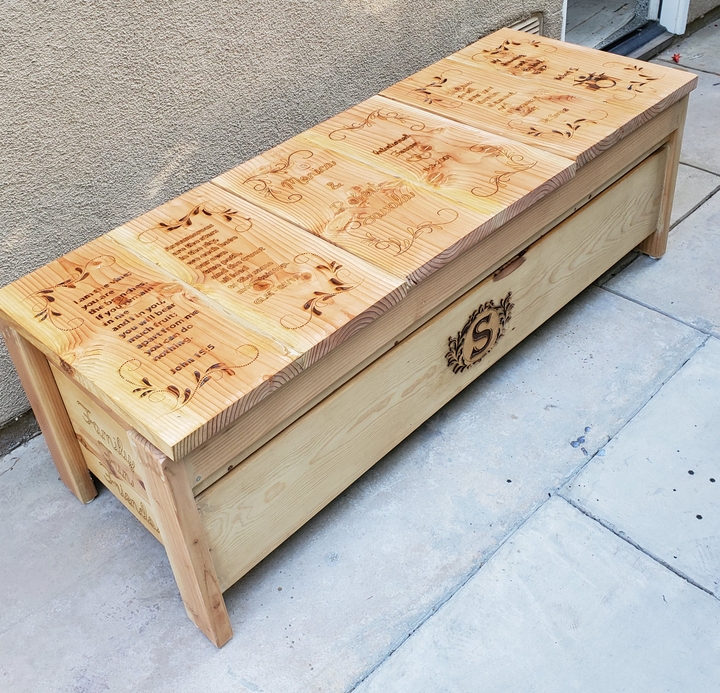
Later, as we sat in the back yard, they mentioned they were going to have a guy come to build a 5 foot long bench up against the garage wall, to put over some sprinkler valves to conceal them from view. My wife volunteered me to do it for them for free. We later settled on $50, basically for materials, piano hinges, varnish, etc.
Before starting on the word art, I read through the GF tutorials and forum advice on using the passthrough, picking up some useful tips. But I then mostly proceeded on my own, using a measure-free method. Using Illustrator, I designed the overall piece so that the connections between the 4 sections to be cut was pretty isolated. Once it was all laid out, I split the paths at every point it was to be a different section. I recolored the vector lines in each section to be a different color. I then put a horizontal score line at the top of the first section, off to the very left, and another aligned with the bottom of that section (also off to the very left). I then did another such score line at the bottom of the next two sections, each in a different color. In this way it did not matter how long each section was (they did not have to be the same), and I could even resize the entire thing if I wanted to. The score lines were grouped with each relevant section. I then selected all of the sections (and their grouped score lines) and aligned them at the top. Saved it as an SVG and uploaded to the GFUI.
After pushing the fiberboard in through the front passthrough slot, perfectly flush against the left side, I used magnets to hold everything in place. I then selected the first section’s score lines, ignoring everything else. I printed them. When that was done, I opened up the machine and taped a toothpick off to the side on the flat area of the crumb tray and extending over to match up with the horizontal upper horizontal line. I then ignored the score lines, selected the upper section to be cut and pressed the button. When the first section was done, I pushed the fiberboard in and out the back passthrough slot, stopping when I could eyeball that the next score line was lined up just every so slightly above the toothpick marker. Magnets in place again. I then selected the lower score line for section 2 and the cut area for section 2 and printed it. I then pushed the board in some more, repeating the line-up and printing process for sections 3 and 4. When all was done, I had a piece of word art about 18 inches wide and 32” long.
For the bench, I used the GF to engrave 6 thick 10 x 18” boards (without the crumb tray). Each pair of boards was later glued together with biscuits for support. I also used the GF to engrave the end pieces of the bench, and to cut out a family monogram that is affixed to the front with glue. Although the bench was specifically sized to fit over the sprinkler area, it could actually be used anywhere. I split the seat into three pieces so they can lift up the portion that is relevant to what they need to access at any point in time (sprinkler, hose, etc.) They got their money’s worth for $50.