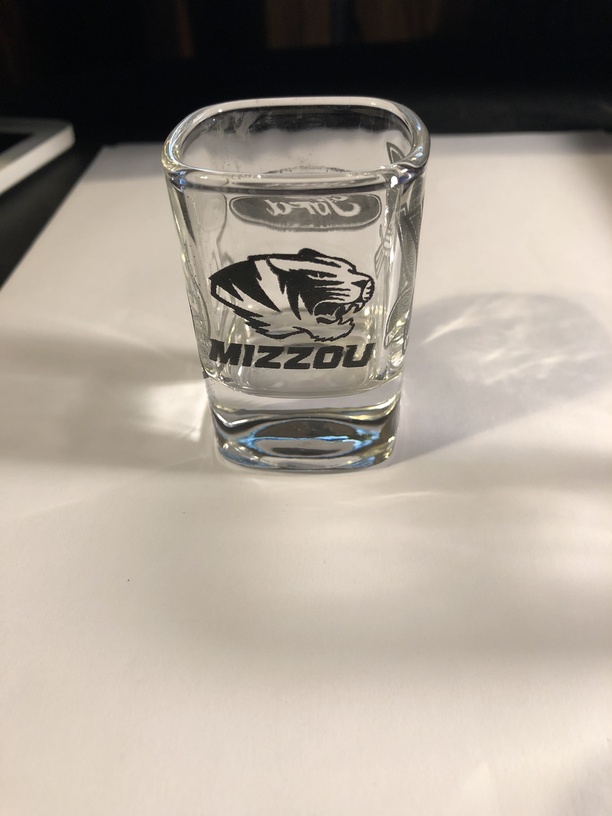
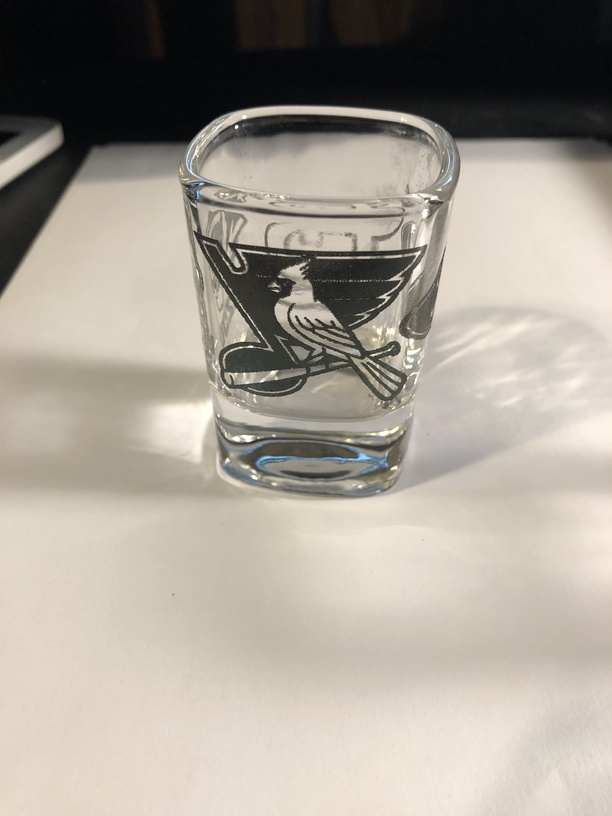
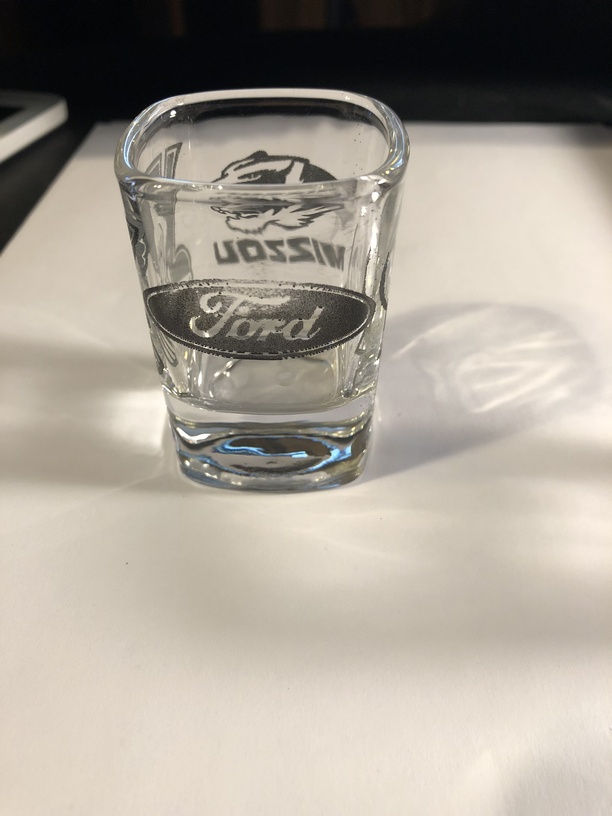
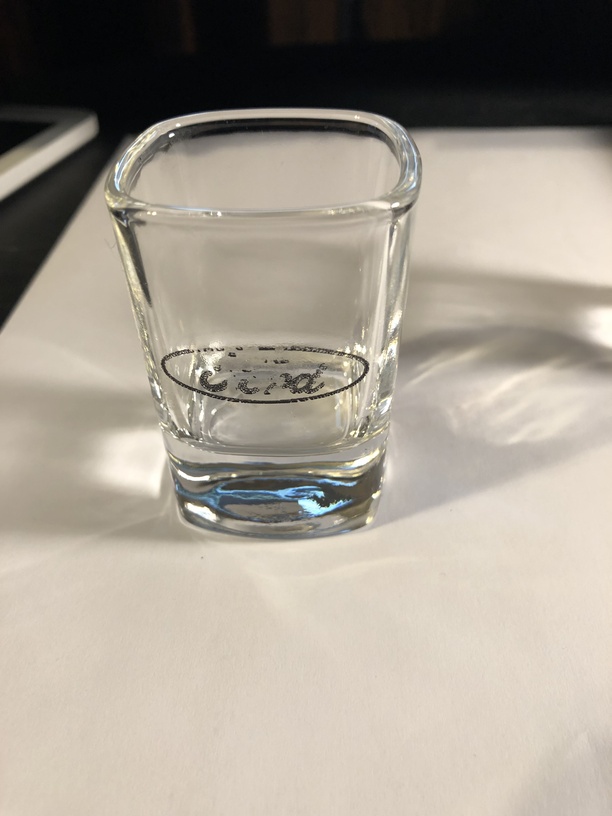
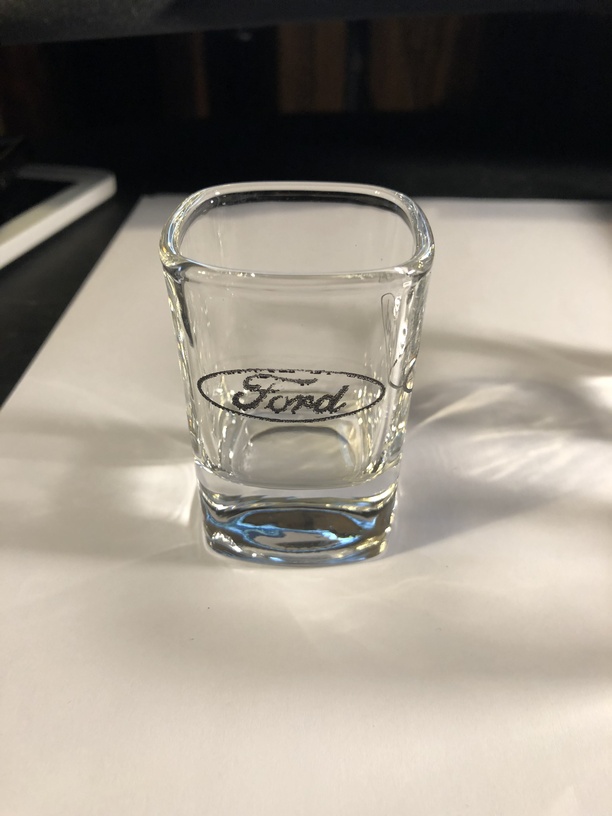
I recently purchased the Cermark LMC-6044p which allows for black markings to be engraved on glass and ceramic. Utilizing the same products (square shot glasses) I have been having varying results. In the images below you can see the Mizzou logo and the Blues / Cardinals logo came out pretty well, but when trying to do the STL logo half of the image didn’t mark, then with the Ford logos I just can’t seem to get a clean version. All of the images used have been high quality jpeg images and I’ve been using the same recommended settings 250s and 30p. As far as height settings I have been utilizing the “Set Focus” feature. Any help / advice would be appreciated. Thank you in advance!

4 Likes
Oily spots on the glass?
4 Likes
I got nothing except I hope you get it fixed before tonight’s game so you can do celebratory shots!
3 Likes
I agree, this looks like an issue with the glass. Something is different about those spots.
Perhaps more power would help?
or maybe clean it with alcohol before spraying. 
1 Like
Yeah good point, a thorough cleaning would be the first step.
1 Like
I appreciate the replies. All of the glasses were wiped down, dried, then sprayed and engraved. I will try cleaning them with a solvent or alcohol this time and will post results. Thank you all again for the suggestions.
I just got my Cermark in the mail today … did you figure out a remedy? I would like to try out some on these spice jars I got to see a comparison on how they look with the Cermark…just hoping I don’t come up with the problem like you did.
1 Like
Hey, I actually am sitting down today to play with it some more. I don’t know if it was the image file I was using or what, but I will let you know later when I get it set up again. Sorry for the delayed response I just don’t get on here / use the laser as often as I’d like.
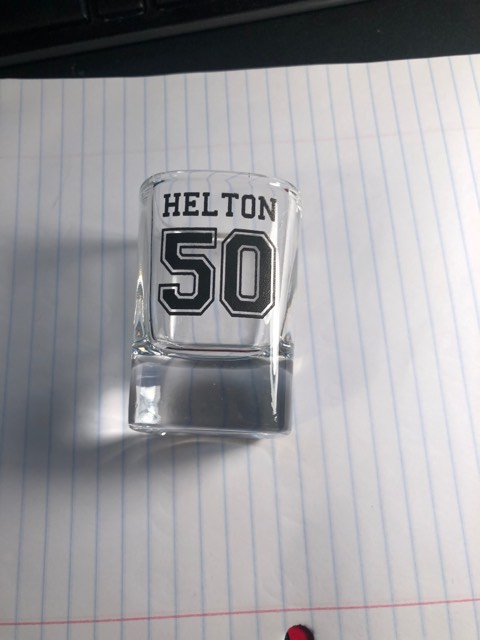
I think I may have hit the sweet spot with it. I tried multiple settings with mixed results until I got the bright idea to mask over the Cermark.
- The supplied shot glass was done with a smooth and dry layer of Cermark spray
- Then I put masking tape over that
- Settings were 400 / 80 with “unknown material” but using “set focus”
12 Likes
That looks great!!! Did you not worry that the masking tape would melt into the cermark or something?
My worry is on the larger spice jar I am kinda hitting too tall (without honeycomb) with just a piece of printer paper underneath it (but adding the cermark/masking would make it where I wouldn’t need something below the glass (for the flashback or whatever the reason was initially)??? I have to measure with the calipers because one way the jar is narrower than the other way.
I’m getting ready to order more jars…but was waiting to see what you came up with … so I’ll try out the cermark tomorrow and see how it goes. hmmm wonder if the “set focus” was what I was missing on the larger diameter jar (it cracked even with dish soap covering it).
Oh do you have a Pro? Wondering if I need different settings.
Thanks for replying back!
Masking (unless you use duct tape!) is effectively invisible at those kinds of power/speed settings, it will be vaporized instantly. It just protects the non-engraved areas from smoke/debris.
Flashback doesn’t apply here. It’s what happens when the beam breaks thru regular material on the honeycomb bed and is reflected by the honeycomb onto the lower surface. leaving irregular burn marks along that lower edge. Masking or paper prevents that reflection from marking that surface.
5 Likes
Honestly I have an abundance of extra materials just for things like this where I have to try different settings etc so I didn’t really worry about anything melting. I would have just rotated the shot glass and tried again on another side.
I haven’t yet had an issue with glass cracking, but these shot glasses are made from pretty thick glass. When I did engraving on them in the past with no Cermark just etching into it I used the soap method and it worked out pretty well.
As long as your jar is under the 2" limit with the comb out you should be ok. That’s typically how I make sure that things run smoothly for me. I pop up the comb then measure my material and add whatever I need to get it in the 1.5"-2" sweet spot. The “Set Focus” option is a gem as well. I also recommend running the camera calibration they have available. I don’t have the link to it, but if you search it in the group you’ll be happy you ran it. Helps with aligning issues even in the far corners of material.
Yes, I do have the Pro version.
1 Like
You know, I can’t honestly say why putting the masking tape over the Cermark worked, but it did. With the same settings my results without the mask were spotty, but adding the tape I have 100% solid results.
2 Likes
I tried it on a white tile…the minute the GF started up, the fan blew the blue tape right off the tile covered in cermark. It did “ok” on it’s own, but I found out part of the graphic needed to be a darker outline. Fun to try and I’ll play with it some more.
As I was reading this from the top, as soon as I saw you were using Set Focus on glass I had the idea that was the source of the inconsistencies, and your use of masking tape and the results seems to confirm my suspicion. My experience with Set Focus and glass is that it’s very inconsistent and sometimes doesn’t work at all due to the refractive properties of the material. If you’re interested in testing this, try putting two glasses in the forge together, with masking tape applied to one and Cermark on the other. Set Focus on the one with masking tape and burn the Cermark one. If those old inconsistencies return then I’m wrong, but if it works perfectly we might all benefit from the experiment. I’d like to do some shot glasses myself so thank you for the information you’ve provided thus far - very helpful.
3 Likes
I appreciate your reply. I only about half agree with your conclusion namely because the Cermark spray leaves the surface with a flat black, non reflective, non transparent coating so it’s as if it were a solid black piece and not clear glass. Also, to the best of my knowledge, the set focus feature is a work around to the manual height / focus setting so what that is accomplishing is essentially sizing for the item without having to do the math of figuring your machine’s depth and working the numbers for the size of your base material setup and shot glass height. I believe my size and placement are correct based on the set focus height since the logos are coming out placed and sized correctly, my post was more concerning the inconsistency of the “burn” into the glass with the Cermark black being spotty which was “fixed” with randomly putting masking tape over the Cermark.
2 Likes
fwiw, I agree - I rarely use Set Focus on odd-shaped items, it’s a variable I have no control over.
I have no cue why adding masking would make a difference, but if I had to guess, I’d say it’s helping prevent the cermark from vaporizing before the underlying surface has been marked.
I engrave directly onto glass with no coating or masking, produces a similar result to mechanical rotary engraving.
Note that focus has no effect on size or placement of designs. It only adjusts the bed image to correct for parallax error due to different thickness materials. A 1" cube at (say) 10,5 will always print at the exact same coordinates, regardless of focus/material height.
2 Likes
I’ve done plenty of shot glasses without the black Cermark and initially used the dish soap method for those. I do like the rotary engraving look it gives, but there is something nice about a stand out black embossed image that can look nice as well.
I like the thought process of “vaporizing” as the images do appear to start off looking great then toward the end of the process they tend to fade out.
I believe I may be a little incorrect on the set focus as I described. Would it be that not having the correct height set would cause for an off center engraving then due to PE?
No. The focus height has no bearing on where a design is placed. It only adjusts the underlying image to fit the actual bed coordinates.
Put a cube at 2,2" (easier now with precise placement) - then score it onto a sheet of paper.
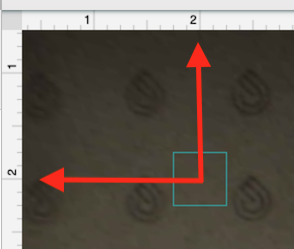
Then put in a 1/2" notebook with a corner over that previous score, and it will appear on the screen that the design will print a long way from that location (assuming you don’t use Set Focus, of course.) I just stacked up a few pieces of scrap to make up .5":
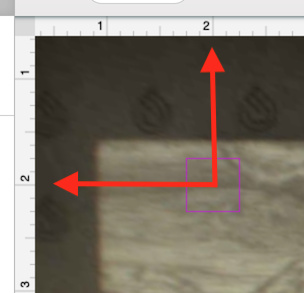
It then prints precisely above the original score, right along the edge of the material. The design does not move, just the image is adjusted to better match actual design coordinates.
1 Like