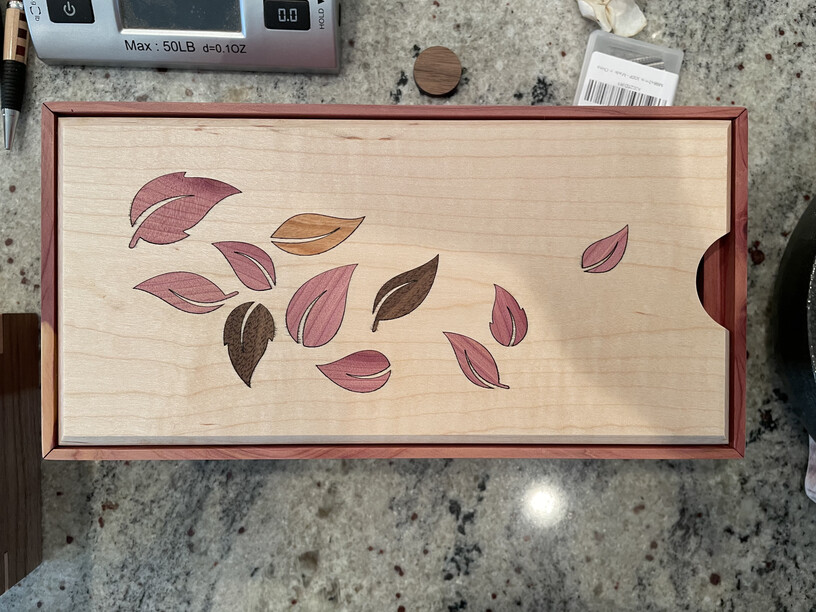
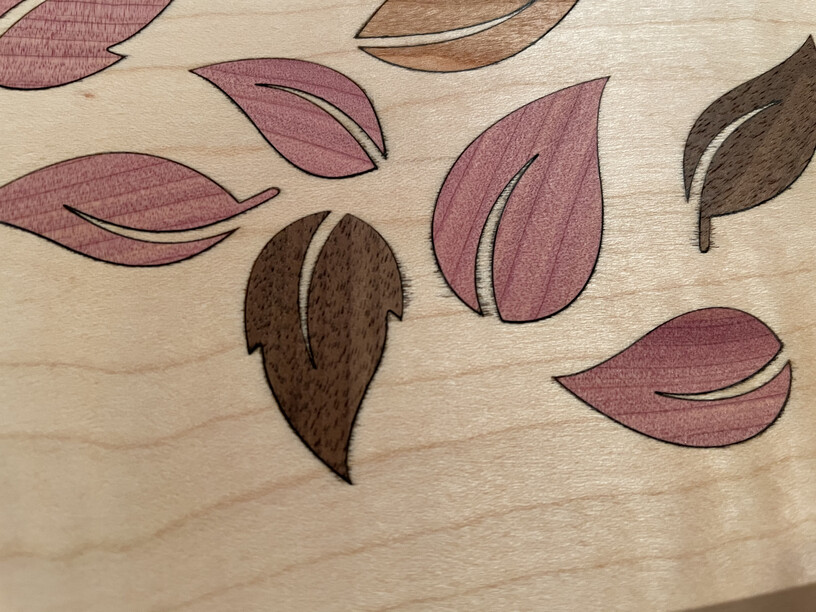
I’ve started doing some inlays, and am running into an issue with the deep engraving causing an odd sort of bleeding around the edges of the pattern. Anyone else encounter this? And if so, how have you avoided it?
I’m engraving at 800 speed, full power and 340 LPI.
What was the process you used? The grain in the PG veneer will wick any sort of moisture. If soot and moisture together, or ink, or stains are present they could be wicked. Maybe a water based glue provided the moisture. Just speculating since we don’t know how it was created.
I’m using solid maple (non-PG), masked but unfinished. Engraving with the previously mentioned settings, then gluing the inlay pieces with Titebond III. Makes sense that the glue could introduce moisture & cause the wicking, but I’m not sure how to avoid that.
Are you getting the bleed directly after the engrave or after the inlay? You could try sealing the engrave with a spray sealant before inlaying if it’s after the inlay, but if it’s before that, could be that the masking isnt totally adhered causing buildup between it and the piece while engraving.
Are you staining the inlay pieces? Could be the stain wicking into the open pores of the engraved area of the base, which the sealant would solve. If you’re finishing the Maple with any type of polyurethane, it may also be that it isn’t fully cured causing wicking. These are what I could imagine happening.
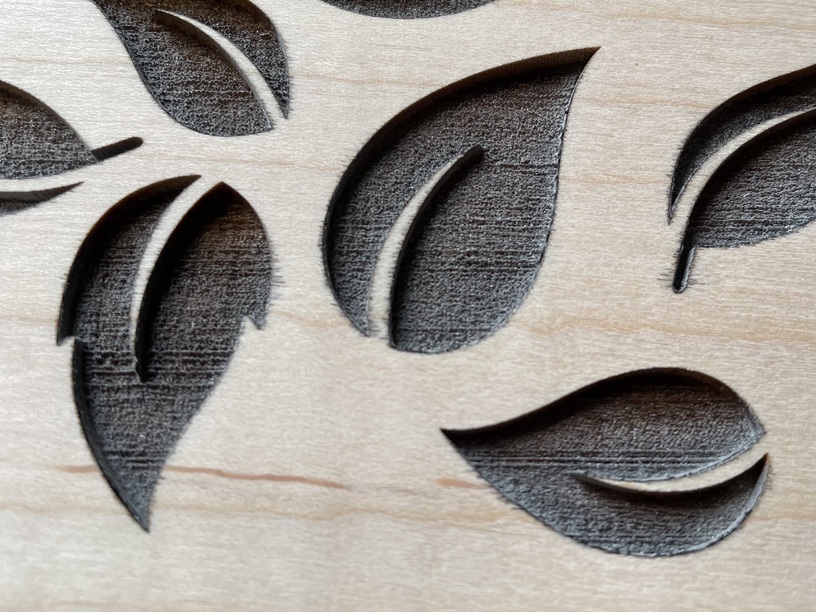
Very slightly noticeable after the engrave, to the point that it might just sand off – I’ll test a bit more tomorrow. Much more pronounced after the inlay though. The inlay pieces aren’t stained, just natural cedar, walnut & cherry. I’m hoping that sealing beforehand will both help the masking adhere better as well as prevent the wicking a bit. The downside of sealing the engrave would be its affect on the hold of the wood glue. Probably not the end of the world for this project, just thinking ahead to things like cutting/charcuterie boards.
No problem! Do you apply the masking yourself? I use a paint spreader to apply, then really put pressure with a rubber brayer. That seems to do a good job on making sure the masking is really stuck down, but yeah, sanding should be good for those little spots! I use 230-400 for sanding burned adges when I don’t mask.
I always spray shellac (2 coats) prior to engraving and then 2 more coats after engraving to seal the wood grain to prevent colors from wicking into the wood. The shellac can be sanded off after assembly if desired fairly easily. Titebond III glue is known to cause black lines at the edges of the wood. I have switched to Titebond II which does not cause this problem and is still FDA rated as food safe.
I’ve never used arm-r-seal so I don’t know about that stuff although it says that they recommend 3 coats with 12-24 hours between coats and then a 24 hour cure after the last coat (says it takes 2 weeks to fully cure). So I’m guessing your arm-r-seal was still wet and the sanding dust was sticking to it in the pores of the wood.
I like shellac, easy to use, dries very fast (30 minutes) and works well. I don’t think I would be sanding before the inlays are glued in. I would shellac it, engrave it, use compressed air to remove the dust then glue in the inlays. I would then sand it 24 hours after the glue has cured.
Yeah, this engrave was done about 24 hours after the last coat – maybe I need to wait the full 2 weeks to cure, but that would be less than ideal.
The sanding dust isn’t really a problem, I meant to point out that the wicking around the edges of the leaves was happening directly after (or during) engraving, before any glue-related moisture was introduced. I only sanded pre-inlay to see if it was surface-level stuff that would come off easily, unfortunately no such luck! So it seems like a better pre-engraving treatment (like the shellac you recommended) is the big thing I’m missing, unless there are any other laser settings I ought to be fiddling with.
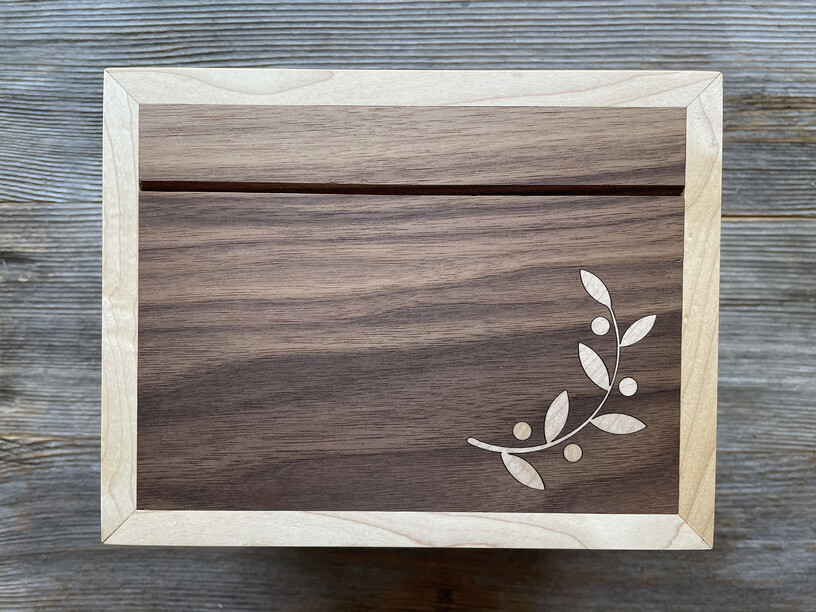
I’ve only tried one other combo, which was this maple-on-walnut inlay. Didn’t notice it happening then, but it’s possible the darker wood hid the effect. Already sent it out to the customer, otherwise I’d take a closer look!