No, no! The polish is that shiny stuff on the surface! Sorry, couldn’t resist. But yeah, it sort of anchors the piece to an origin place and time.
Yeah, but my shop is in the garage and even with air filtration and dust collection enough gets out that when I’m not wearing the respirator it still smelled great. That lamp base looks amazing. I like to include the heartwood and the sapwood when turning cedar because of exactly the effect you got. Except I have yet to find a workpiece as interesting as the one you have. I confess to a flash of envy when I saw the photo.
I won’t put words in her mouth but I’m guessing it’s a short list.
Mine’s a Nova Saturn DVR. I bought the outrigger so in theory I could rotate the head and turn something as large as 27" but for now that remains aspirational. When I get around to that though, I’ll need the GF to make the mother of all bowl badges.
No worries! And in fact, I’d be a bit disappointed if you don’t come back later and post the “after” pic, as others have suggested. Besides, it’s nice to spark a lively and positive discussion and see where it goes, and sometimes the best ones took the unexpected turn. (Little lathe humor there.)
Oh, man, if only you were closer, I’d share! The eastern red cedar we have all over the place here likes to send out bunches of branches from the same part of the trunk, so it’s not hard at all to find a piece like that.
I will share an “after” photo when it’s done. I had to order an extender for my Jacobs chuck so I can drill all the way through the piece before I finish it off. I had tenons turned at both ends so I could drill halfway through from each end, but there was a bark inclusion through the one on the bottom and I couldn’t make it solid enough to hold.
Love your wood turning abilities. So glad you can do your badges on the GF. That’s one of the things that constantly amazes me about it - the tiny details you can get, either cutting or engraving. Glad you can use the two together!
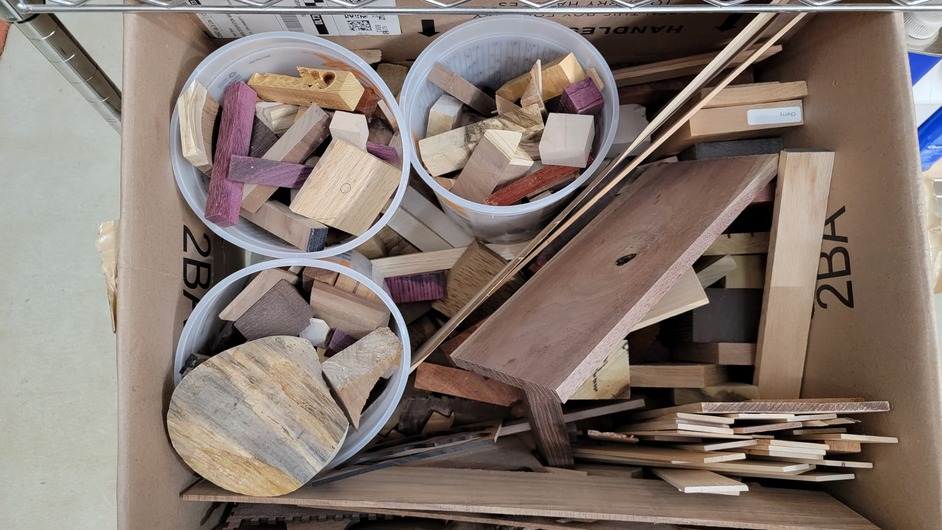
Thanks! That’s basically all of the corners and off-cuts from various projects. It’s nice wood and some of it is expensive so I can never seem to bring myself to toss them out. When enough chip buckets get full I fill a mold with the small wood bits. Then when I use resin for some other project and have some left over, I pour it into the chip mold. Between the various wood species and many colors of resin, chaos emerges!
This was the first such item I ever made but the chip buckets are getting full again so I may yet turn a complete place setting - chaos plate, bowl, and cup.
By the way - all that thin stock in the box is leftover from various projects, but it gets used in the Glowforge. This last Christmas I made all our gift tags and a ton of ornaments on the . I posted pix of the tags, I believe. For Valentine’s day I cut cherry & walnut hearts out and glued them on the outside of a wrapped package to dress up the plain red paper.
If I want to glue a bunch of those thin strips together to make a pen blank, I laser them to the exact same size and skip all the machining and sanding to square up the ends. I haven’t posted pix of this type of work because until recently I kinda figured if I finished it on the lathe it doidn’t count as “made on a Glowforge.” After the last couple of threads it seems like people appreciate this kind of project too. I’ll post the next pen blank project.
What a great use of corners and off-cuts! My dad did a lot of woodworking, and I don’t think he ever threw away any scrap larger than a toothpick. He would have loved this idea. And my mom would have appreciated a shrinking scrap pile.
I’d say the physical nature of the projects you undertake and the tools you wrangle betray a good amount of athletic ability.
No. But at the rate I’m going friends and family are eventually going to beg me to stop giving them stuff. Then I’ll need to figure out what to do with it all.
Thanks for the suggestion! I was super bummed when I tried to put my first few bowls in the glow forge and found they were too tall! I’ve been scratching my head trying to figure out how to engrave stuff in the bottom, so the badge is a great idea! Love it!
I haven’t yet, but I do want to experiment with turning a platter or a shallow bowl with a really large lip and then engraving that
The toughest thing for me has been positioning the pattern on the workpiece. Even after going through all of the alignment advice it’s difficult. Engraving on the rim of a platter is particularly tricky because even a small deviation from center would stick out like a sore thumb, even at a casual glance.
To address this I’ve come up with a few positioning tricks. For example, if I want to engrave on the side of a pen I make a bounding box that snugly fits the pen. Then I hold some draftboard in place with honeycomb pins and cut the bounding box out. A bit of masking tape lifts it without disturbing the board below. After that I can drop in the pen and know the pattern will be perfectly aligned.
Problem with thick pieces like a platter is that the laser can’t focus on the bottom to cut an alignment hole and then on the top for the engraving. What I do in that case is place some light card stock on top of the workpiece and engrave the outline on that. Takes a bit of fiddling to get settings that mark the paper without cutting it or marking the workpiece below, but it’s doable. Then I reposition the workpiece to match the bounding line on the paper. Repeat until it is perfectly aligned.
In case it isn’t obvious, it’s necessary to tape the card stock to the workpiece to keep it from blowing around. Be sure to re-focus when the card stock is removed, too.
Please do post it when you complete the project. Always fascinating to see how people work around the challenges and what comes out of that.
No, I hadn’t. That’s quite the project! Back when the commercial kits were die cut the only models worth making dies for were ones that would sell in high numbers. And if too many kits were on the market it would be hard to recover the cost if making the dies so the overhead constrained the catalog of what was available for pre-cut kits. It was an artificial scarcity in the manufacturing step.
A consumer-grade laser upends that entire market because without the cost of dies and the machines that use them, it’s possible to serve a market in which only a few of any item get made. Glowforge and hobby lasers in general completely eliminate manufacturing scarcity as a constraint.
As a tool for marking and cutting stuff, the GF is pretty amazing. As a tool for prying an entire industry out from under artificial scarcity its even more so.
I love how you made the pen! I have done some segmented work but it was to build a conventional blank which I then drilled and turned as usual. What you did is build a segmented blank except you accounted for the drilling and rough shaping during the segmenting. Cool! And I love the makeshift lathe. Looking forward to seeing the next one.
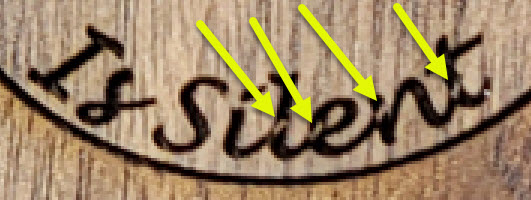
I’m guessing that would get rid of the blank spots where the letters overlap? If so, then thanks. I’ll give it a try. But if you were referring to something else, I’m afraid you are going to have to throw me the clue stick.
I’ve been trying to carve out more time to learn Inkscape but my current consulting client has decided I need to learn Amazon Web Services and get certified. By the end of every day, Inkscape seems to have fallen off the priority list so it’s been slow going. Took me months to realize I had to remove shadow and anti-aliasing on the text. D’oh! I noticed those little voids but hadn’t gotten around to figuring out what to do about them.
Yes, Union will fix the overlaps. It took me a while to get to the point where the process became automatic. I had a post-it on my computer that read: • PATH | Object to Path • OBJECT | Ungroup • PATH | Union.
…and when I would forget and didn’t want to recut something, an X-acto and thin brown Sharpie works too