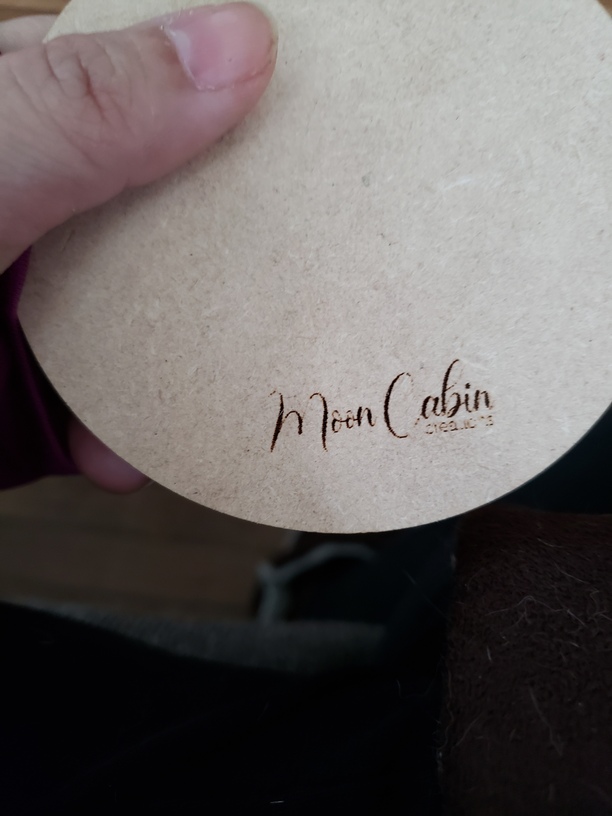
I would like to be able to put a small version of my logo on the back of the products that I create, but the engraving doesn’t come through very well. What do I need to do in order for this to come out better?
The best thing to do IMHO is use this as an opportunity to experiment with Engrave settings. Once you gain knowledge first hand about how settings affect the output you have gained more control. That knowledge is Power!
What type of image are you using? To me it looks like a lower resolution bitmap. You should be able to get crisp engravings at that size with no problem. But this is where understanding bitmap resolution or having a vector version of the logo makes a difference when you go to different sizes.
The original iteration of my logo was built in Photoshop and converted to an SVG file. I will recreate the logo in Illustrator and see if it comes out any better. Thanks everyone - still very squeaky brand new to this!
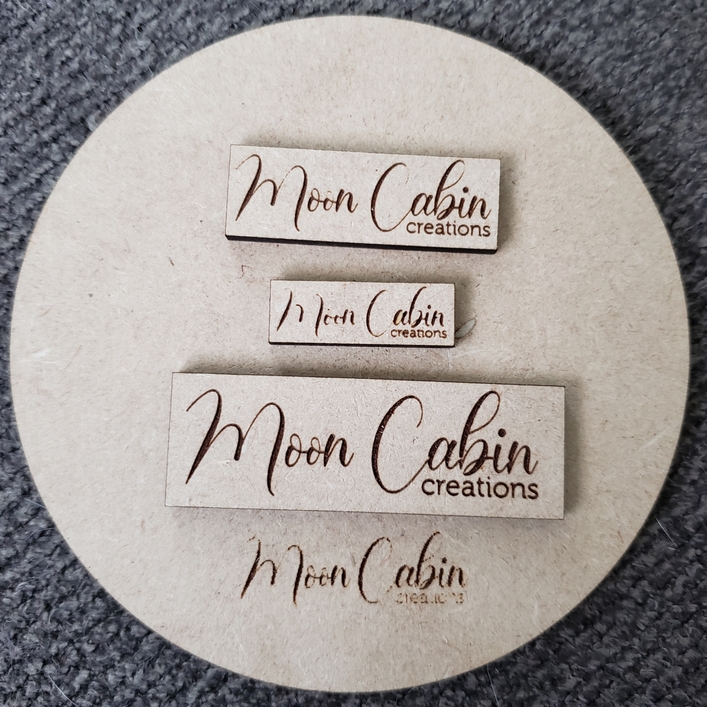
From the bottom you can see the original that started it all. I recreated the logo in Illustrator and made a 2-inch version. It was only after I printed it that I realized I hadn’t united the font (oops). After I fixed that issue I made two more versions (1 inch and 1.5 inches), but I lose a little bit of detail there so I think if I stick with 1.75 and 2 inch versions it will come out alright.
The reason the original lacks so much definition is that the detail is so fine, the engrave simply doesn’t mark the material enough (if at all) in those areas. When you scale it up, however, those areas are wide enough that it does leave a mark.
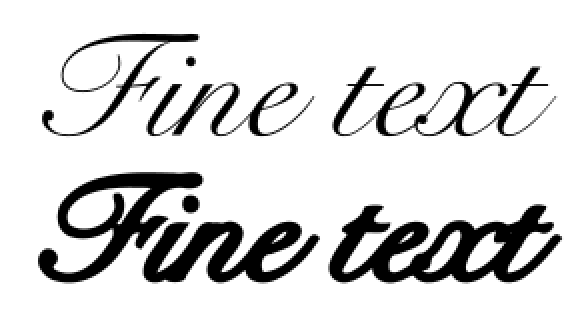
You could still make it work at the original size by “thickening” the design. Inkscape calls it “outset” and it will widen the paths by a defined amount. It wont look great close-up, but it will give you a darker engrave in those areas with fine detail. Takes just seconds…
And illustrator calls it offset path. Just be aware that when you offset it, it creates a duplicate that is either bigger or smaller over the original artwork. If it’s bigger, I generally just select all of it and use the Pathfinder tool to merge the parts. GF doesn’t like when two paths overlap, so it’s important to remember this. Also, it only works when your image is a vector, which will give you the best results, anyway.
Ideally, after making it a vector, shrinking it to the desired size, and running a test to see what needs to be increased, if the thick parts are where you’d like them to be already, you can use the direct selection tool to individually (or using Shift to grab multiple) anchor points and dragging them out to thicken parts manually.
Just a note of technicality for the benefit of those following along - Inkscape has “Offset” path functions as well. they can produce similar results, but not as easily and the results are not as “clean” as the Outset (and Inset) functions. The issues you describe can crop up using the Offset functions, but not with Inset or Outset.
These are the paths before and after using Outset:
Not touting one app over the other, my advice was “in general” for folks encountering similar challenges, but seeing as we’ve gone down that rabbit-hole…
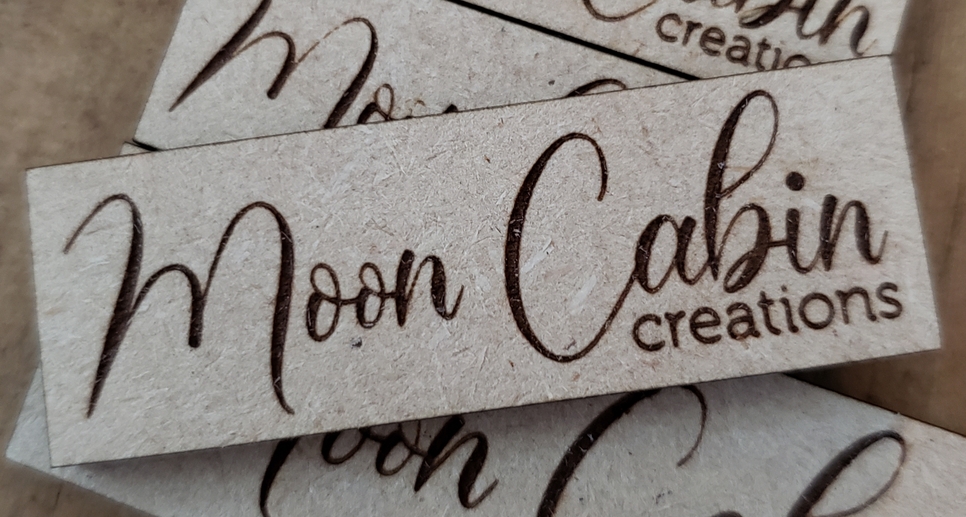
I’m really happy with the thicker lines, it’s just those smaller lines where I lose detail. I’ve been learning the pen tool and the direct selection tool for the past few days (with much kicking and dragging of my feet) so I’m going to give that a shot.
didn’t know there was a setting for this, good to know. I always just copied the object put a thicker stoke onto it and then converted that stroke to path and either merged or unioned that to the original object.
Finally got it dialed in. I used the direct selection tool in Illustrator (thanks @raymondking32 for the tip) and adjusted only the lines that were giving me grief. Made the text 1.75 inches in width and it printed out beautifully.
The setting for the amount the simple outset does is in the settings command. I found the default to be excessive and caused enough problems that I quit using it. When I found the setting I made it extremely small as I would rather have to call the command many times than not have that control. Of note also any kink in the offset can have surprising results such as a loop that goes to infinity and crashes the drawing.