Disclaimer: See my username. Edits likely.
So this topic has come up a couple of times. After all the reading, here and other places, I still left very unsure of how to proceed. This is going to be the spot where I vomit (via keyboard) my experience so far. Tips appreciated and feel free to ask any question you please.
Step one: Open an account at my credit union to separate business expenses out so I don’t spend my life savings playing around with a laser. UBI (Unified Business Identifier) required to open the account as a sole proprieter.
Step one: Register my business with the State of Washington to get a UBI number.
Step two: Open a business account at my credit union.
Step three: Get a business license and home occupation permit from my city in order to become “2 legit 2 quit.” I read through the city’s rules on their website to make sure I wouldn’t be breaking any of them. I had to send the guy reviewing the home occupation permit to the Glowforge website to help him understand what I’d be doing in my house.
Step four: Prepare to accept payments in as many was as practical. Got a merchant account through a place my credit union pointed me to. Not square or the other one. Instead of a little thing that goes into your phone’s headphone jack, the reader is Bluetooth and accepts chips. Pretty slick and customers seem to me to see it as “classier.” Easy enough to use, too.
Step five: Find a place to sell some stuff. I’m starting out by selling things in person. Working on a website, which would have been great to hand out in person. But the priority ended up being able to “dip my toe” in the business water. Got a hold of a place doing a German-themed market in a historic mansion. They took my money and gave me a spot.
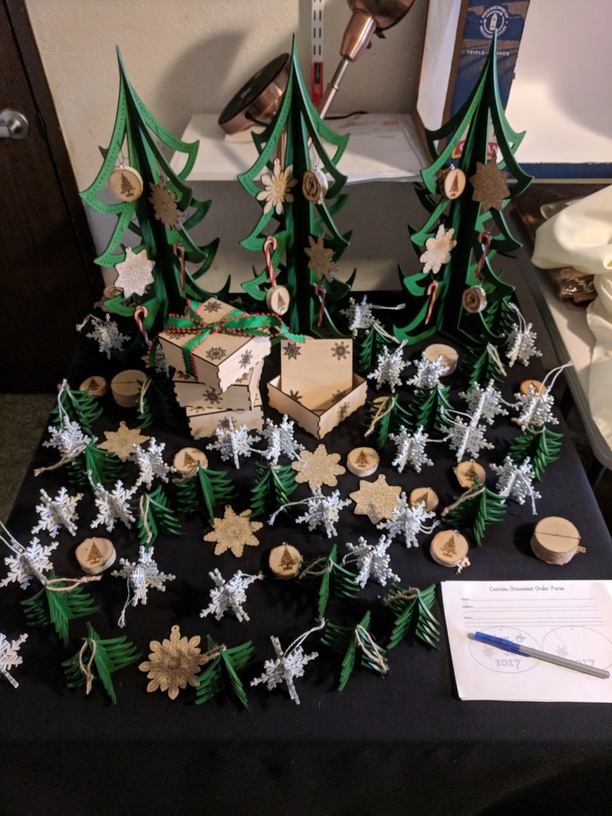
Step six: Make some stuff to sell. As it is the holiday season, I chose to make a selection of ornaments. Came up with a handful of ideas. A couple failed either because I couldn’t get the quality I wanted or the laser time was too high or painting took to long or… anyway. I think I had maybe six or eight ready-made ornaments and a couple of wooden boxes.
Step seven: Get ready to sell some stuff. I watched this great video on preparing to show up at a market. @makesomething from right here on the forums made it! https://youtu.be/WBnWlc6UDb4 I wasn’t able to follow as many suggestions that he had as I’d have liked to, but boy did it bring the PANIC AND TERROR AND WHAT DO I DO! level from a 10 to about an 8 and a half. Also, the custom order form was a tremendous suggestion he gave. I had what was really more semi-custom. People could get their names or what have you cut into an oval ornament with a snowflake scored on it and the year. I also lasered up some displays and ordered a fitted tablecloth to get to looking more presentable. Oh, and little bags and tissue package purchases and send customers on their way with.
Step eight: Sell some stuff. I showed up at the market still peeling masking and tying ribbons to the ornaments even though I was up 'till 2AM trying to finalize as much as I could. Once I set up and realized that things didn’t look embarrassing, that panic level went down a bit more. Then they opened the doors and people bought stuff. I had talked to my brother about business. He’s run a couple. As his experience is in restaurants, we talked about steaks and fries. I won’t go too much into it, but basically for this event ready made ornaments were my fries, which I sold a ton of. Semi-custom ones were steaks, which I sold a few. Let me tell you, though: one thing that I did not foresee is how personal a custom ornament could be for folks. There was one guy, who on his second time by stood in front of the order forms wrestling with pulling the trigger on getting an ornament for what would be his first niece before he went for it. It was sooo important to him that he get just the right thing for her. Another custom order was from a couple who had a baby before Christmas 2016 which they lost some time after. They asked for it to have the baby’s name, 2016, baby’s first Christmas, and an anchor as that was special to them. The husband was there fighting back tears! So was I. I thought I made a faux pas by asking more about it, but they actually seemed to appreciate being able to talk.
Step nine: repeat steps five through eight as needed.
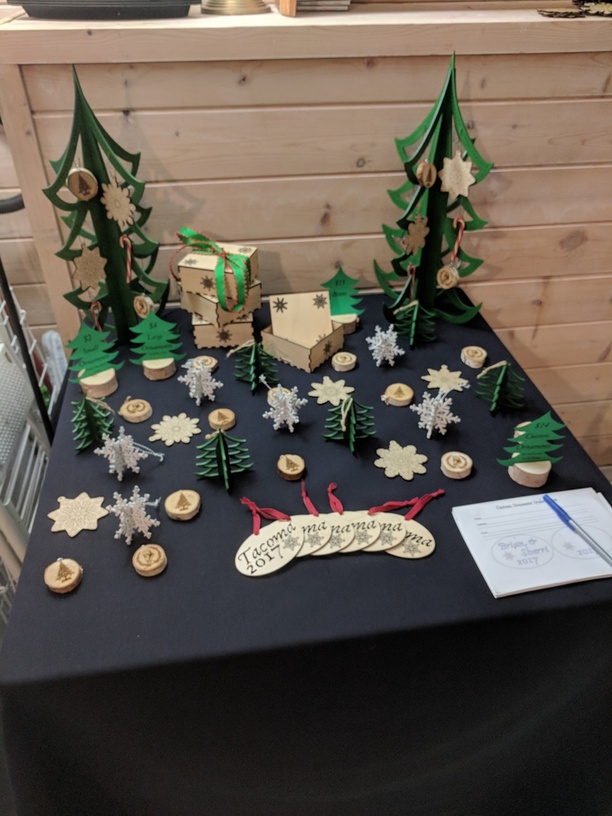
This photo isn’t from that market. I’m doing another one tomorrow that called for a smaller table. It’s just sort of what it looked like and shows examples of what I was selling. I’ll be printing up a few event-specific ornaments as they sold well at the last one. Well enough that there are none left to put on this table.
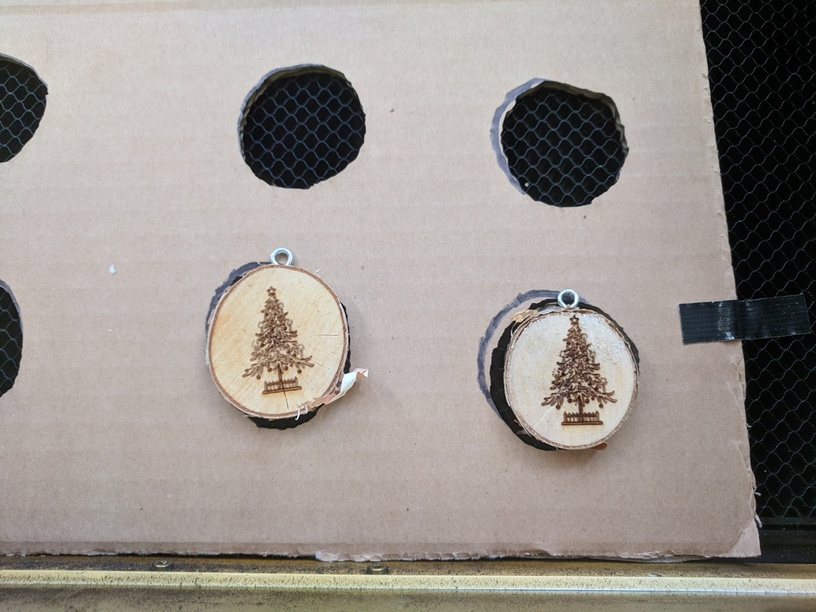
One last note: the “trace” feature was quite useful in positioning these engravings on irregularly sized birch rounds. Traced them in pencil as to not mark on them. Went over the pencil with Sharpie, being sure there were no lighter spots that might not be seen well by the 'forge. Put the cardboard in the machine. Traced. Placed. Set the engrave to ignore. Removed the cutouts and inserted the birch. With the trace design still loaded and not moved, add the tree artwork. Use the traced cut line to position the artwork ignoring the photo from the machine (for now.) Set the trace cut line to ignore. Engrave the tree.


 . Nothing amazing like