I find cutting glass by the traditional method of scoring with a glass cutter and then snapping a bit hit and miss. It works a lot better with oil but I wondered if it could be scored with a Glowforge. Is the engraving deep enough to snap along?
4 Likes
@aeva & @Kusmeroglu did some tests way back when and were able to get straight lines. Any updates on curved score lines?
2 Likes
Great, I only want to make rectangles for picture framing and 3D printer beds so it seem like it should work.
4 Likes
Not that I am trying to discourage you from using your Glowforge, but…
You might want to get an old school glass cutter and practice a few times. They are cheap, easy to use, work really well and will probably do a better job on simple rectangular shapes.
4 Likes
I do have one and have used it many times but my success rate is not 100%, so I waste glass. It was less than 50% until I discovered you need to put oil on the cutter. I got a new with an oil reservoir but I haven’t used that yet.
The other problem is getting it exactly on the right line as the straight edge I use tends to slip when I am putting extreme pressure on the cutter to get it to bite.
All in all I don’t like doing jobs that require manual skill / dexterity as I don’t have much of either. I prefer to get machines to do as much as possible.
6 Likes
I haven’t gotten around to trying again, there’s just so many other exciting projects, though it’s on my list - I got a tip from someone about using a wet paper towel to protect the glass from heat fractures. Though the Glowforge does beautiful engraving on glass, for cutting I agree with @jkopel that glass tools are super cheap and easy to use once you get the hang of it. I did try engraving a line in the glass then going back and scoring it with a glass tool (for precise cutting) and the glass tool does not like to run over rough engraved glass - it definitely is much easier to use on smooth glass surfaces. For Glowforge assisted straight lines you are better off doing an engrave with the Glowforge and just breaking the glass along it with the running pliers.
2 Likes
I used to cut my own glass for fan frames - think arch topped picture frames.
If you’re pressing the cutter to get it to ‘bite’, then your cutter wheel is blunt.
I switched to a diamond head cutter (not much more expensive than the traditional wheel type), used mineral spirit still as a lubricant, and found that it just slid along perfectly.
Two tips. 1. snap the glass immediately you’ve scored it - it doesn’t seem to be the same if you leave it ! 2. Make sure the glass is really clean before you try cutting.
If you have problems with snapping the glass, try turning it over onto a soft surface, like a piece of felt on top of the work bench. A slight pressure above the scratch will start the crack going, then push along the scratch, and the crack will travel ahead of your pressure point.
John
13 Likes
Using a soft surface is an invaluable tip! My mind was blown when one of my glass fusing class instructors showed me that for popping out perfect circles. It’s like magic. They had a couple of foam core boards around the studio for that.
@palmercr - There’s definitely a trick to the whole process. For me, having someone show me how to do it made a giant difference, I think I was afraid of breaking the glass (ironically), and then didn’t make solid score lines. Also, glass fusing is very forgiving as you can just push things that accidentally broke together and they’ll fuse back up in the kiln, which is not typical for glass cutting.
8 Likes
My brother taught my wife how to cut glass. She was a pro after one lesson. He owned the local glass company and did it 1000 times a day. Remember him suggesting she staple some cheap carpet stretched smooth over the workbench. Lay the glass flat on the carpet. You don’t have to use much pressure at all to score the glass with a good cutter. If you use a lot of pressure it creates micro-shatters in the glass and the break will not be clean. Also never double score the glass for the same reason. One clean fluid score (straight or with smooth curves).
7 Likes
Perhaps I should have added ’ push the cut with the back end of the class cutter - not your finger ! '
John
7 Likes
I actually wonder if the best approach is to use a GlowForge to mark the glass and then trace the markings with your oiled glass cutter. I was planning to use a similar approach to mark thicker pieces of wood before using my jigsaw.
2 Likes
Could be just a case of my general ignorance, however, isn’t the glass used on 3D printer beds treated, or special, in some way to better cope with the heat and won’t the treatment interfere with cutting it?
Some people use special glass but I use plain 2mm glass used for picture frames or 3mm mirror glass. The heat isn’t a problem as long as it is evenly distributed and the sheet is free to expand, i.e. not rigidly constrained at the edges. I use picture frame clips that allow a bit of sideways expansion.
I heat to 130C and cool rapidly with a powerful fan. The thermal shock never breaks the glass but occasionally parts stick too well and pull out chunks of the surface. That is the only failure mode I get (other than dropping something heavy on a machine) but they generally last me for years.
2 Likes
Here’s some advice I had a while back when this came up before:
1 Like
I thought exactly this, tried it, and it really doesn’t work well. The laser engraved glass is essentially explosions on the surface of the glass, which make it extremely hard to run the scoring tool over smoothly, and prevent the score from working perfectly.
This was a good read if you are curious what’s happening with the glass under the laser:
https://www.engraversjournal.com/article.php/2360/index.html
11 Likes
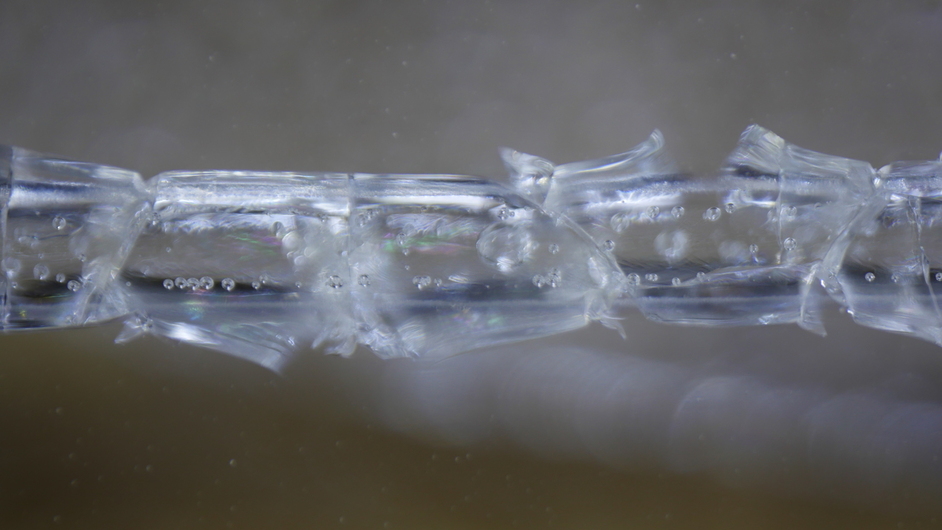
I gave it a try a while ago and also didn’t have much luck. I figured I’d share some super-macro photos I took of the cut lines…
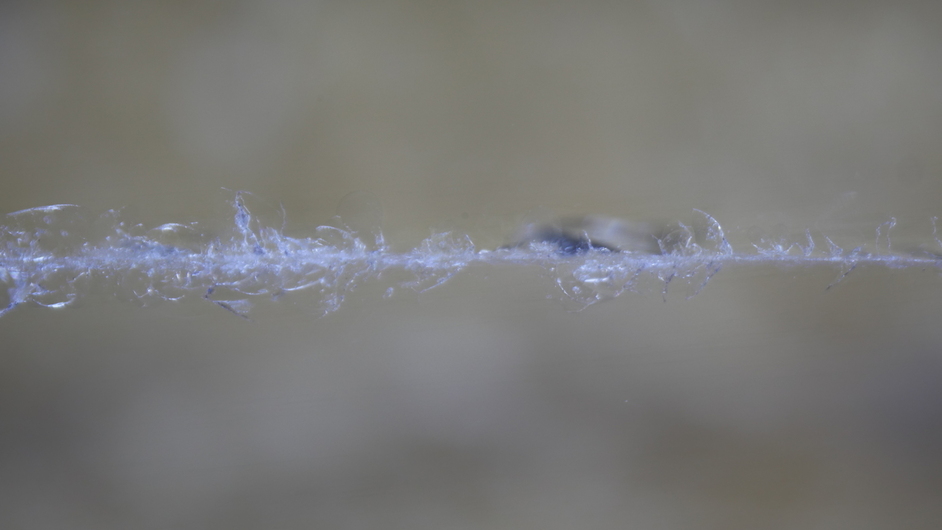
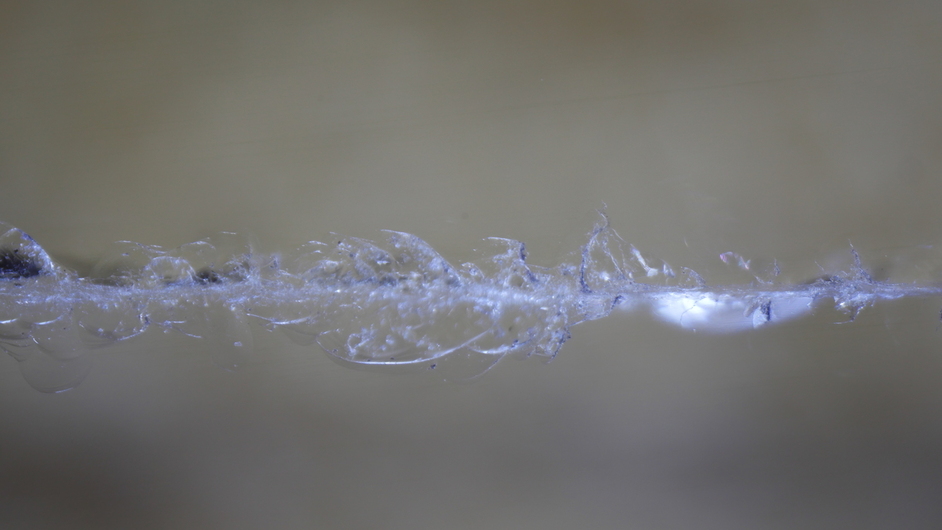
First, two shots of glass that was cut using a traditional glass scoring tool. I should mention that I haven’t cut much glass. The tool is pretty easy to use, easy enough that you can get the job done on your first try, but it’s possible that this is an exceptionally poor quality cut. Regardless of the quality, this split the piece of glass in twain.
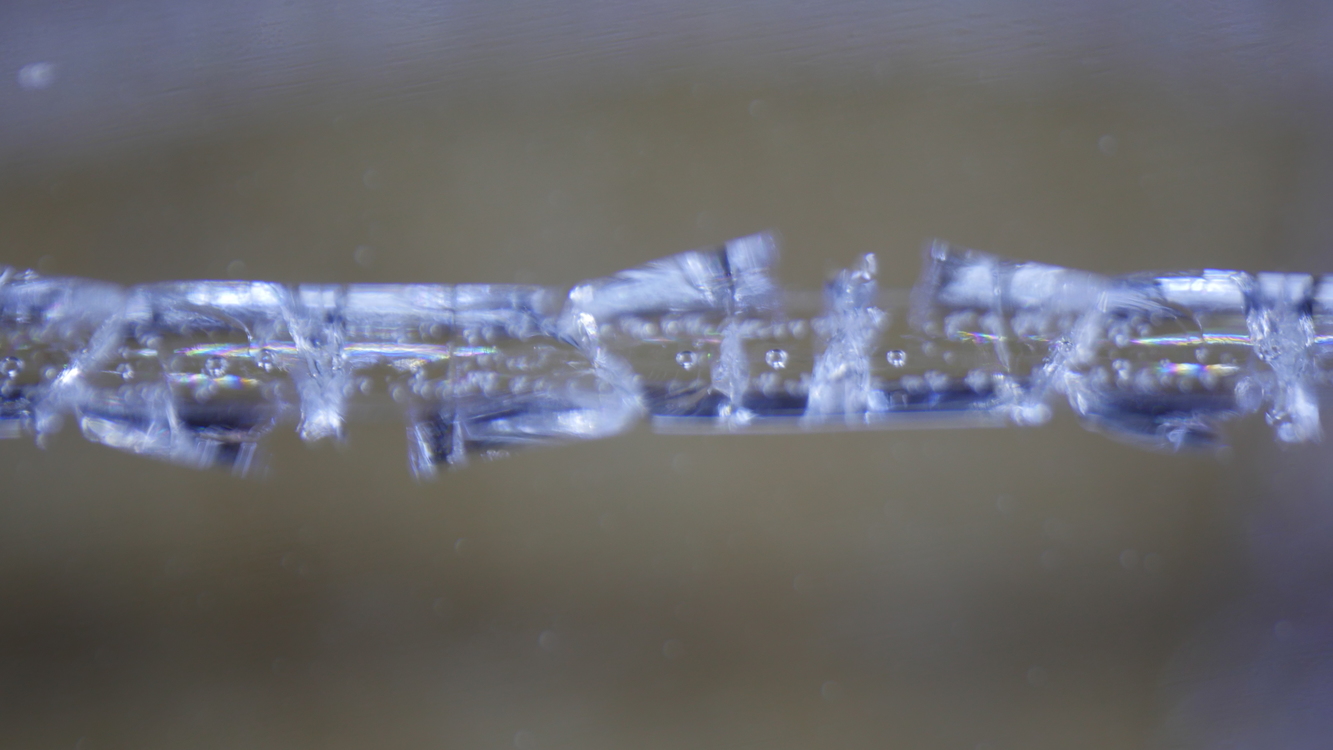
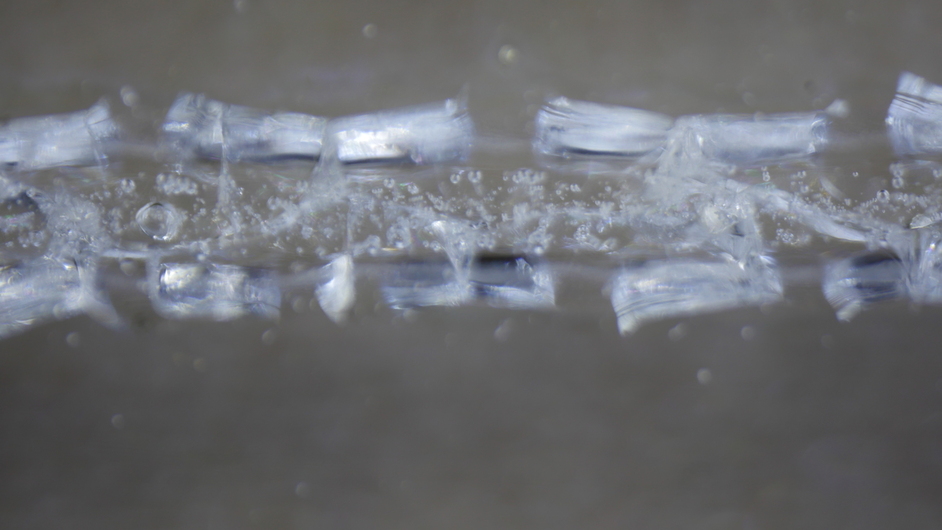
And three shots of lasered glass. None of these were good enough to make a reliable break.
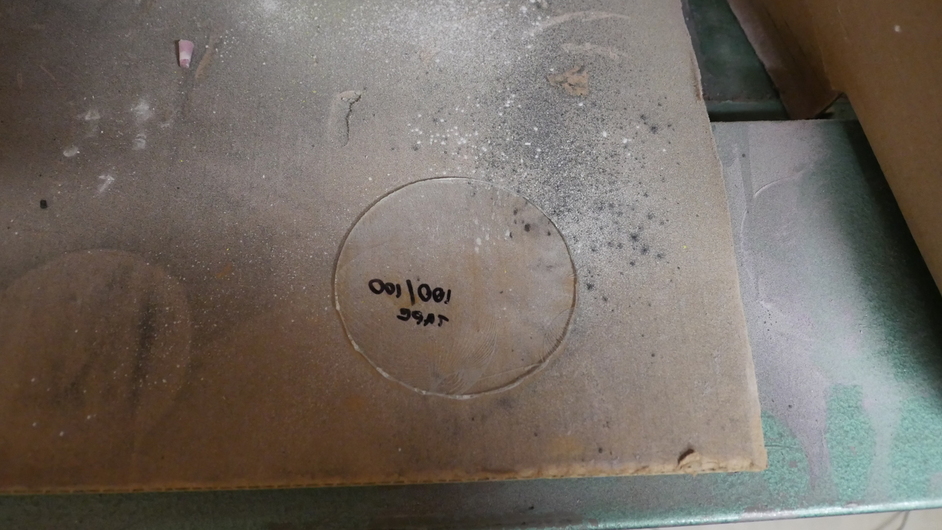
I did actually successfully “cut” the glass using the laser, but the cut quality was pretty bad. I think the settings I used were 50% power (my laser cutter has a 30-watt tube) at 14mm/sec - two passes. I was able to cut out a 3"-diameter circle that wasn’t terrible but also wasn’t very good… not good enough to call a “success”. (Ignore the writing, I used this piece of glass to test out engraving settings as well.)
I tried everything I could think of. I used different power levels, different speeds, multiple passes (up to 10 in one case), and defocusing. I even did few tries where I did two passes with a slight offset between them; I was hoping the heat generated by the second pass would crack the score line made in the first. No such luck. I also tried different defocus amounts with the offset passes as well.
I didn’t try any glass other than this one piece, perhaps it has some property that makes it harder to cut or something. I also don’t think I tried messing with the frequency - frankly, the frequency setting is basically a mystery to me so I don’t mess with it too much. OK, I guess I didn’t actually try everything I could think of.
14 Likes
You can see the glass cutter results in an unbroken score line even though it also has some fracturing around the edges.
The laser cut does not have a continuous score line amongst the fracturing. Since the glass breaks along the score it won’t crack & break cleanly without the continuous score line.
1 Like
This is going to sound weird, but from the pictures it looks as if the laser is excavating bits of glass from a u-shaped channel rather than making a really narrow score. Which would mean not a strong enough stress concentration. Of course that could be completely wrong.
1 Like
Here is a link to some info that @soldiercoleman originally shared.
http://community.glowforge.com/t/cutting-glass/1651/12?u=lcuellar63
3 Likes