Background:
My buddies and I were playing Catan last week. While rolling dice, they kept on roll all over the cities / roads / game pieces, and off the table, which drove us all insane.
In that moment, I knew it my mission to remedy this.
Ladies and gentlemen, I bring to you… an Automatic Catan Dice Roller!
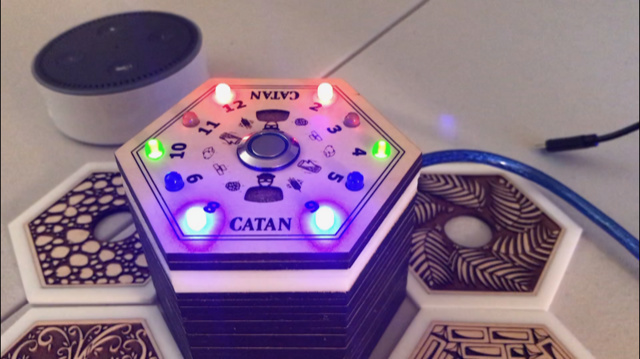
Pretty self explanatory: press the middle button, and see the dice roll with awesome animation!
But wait - something is bound to happen when a “7” is rolled…
All lights light up with awesome animation, including the middle button that you just pressed! (What is this wizardry??!?)
Here’s the video of it in action:

How it works:
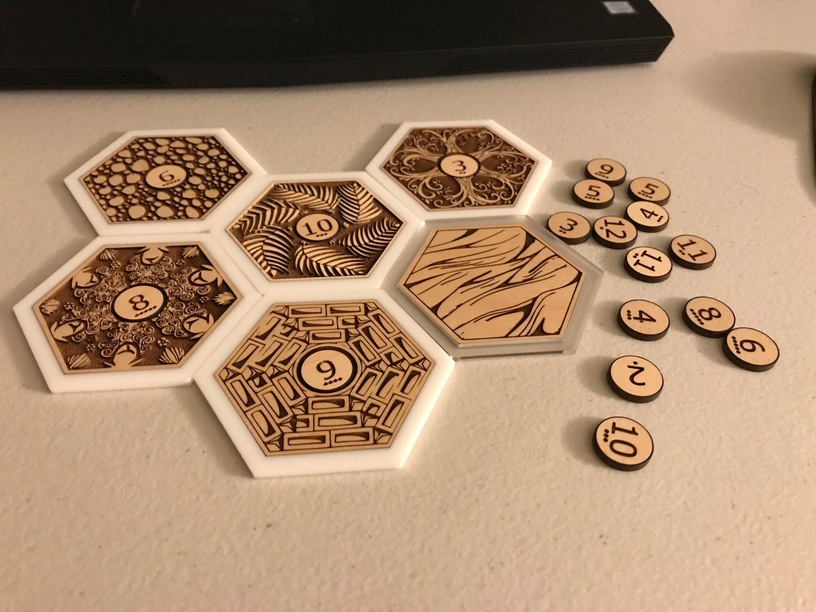
Dice rolls are random and accurate to actual percentage of getting the roll on two, fair sided dice:
Arduino generates 2 random numbers from range 1 - 6 with random (or as random as a computer can get) probability, and add them together to get the sum.
Animation (cuz we need that!) starts, signifying a roll of dice!
Depending on what the random number is, the LED of sum-of-2-random-numbers would light up.
All players with cities / settlements on tiles with rolled number without robber will then receive resources, trades happen, build stuff, and repeat.
If a “7” is rolled instead… something cool happens ![]() (Watch video til the end)
(Watch video til the end)
How it’s made:
I’ve attached all SVG’s and Arduino code, sufficient enough to make your own!
Other materials you’ll need:
1x Arduino Nano (fits nicely into the shape of a Catan tile)
10 x LED lights (colors to be determined by YOU!)
11X resistors (they can all be 1k ohms, but I’ve decreased some of them to 220 ohms so some LED’s are brighter. 1 resistor is for the button acting as digital input)
1x light-up button
“Some”: wires, connectors, mating connectors, prototyping board, M3 screws and spacers.
“Some”: Glowforge proofgrade (or equiv) materials
Other tools:
Screw driver, laptop for programming, clamps, Elmer’s Glue (YES, I USED GLUE IN THIS PROJECT! Let’s continue…).
And possibly a dog or two to keep you company while you’re putting your creativity to work:

And last but not least: a Glowforge to cut the materials!
Before we go any further, follow me on Instagram @salocinah321
I’ll be posting more and more as I find more time outside of work ![]()
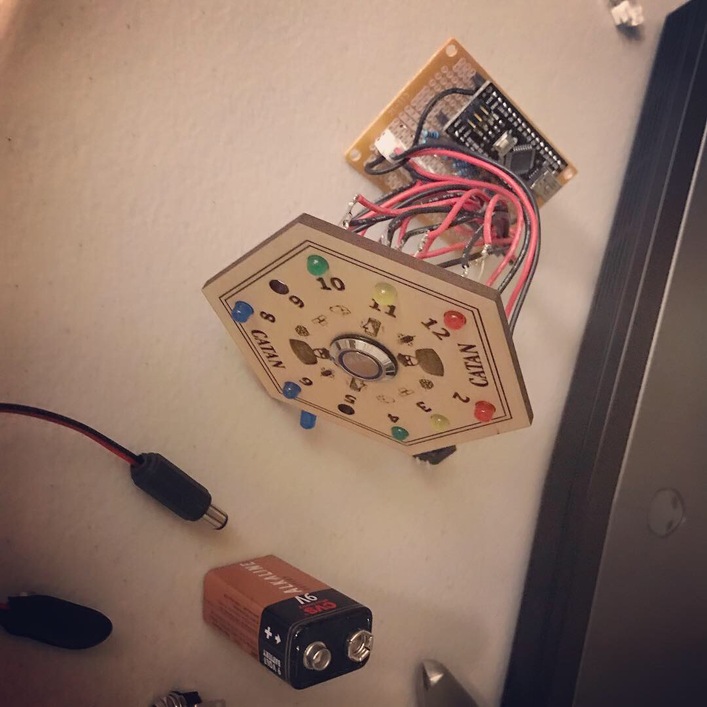
Here’s the picture of LED button into face, with soldered resistors / mating connectors ready for the LED lights.
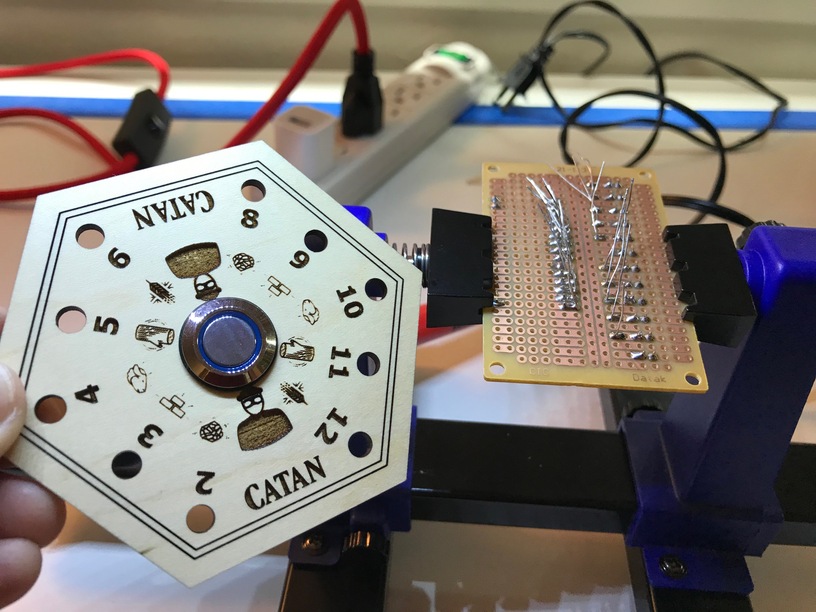
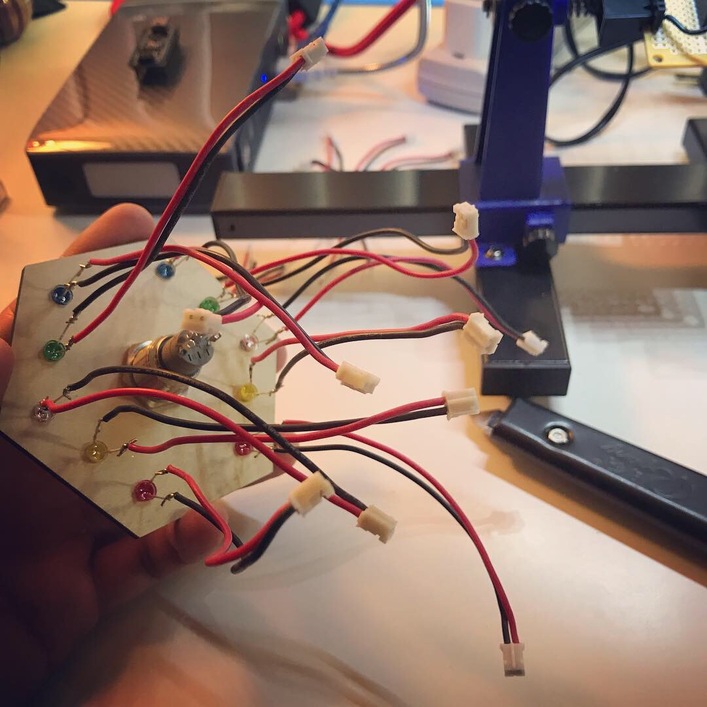
Here’s the other side of the board!
This looks like a spider or octopus (or decopus, since it has 10 wires coming out), but I guarantee you that it’s just the front face with LED’s, with wires soldered onto each leg.
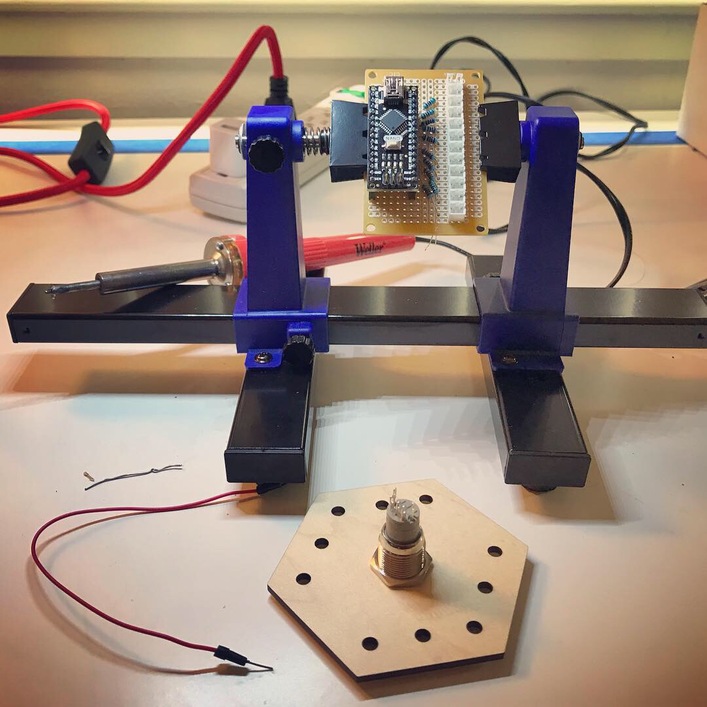
Installing the board into the laser cut pieces… Felt like legos!
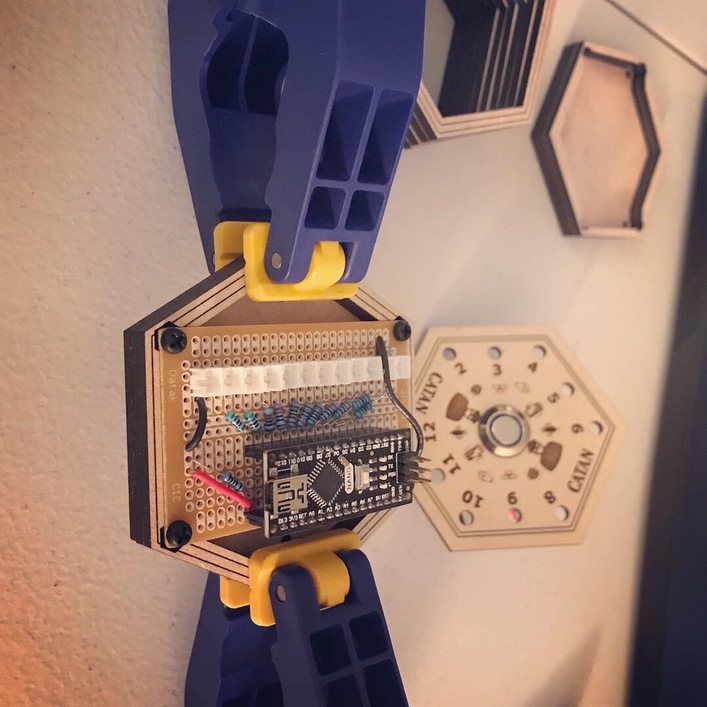
Testing connection of LED’s with board:
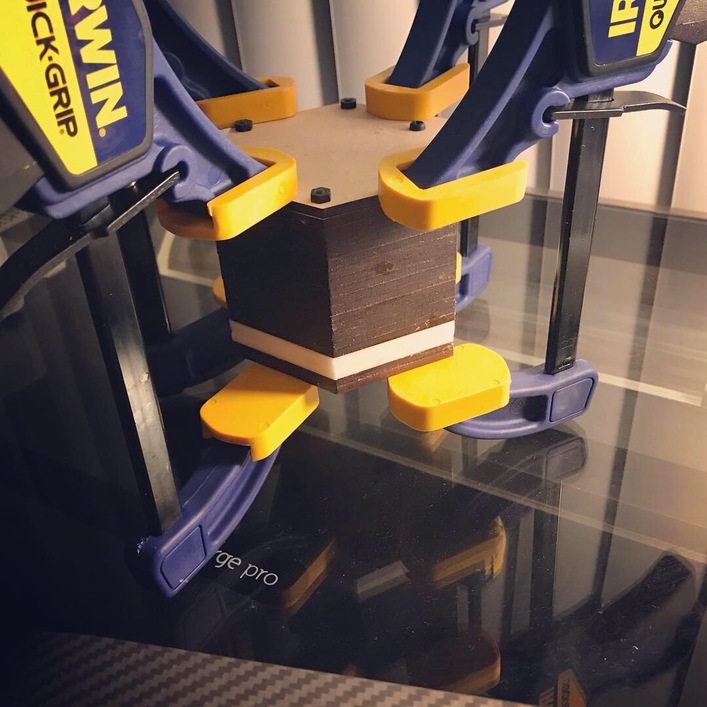
Last but not least, clamp them all together overnight for glue to dry.
Here’s the SVG for the body. You will need to add more to create the entire body, and change the sizes / locations / stuff to use based on your prototyping board, your soldering locations, etc etc. Be creative on Inkscape! Red / Orange = cut. Blue = score. Everything in the middle is… I forgot! Print one and you’ll know ![]()

Here’s the SVG for the face.

Here are the arduino codes:
Catan Dice Roller Code for Arduino.docx (13.2 KB)
Final notes and how I would make it differently next time:
- This project is meant as a guideline of how to make yours, but not the exact one. I have not specified what prototyping board // connectors to use (I don’t even know what brand they are!), so you’ll just have to find your own and do some measurements, and put it all in Inkscape or whatever svg editor you fancy!
- The height of this “thing” is kind of high. My next prototype (if I ever make another one) would be to minimize the height by using different electronics.
- This is currently USB powered. Making it battery powered would be pretty cool.
- Maybe add a window on the side so players can look into all the wiring and guts!
- Add a mini speaker to output “click click click” noise when dice is “rolled”.
And that’s it, folks! Hope you enjoyed it, and let me know if you have any questions.
-Nick-
**
**
[EDITED]
I am very happy to have posted my work here, and have gotten a lot of great feedback.
In particular, I’d like to give a huge SHOUTOUT to @evansd2 (Dave) for taking time in reviewing my codes and providing feedback and corrections! The previous codes I’ve uploaded seemed “good enough”, but it was actually NOT! The randomness seemed random, but will give the same numbers once you power cycle the unit! So it went 8, 8, 5, 7, 4, 9, 2, 5, etc… and when you power cycle, it goes 8, 8, 5, 7, 4, 9, 2, 5, etc… again!!! What an “a-ha” moment!
I’ve uploaded Dave’s changes (huge upgrade) here:
Catan_notes_and_changes.docx (15.9 KB)
I’ve kept the old codes here if anyone wants to look at both versions and compare the 2. It’s like day and night. Thanks again, Dave!


