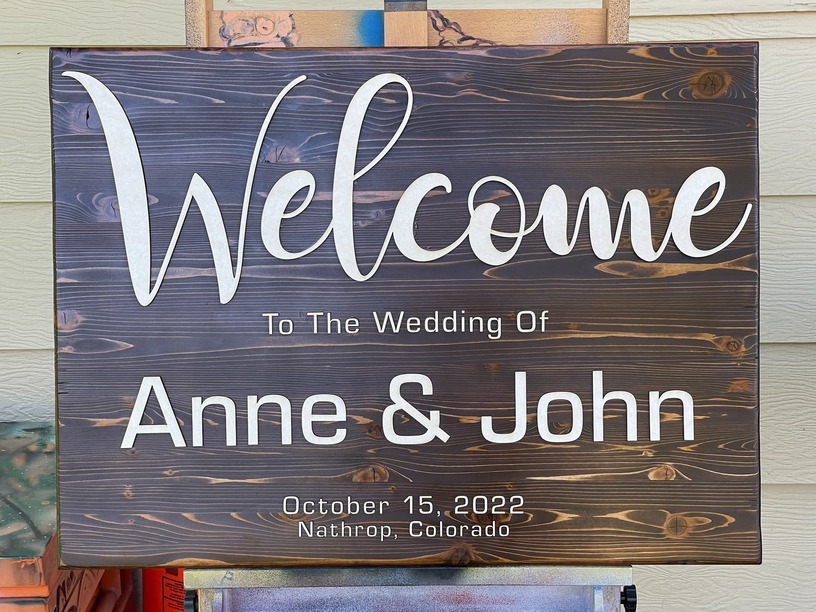
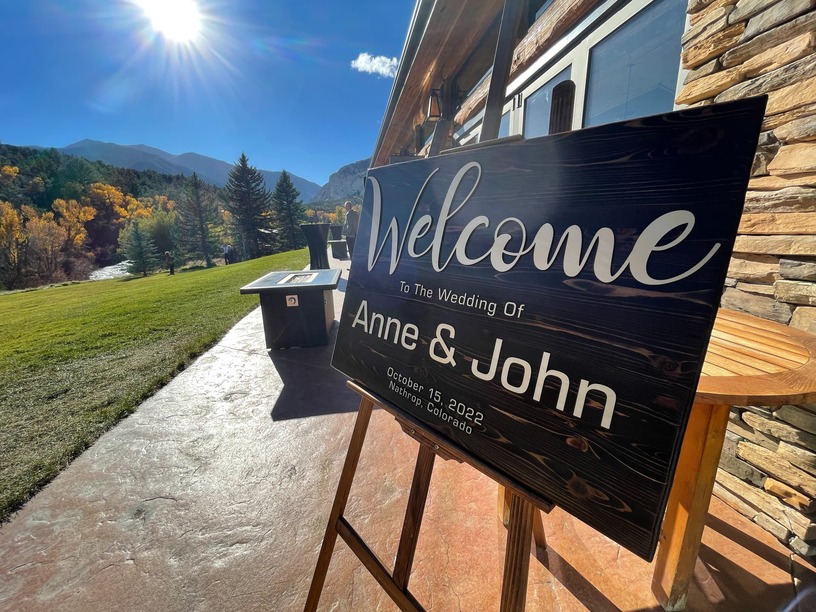
I was asked to make a welcome sign for Dr. Girlfriend’s youngest sister’s wedding, and of course I said “no problem”. One week before the wedding, I was finally given the wording and style that they wanted and I went to work, crossing my fingers that glue and stain would all be dry and ready in time.
This is not a style that I do much of, and my inventory of wood was not quite what I imagined it was, so I had a few challenges. I had to glue up strips of cedar to make the sign blank, router the edges and sand sand sand, and then stain it dark. of course I managed to smear glue when aligning the letters, and it was very obvious, so before I removed the masking from the letters I sprayed the whole thing with several layers of clear, alternating between ultra-flat and high gloss. it was a gamble, but it worked out pretty well. The weather worked out pretty well for us as well!
No accounting for individual tastes when it comes to commissions.
Well executed, nice work. The design is successful within the parameters that you were given, alignment and kerning are both really good, color choices make for a highly legible result, which can be a challenge with swoopy fonts. It’s good that you chose a sans serif font for the bulk of the design, an entire sign of swoopy faux handwriting would have definitely been too much. Whoever made that call did the right thing.
I can kind of intuit rough dimensions, but what were the actual measurements?
Yeah, not really my style, but the bride gets what she wants.
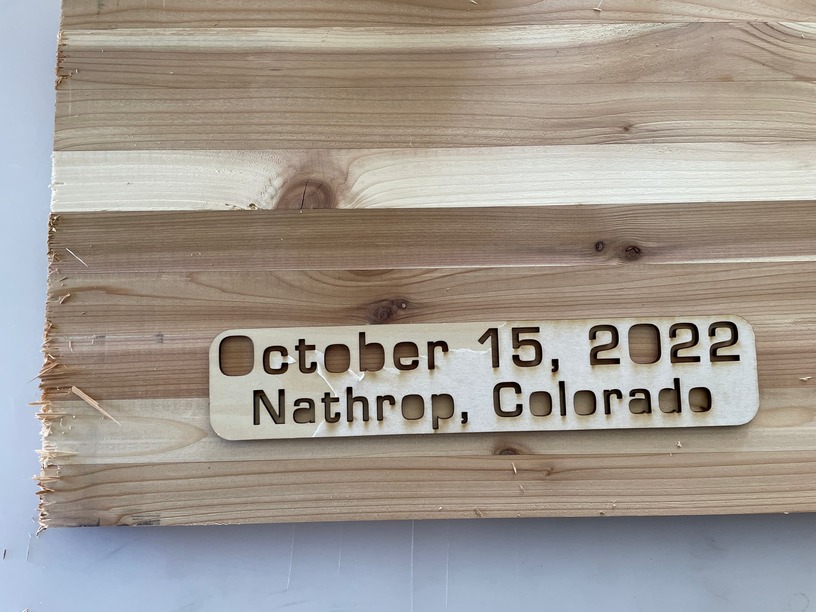
22”x30” .5” cedar. @rbtdanforth a pinch too large to engrave, but yeah for a smaller sign that’s the way to go, no doubt. I had my blocks of text all set together, and aligned them the old fashioned way with a ruler.
What you did on the bottom photo is the best fall back, Either the wood you cut it out of taped in place, or some other material with the spacing correct as well as the bottom line.
I think it turned out very, very nice. And then my brain goes, "Hmm…that would be great to hang on the wall as a “Welcome” sign - just change of word “wedding” with “home” and add the word “Established” before the date. But don’t suggest it to them!
Congratulations to the couple! Glad the weather was so perfect.
The flat layers in between may have helped to avoid magnifying the glossy-ness of the glue spots while building the thickness of of the coating, if that makes sense.
I don’t know that there was any real benefit, other than stretching my paint supply. my the idea was to try and hide the glossy glue spot by making the wood glossy, or by making the glue flat.
I had less than a half a can each of ultra-flat & gloss. The clear gorilla glue smears and pushouts stood out as glossy against the flat stained cedar. I figured I would try a base of gloss to get a good consistent undercoat, and then finish with flat. That looked good for a sec, but the wood soaked it up and the glue was still too noticable and distracting. I thought, maybe a coat of clear would just smooth out that transition, and it looked a tiny bit better, but still too obvious as it dried.
Ok, I’ll just finish with a coat of the flat, because that was looking good last time at this point…but the can started sputtering on me, messing up the finish.
Now I had no choice but to try the glossy can again, since it was still spraying clean. At this point I guess I had built up enough of a coating of mixed clears that this last coat of glossy gave a very consistent look across the glue and wood. And both cans were empty, so I was done anyway.