Over the years, our family has gone through a bunch of charging stations. We outgrew one (or two?), grew to hate another within weeks of getting it, and grudgingly lived with the most recent one for a several years. Adjusting it for different devices was overly fiddly and it tended to put a sharp bend in each cable near where it plugs into a device. Over time, more and more things ended up sitting on the counter next to it, which kind of defeats the purpose of having a charging station. It was time for a laser-based intervention.
I wanted to go simple, so I chose a well-reviewed 10-port USB charger (Anker PowerPort 10) and built the whole thing around it.
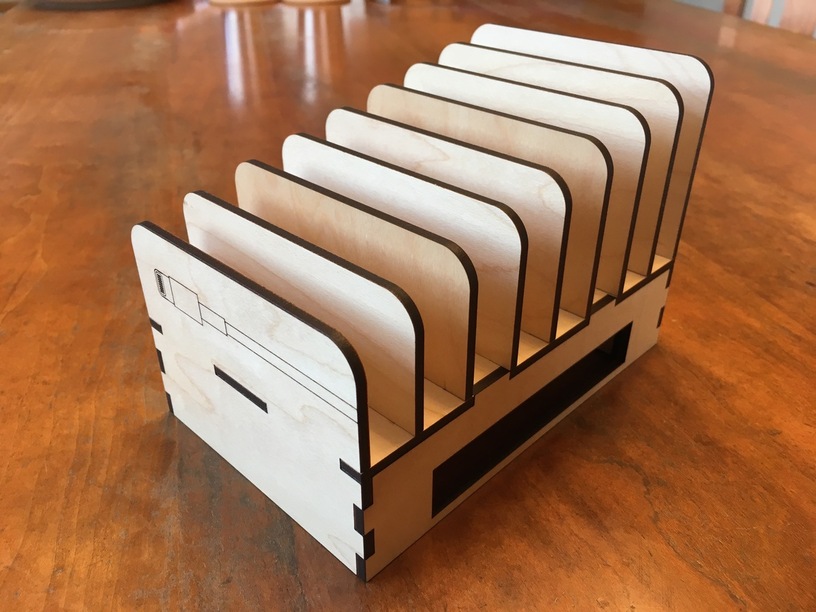
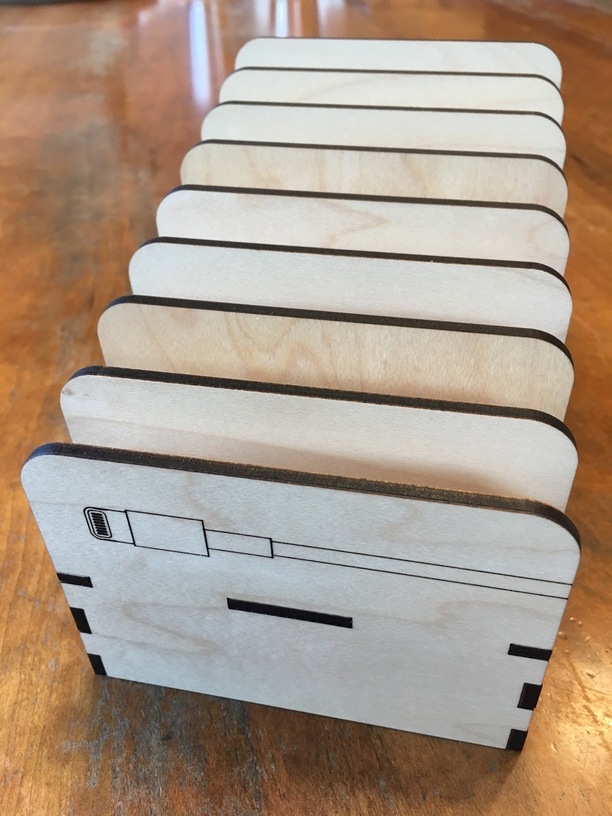
I originally planned to put a realistic-looking lightning bolt on the front, but without some context, my test engraves looked more like rivers or tree roots than lightning. Nature’s funny that way. I switched to a more iconic lightning bolt, but wasn’t really happy with that either. As a joke, I drew an Apple lightning connector and put it on a prototype. Joke or not, it looked pretty good, so I stuck with it. I think I’m going to have to try scoring some more detailed technical drawings.
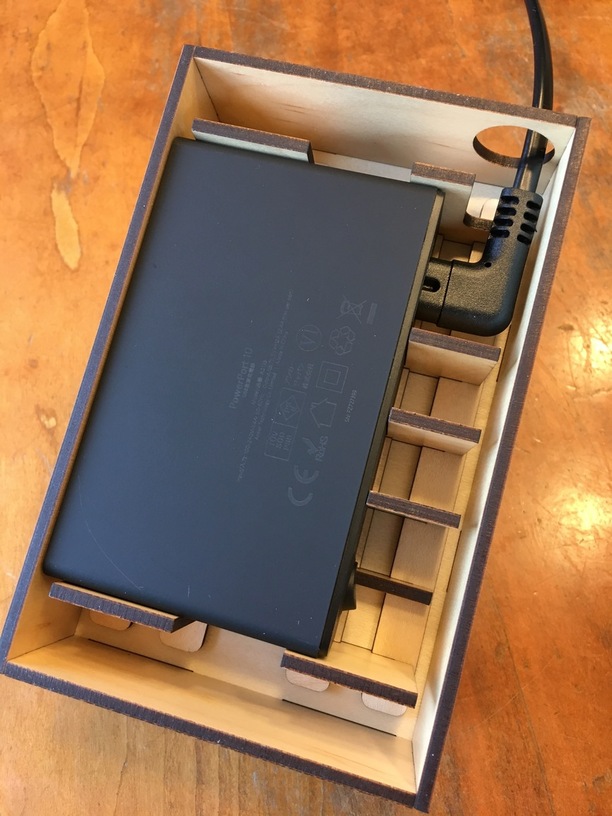
From the start, I wanted to minimize the height of the box while ensuring that the individual dividers were still rigid enough to support larger devices like tablets. I came up with this solution:
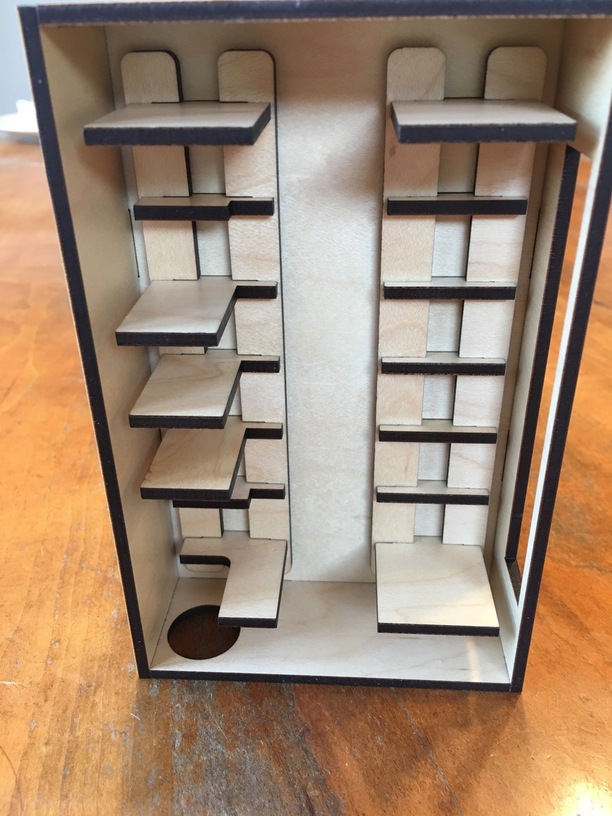
Two tabs on each divider extend through the top panel and get wedged into place by four notched strips that fit into matching notches on the tabs.
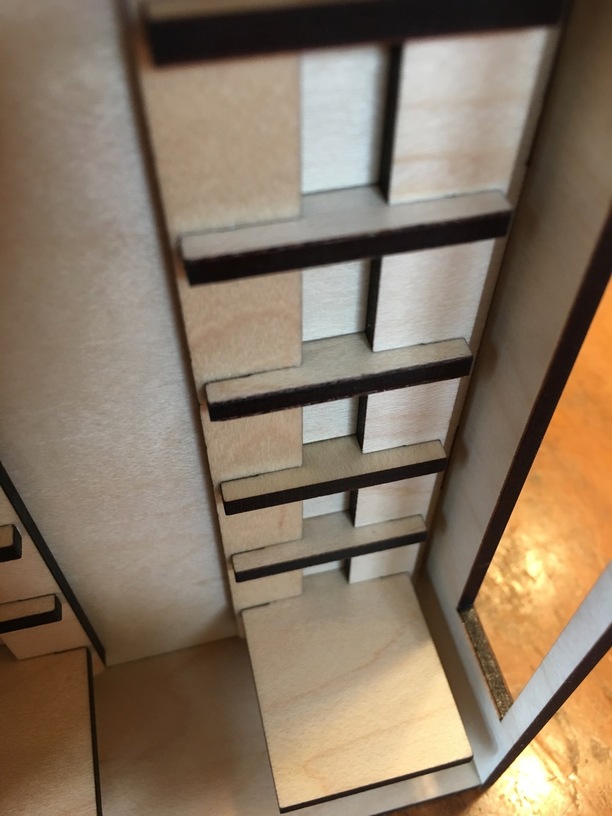
The end result is incredibly strong and rigid (but probably wouldn’t work as well in hardwood). Some of the tabs are lengthened to hold hold the USB charger snugly in place:
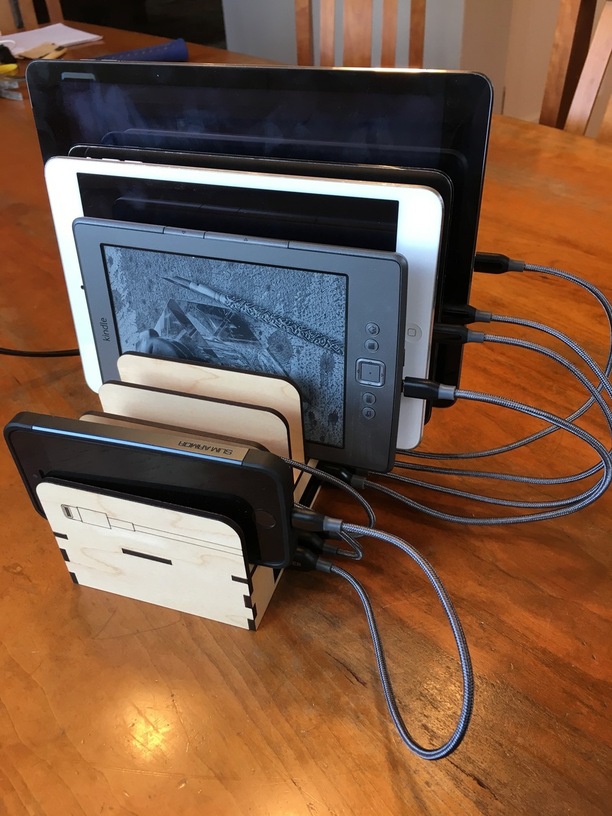
The end result (in Proofgrade maple ply):
So, what did I learn? Well…
Getting a snug joint can be tricky. It’s not just a matter of applying a kerf adjustment. Different kinds of joints need different levels of snugness, so you might have to adjust each one separately.
Also, the surface of plywood is just as much a natural product as hardwood and requires just as much attention to grain and coloration. You might notice that two of the divider panels are significantly darker than the others. Those two were printed “flipped” to better fit on a single sheet, so the front side in the finished piece is the back side of the plywood. I didn’t even notice the difference until the whole thing was assembled, so I’m not going to change it now, but I wish I’d paid more attention when I was laying it out.
Oh, and promises to the contrary notwithstanding, Proofgrade draftboard isn’t necessarily the same thickness as Proofgrade plywood, so if you get all your adjustments dialed in with draftboard, it won’t necessarily be smooth sailing switching to plywood. In my case, all of the medium draftboard I have is dead on 1/8" (3.175 mm), but the medium maple plywood is all a little thicker (3.25 mm). I was sure I’d screwed something up in Affinity Designer or accidentally resized my artwork in the GFUI until I got out my caliper and started taking some measurements. On the bright side, the kerf is pretty much exactly the same in draftboard and maple ply.


 and write-up.