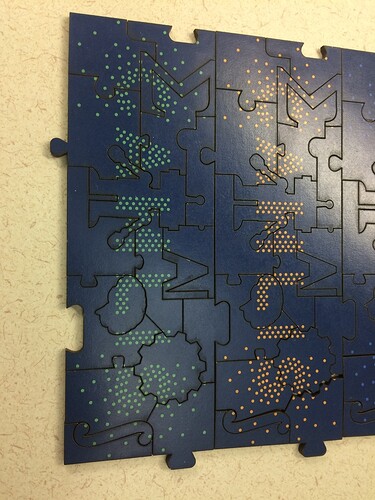
Mostly from Papermart – https://www.papermart.com/i/metal-tin-containers/19037
I’ve used these for years for different items I’ve made and sold (pre-Glowforge), and love them. Totally reusable/repurpose-able. For the puzzles I made a sticker on the underside of the box with the photo of the tiny puzzle.
Thanks for sharing. I’ll have to compare prices, but they look great. Do you spray any type of varnish over yours. I’m cutting my puzzles out of 1/8" birch plywood but getting a film on the paper that doesn’t easily wipe off.
I haven’t. I was using an actual photo print so in some ways it’s got a coating on it already. Really I consider @jbmanning5 the expert at all such things.
i’m pretty sure @jbmanning5 uses winsor & newton varnish (since that’s what he recommended to me and what i use now).
I like the Windsor & Newton. The Golden is quality stuff also. There are a ton of variables ultimately though - between the wood, the type of paper used, the coating on the paper, whether the printer itself applies a coating, finding the perfect cut settings, etc.
May I ask, where did you buy the chipboard?
I have a wholesale supplier now but Dick Blick is a good source if you’re just doing a few.
Thanks! I actually bought the ones(both the 0.05 and 0.1) that you mentioned in the forum. Did a few tests. The 0.05 cut through flawlessly at 230/100 but the 0.1 is the one that giving me problems.
After mounting the photo on the chipboard and adding the masking paper, the caliper read 0.11 inch.
I tried 150/100 and 1 pass. It cut through but the edges of the photo are a little burnt. I tried to increase the speed but it wouldn’t cut through.
I also tried 220/100 and 2 passes and the same problem occurred. The edges are burnt.
Trying to slow it down but it wouldn’t cut through.
I was thinking I wanted to try something in between 0.05 and 0.1 but Dick Blick doesn’t have it.
Chipboard is actually pretty difficult to cut, contrary to what one might think. And it varies by manufacturer (density). I had a supplier I was buying from and it worked really well, picked up another batch - and couldn’t cut it worth a darn. It felt heavier, so I weighed an old one vs a new one - and it was like a 30% difference in weight or something (same thickness).
With paper plies, you just don’t get the beam reflecting back and forth cutting deeper and deeper for you like you do with wood and acrylic, so you run out of energy and focus fairly quick.
For the thicker one, you could always spray it with a varnish before gluing and see if that helps. I’ve used triple thick glaze before and can actually wipe the print down with a damp towel without smearing the ink.
I am super new to all this so forgive me. I have cut several test pieces and they come out ok, but I would like to decrease the kerf between the pieces so they fit more snuggly. What setting would I adjust for that?
Kind of depends on what’s going on. You could try manual focus and focusing down a little bit below the material thickness. If your current speed and power is right, you might try reducing the power and speed both which can also help. Some people cut upside down because it makes the kerf look smaller on the face, but the piece actually fits looser.
But in the end, it’s important to remember that there is actually material removed unlike when something is die cut.
Welcome to the forum.
Kerf is something kind of “fiddly” in that it is dependent on several interactive variables. There are lots of posts regarding kerf in the forum should you choose to delve into the discussions, simply use the search function.
