Every GF has at least 4 fans (very early units have 5)…
The air assist fan is clearly documented, however, along with cleaning instructions in the official support pages.
Every GF has at least 4 fans (very early units have 5)…
The air assist fan is clearly documented, however, along with cleaning instructions in the official support pages.
That’s what I get for not using mine enough to need to have cleaned it much. Working 2-3 jobs at a time really kills free time but I ain’t giving up my forge. I always saw 3 mentioned here and there so thought that was it…
Thank you for providing us with a detailed video. In order to investigate this further, I’d like to take a close look at your unit from end-to-end and check for anything unusual, and then have you run a test print on Proofgrade material using default settings. The test on Proofgrade will allow us to extract logs from the test on our end and review them along with any photos or video you share from the test.
So that our team has complete information to work with, I’d like to review photos of the following:
While taking the photos using instructions listed below, if you happen to see anything which needs cleaning, please do so by following our guide here.
To take a photo of the air assist fan:
Turn off your Glowforge
Open the front door and carefully remove the crumb tray
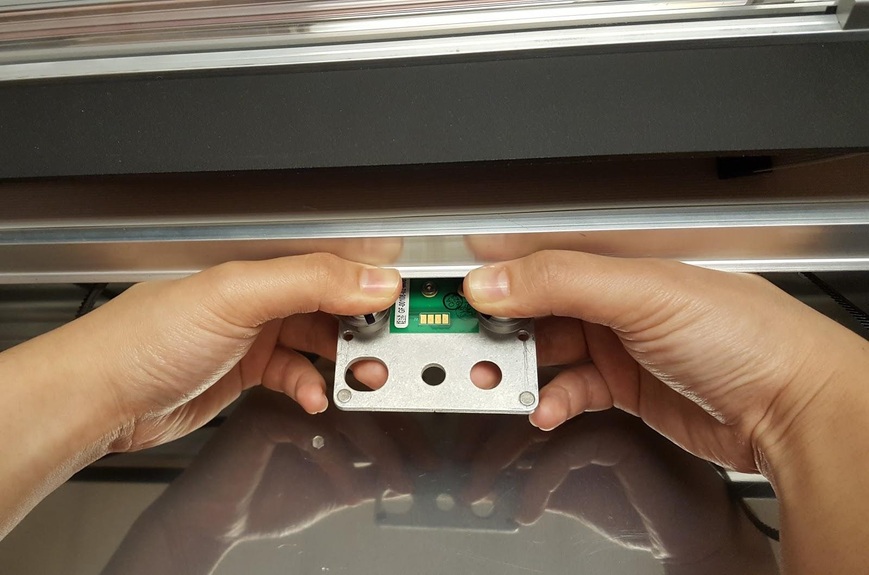
Remove the printer head
Push the carriage plate to the center of the laser arm so it’s out of the way
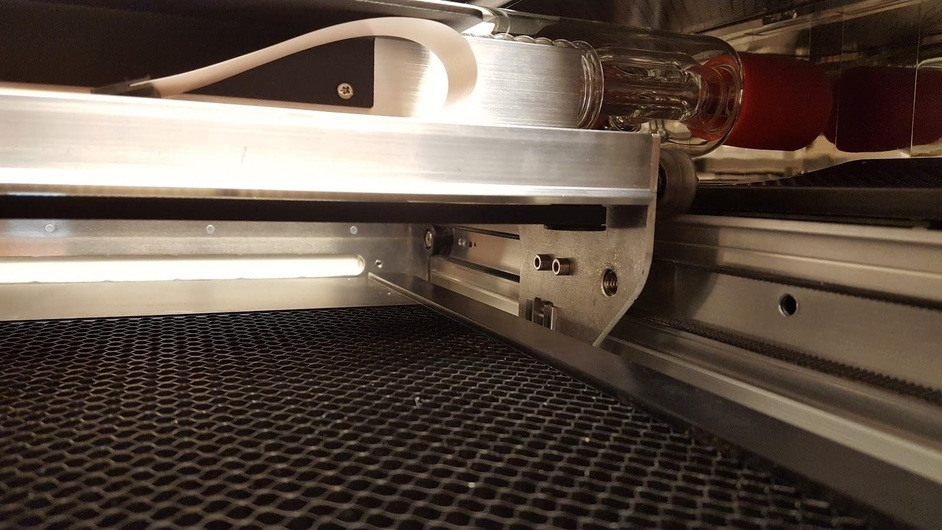
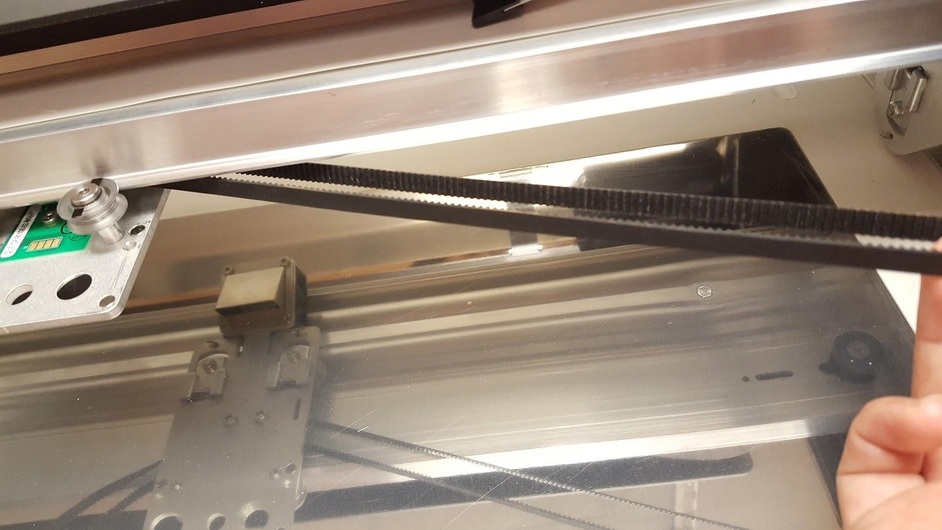
Reach under the laser arm on the right side and feel for a black belt and pulley
Take the belt off of the laser arm
Unhook the belt from the motor on the left side
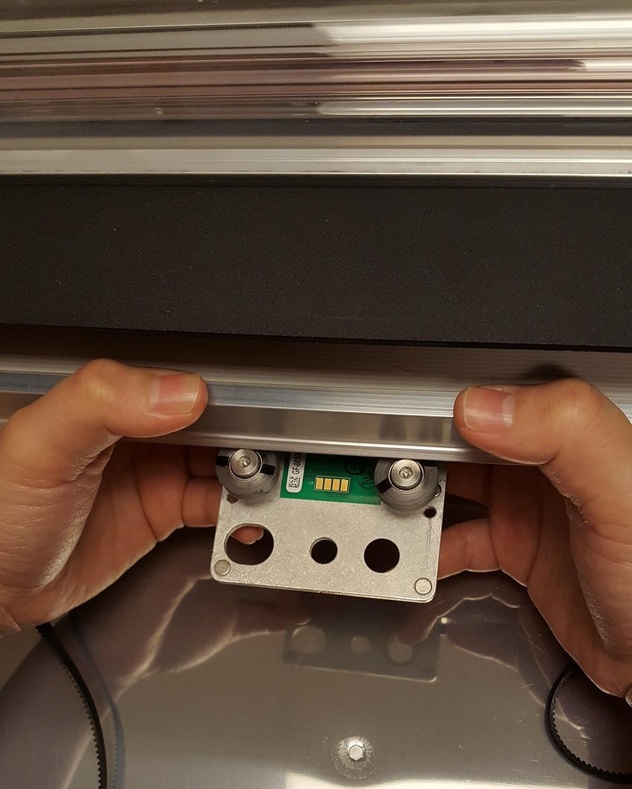
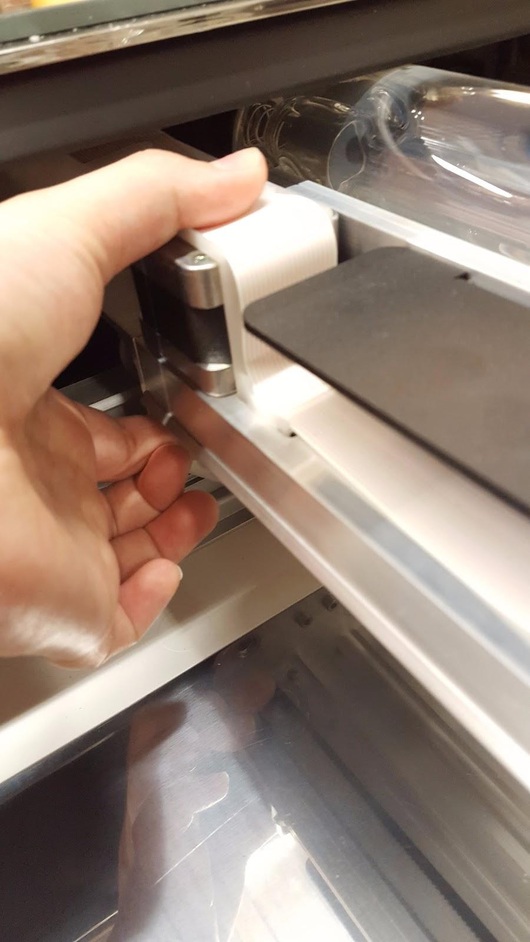
Once you’re done inspecting and cleaning, you can replace the carriage plate:
Pull the plate forward until the front wheels clear the laser arm then angle the plate up until the the wheels are in line with the rail. Release the plate – it should grasp the rail firmly.
Pick up the right side of the belt and make sure it is not twisted. The outside of the belt should be smooth and the inside should have ridges.
Hook the belt onto the pulley on the right side.
Make sure that the left side of the belt is not twisted and is smooth on the outside and ridged on the inside
Attach the belt on the left side
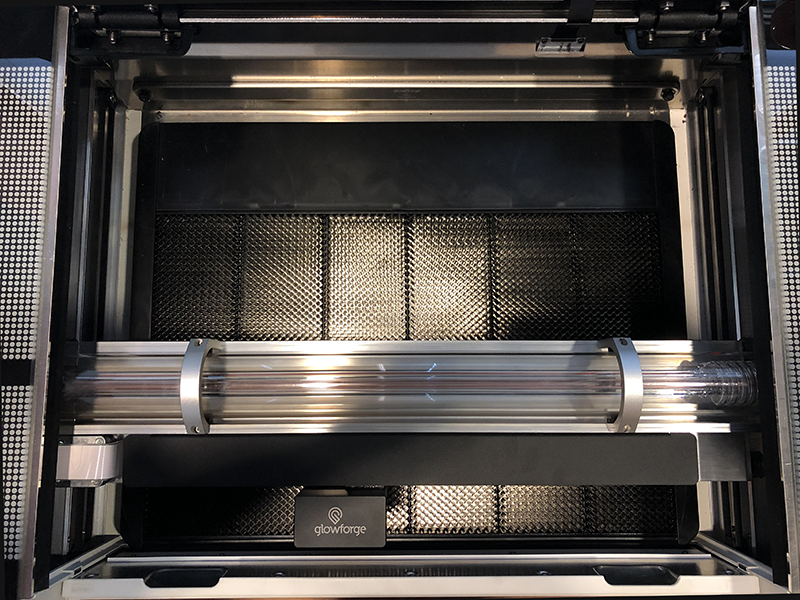
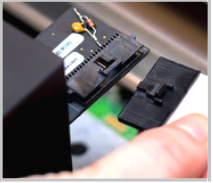
Here are the photos of your unit’s optics we’d like to review:


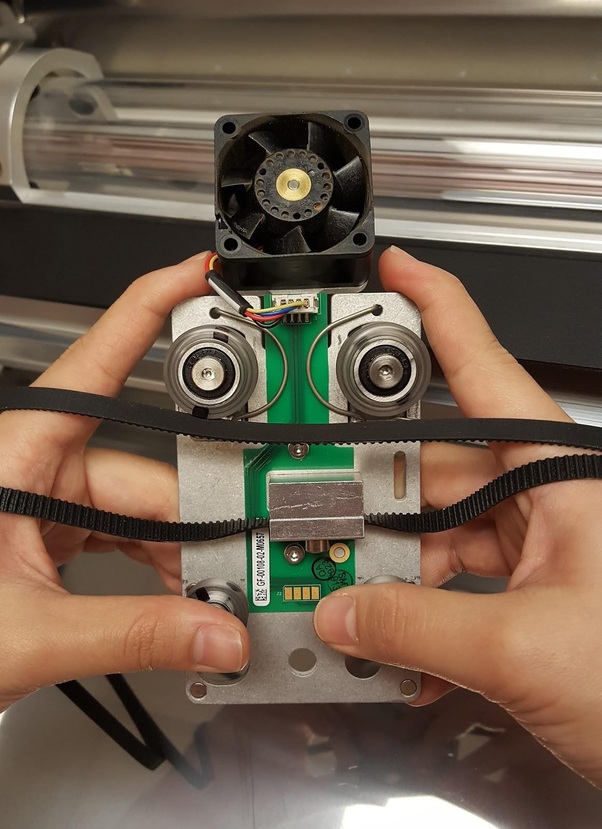
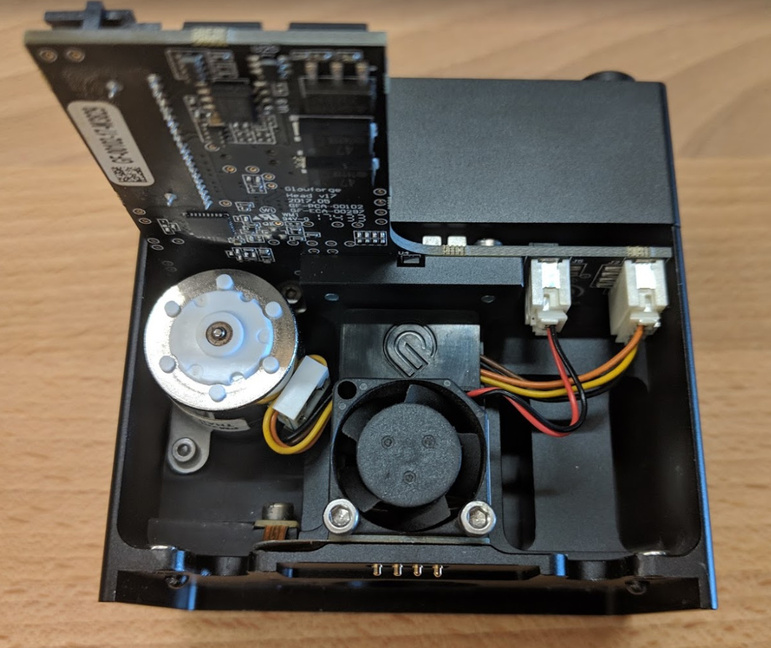
While you have the print head off of the carriage plate, please also send us a photo of the purge fan on the back of the head:
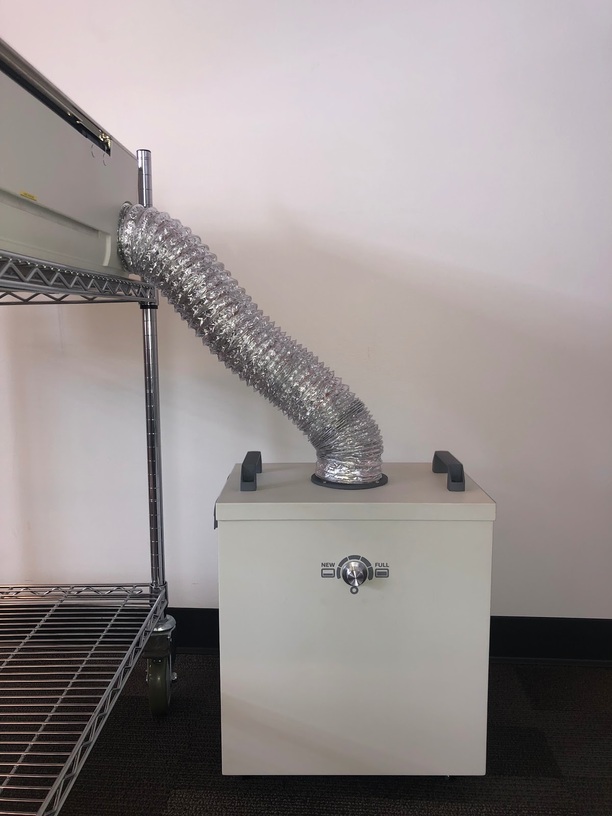
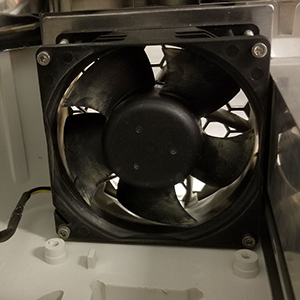
Please follow these steps to send us photos of your unit’s exhaust system:
The exhaust fan from the inside of the unit. To capture this photo:
Turn your Glowforge off
Open the lid
Using both hands, gently pull the printer arm towards you as shown below:
Move your phone or camera inside the Glowforge on the left-hand side, past the metal rail, pointed away from you towards the exhaust hose, to capture a photo like the one below:
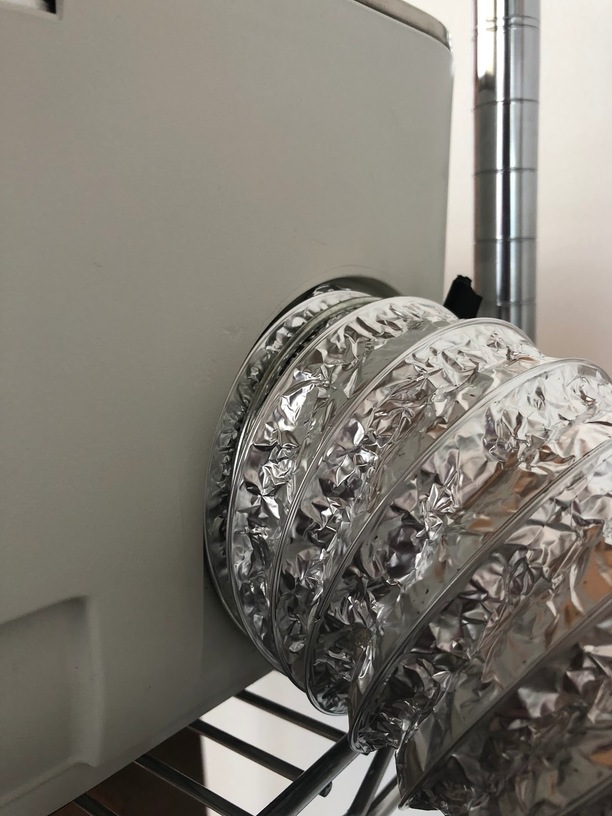
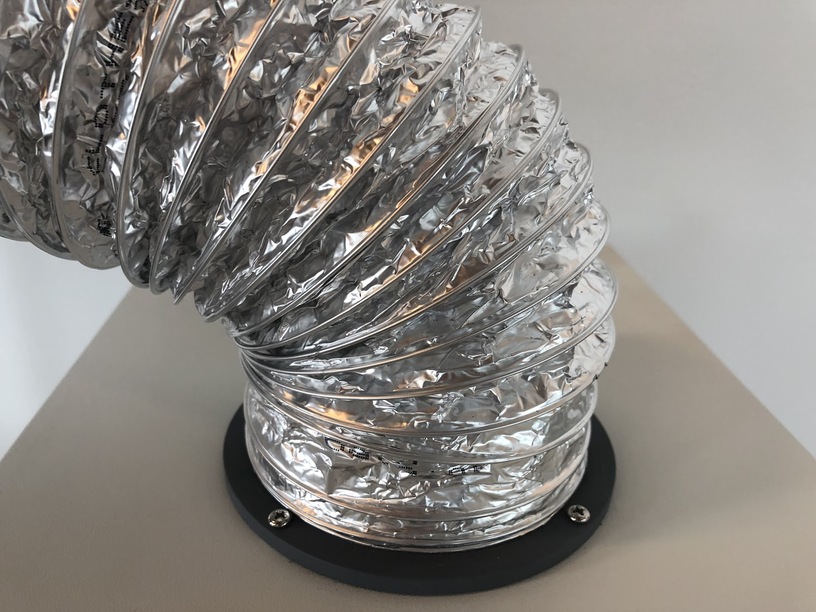
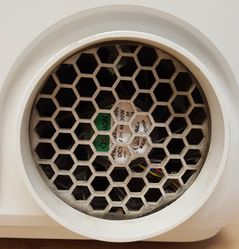
A photo of where your exhaust hose attaches to the Glowforge, where your exhaust hose exits the room, and the path your exhaust hose takes from your Glowforge to the exterior vent or Compact Filter
The exhaust connection on the back of your Glowforge, with the exhaust hose removed:
After capturing these photos, please run the following test print. A piece of Proofgrade Acrylic would be the best option for this test. If you don’t have acrylic currently, please use a different type of Proofgrade and let us know which kind you used.
Thank you for your patience, and for working through these steps. If you’d prefer to email the photos to us, you can send them to our team at support@glowforge.com.
So the only problem here is no one has profgrade. Im going to take the photos today
The machine was shipped with a spare piece of draftboard to be reserved exclusively for troubleshooting.
If you used it for other purposes, you can’t blame that on support.
I don’t want to delay in getting this resolved for you. I’ve just sent you an email with the next steps. Please send me the photos when you’re ready.
I’ll continue to work on this through email with you, so this post will be closed.