A while back I did the full functional 3D printed Trent 800 Turbofan engine, which is loosely derived from the famous CATIA CAD demo file you see at every 3D printer booth at any show. The engine is a complex build (If I recall it used over 350 M2.5 screws). I tweaked it a bit to add red LEDs inside the combustion chamber, which looks really cool with the copper PLA I printed those parts in. For filming I removed the casing around the side towards the camera, as when opened it would be really hard to see inside since it is not mounted on a jet.

Anyway for the past year or so I just had a barrel connector from a 12VDC wall wart to the cable that powers the gear-motor in the tail cone and the LEDs, but that wasn’t cool. I wanted a nice rotary switch like on a real jet (I sort of based it off the 737’s) and using a 5-position rotary switch and a quick knob I whipped up in CAD I had the electrical part, but wanted a backlit control panel. The white Glowforge Acrylic is too opaque, but I remembered I had a leftover bunch of Perspex brand translucent white, which I would describe as very dilute skim milk color, it almost feels like nylon rather than acrylic, and it is really, really good at diffusing. I printed a case for the panel to sit on and printed that and inserted brass inserts. The CAD file got exported as DXF into Illustrator to cut and engrave, and next I took the cut acrylic panel and used a nice matte acrylic spray paint in “stealth” which is a dark gray color, let it cure and then using fast and low power (as I don’t want to actually engrave the acrylic but instead just blast the paint off). I threw a bit of 12V LED white strip inside and here is the panel with the backlighting on. If the room is really dark the white ASA knob lights from the ring I did around the knob, and the letter look incredibly good. The only part I hadn’t added yet was the fake DZUS gussets for the M4 screws for the faceplate. The letters, knob surround and rectangles are engraved while the surrounding box is scored.
No there was no real need for it, I just wanted to make a better looking switch panel and perfect the settings (took a bunch of tries to get it so the paint left but the acrylic didn’t engrave).
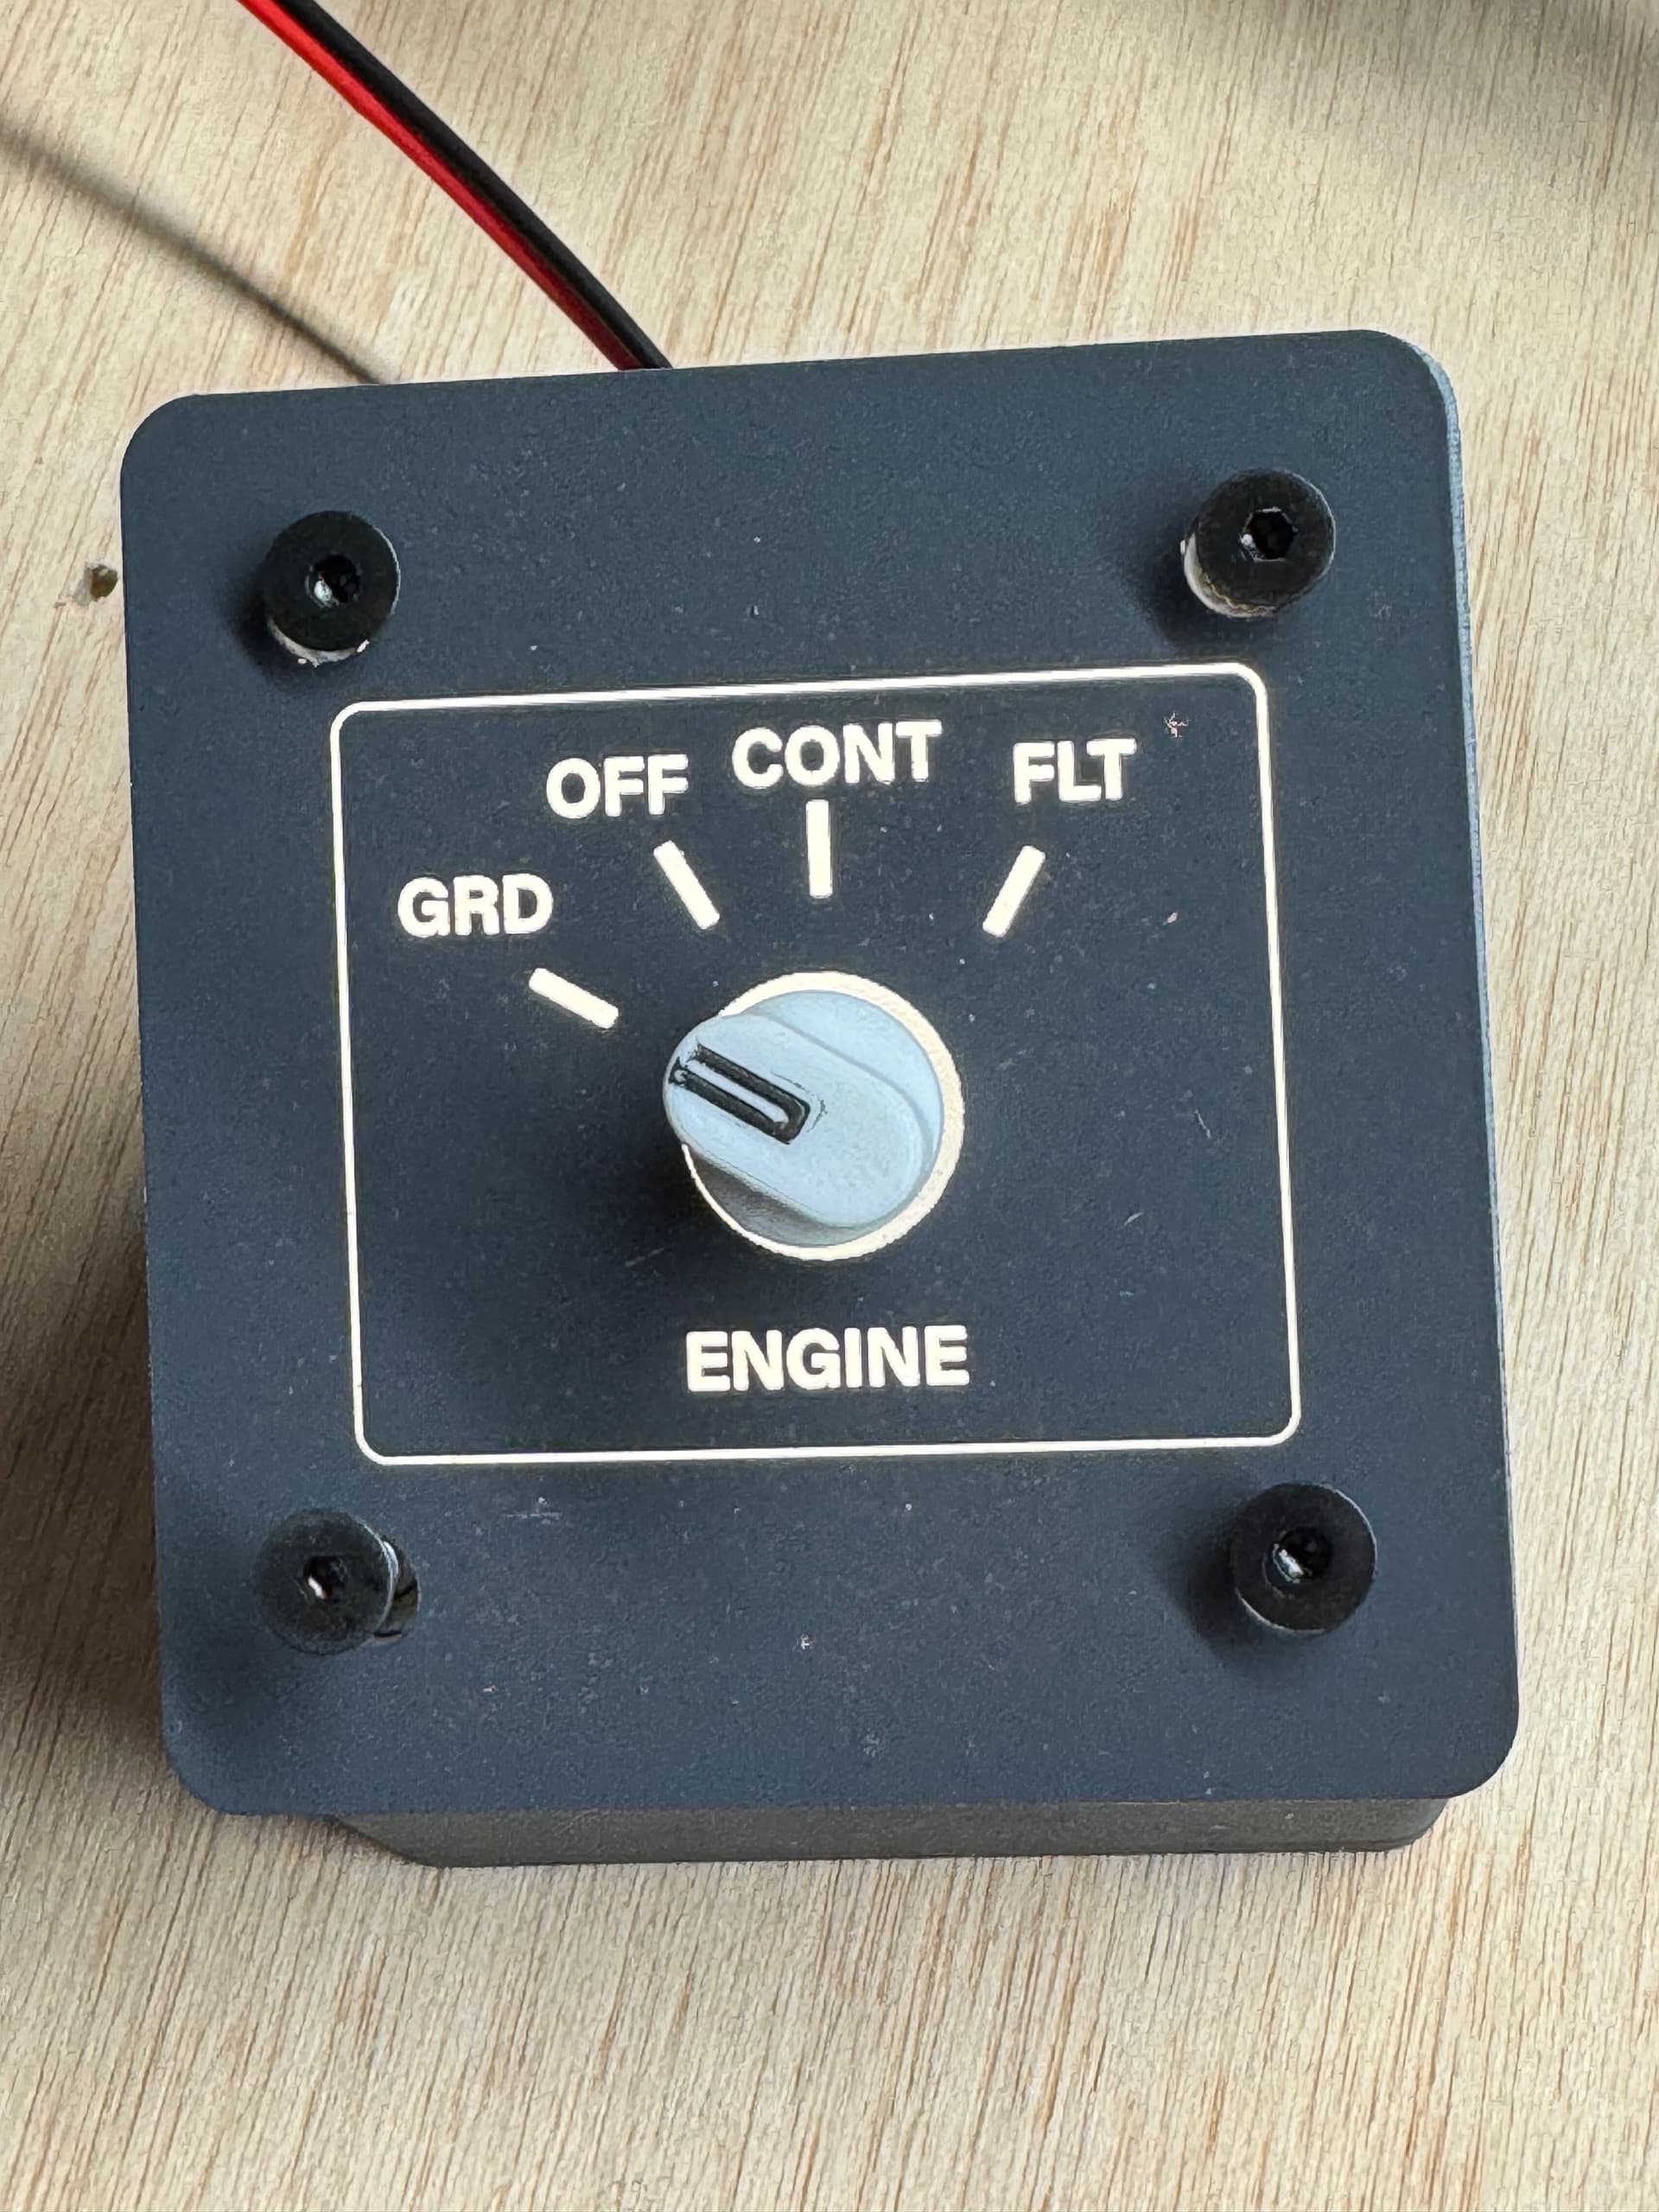
Let me just add not all the wires were there for that picture, that was just power to the LEDs, not the 4-wire cable to the motor and LED.
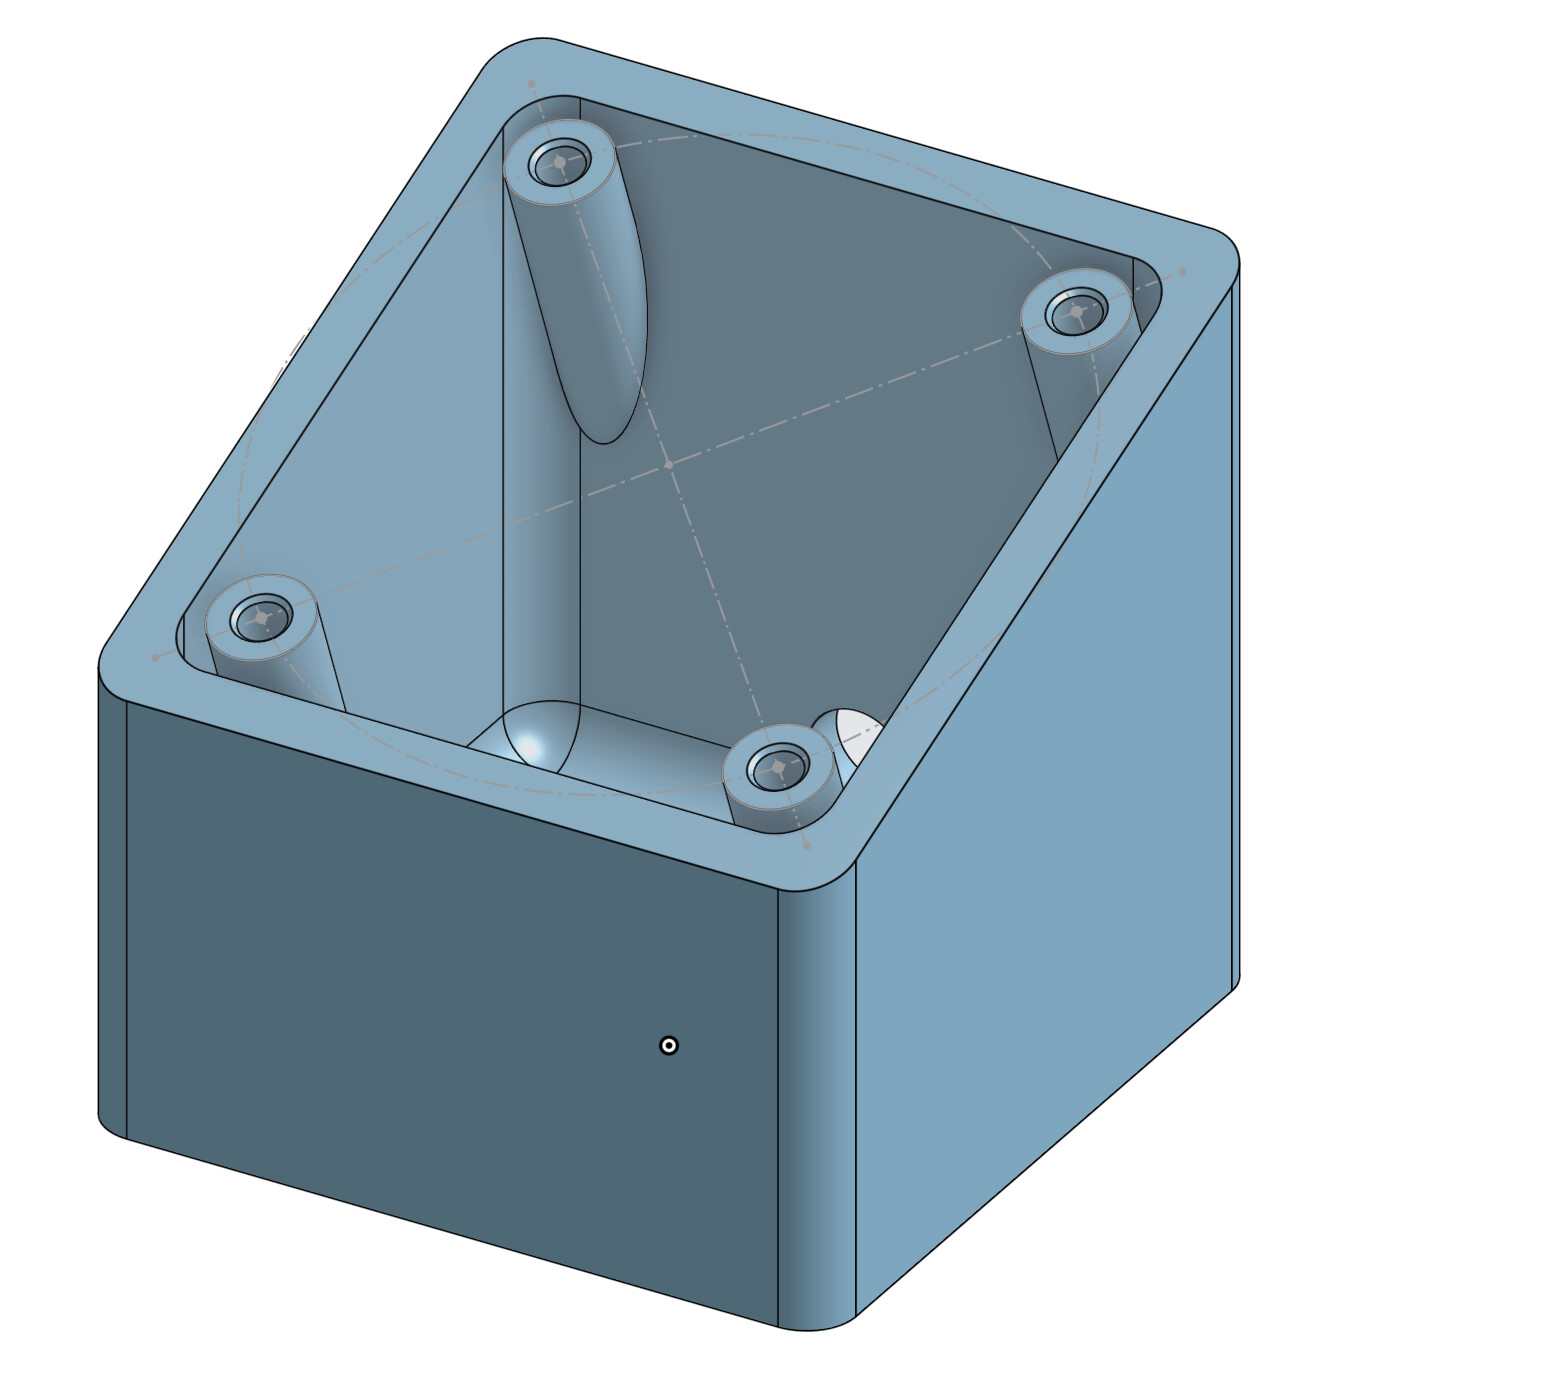
BTW The bosses under the panel that have the threaded inserts are normal to the acrylic, which made for an interesting problem of putting the inserts in, but I just shimmed the case until the top was perpendicular to the insert rig I have.